52
Chapter 4 Storage Management
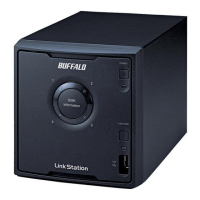
4 Enable quotas, choose the maximum amount of space the group will be allowed to use, and click [OK].
5 Click [Close].
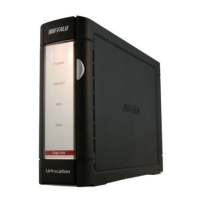
6 Click to the right of “Users”.
7 Select the user that will inherit the group quota settings and click [Edit]. If you want to add a new user to a
group with a quota, create a user by referring to the “Adding a User” section in chapter 3.
8 Select the group’s checkbox to join and change the user’s primary group to the group with the quota, then
click [OK].
9 Click [Close].
10 Click at the top-right of Settings and select [Restart].
Drive Replacement
If a drive fails, an error message will be displayed in both NAS Navigator2 and Settings.
Notes:
• Do not replace a running drive while the LinkStation is turned on. Power down the LinkStation before changing
the drive. While the LinkStation is running, never unplug or remove drives without dismounting them first.
• If using the LS220DR LinkStation model, use a Buffalo OP-HDBN series drive as the replacement drive. For the
replacement drive of other LinkStation models, use a Buffalo OP-HDBST series drive. The replacement drive
should be the same size or larger as the original drive. If a larger drive is used, the extra space will not be usable in
a RAID array.
• If sending a defective drive to Buffalo for replacement, please keep the cartridge as Buffalo will only replace the
drive and not the cartridge.
• To avoid damaging the LinkStation with static electricity, ground yourself by touching something made of metal
before handling any sensitive electronic parts.
• After a drive is replaced, it will take about 30 minutes before normal file reading and writing operations are
restored. Settings may not be accessible during this period.
• Do not change the order of the drives on the LinkStation. For example, pulling out the drive in slot 1 and
replacing it with the drive in slot 2 may cause data to be corrupted or lost.
• If a new drive is not recognized after installing it, click [Rediscover Disk] in Settings.
 Loading...