87
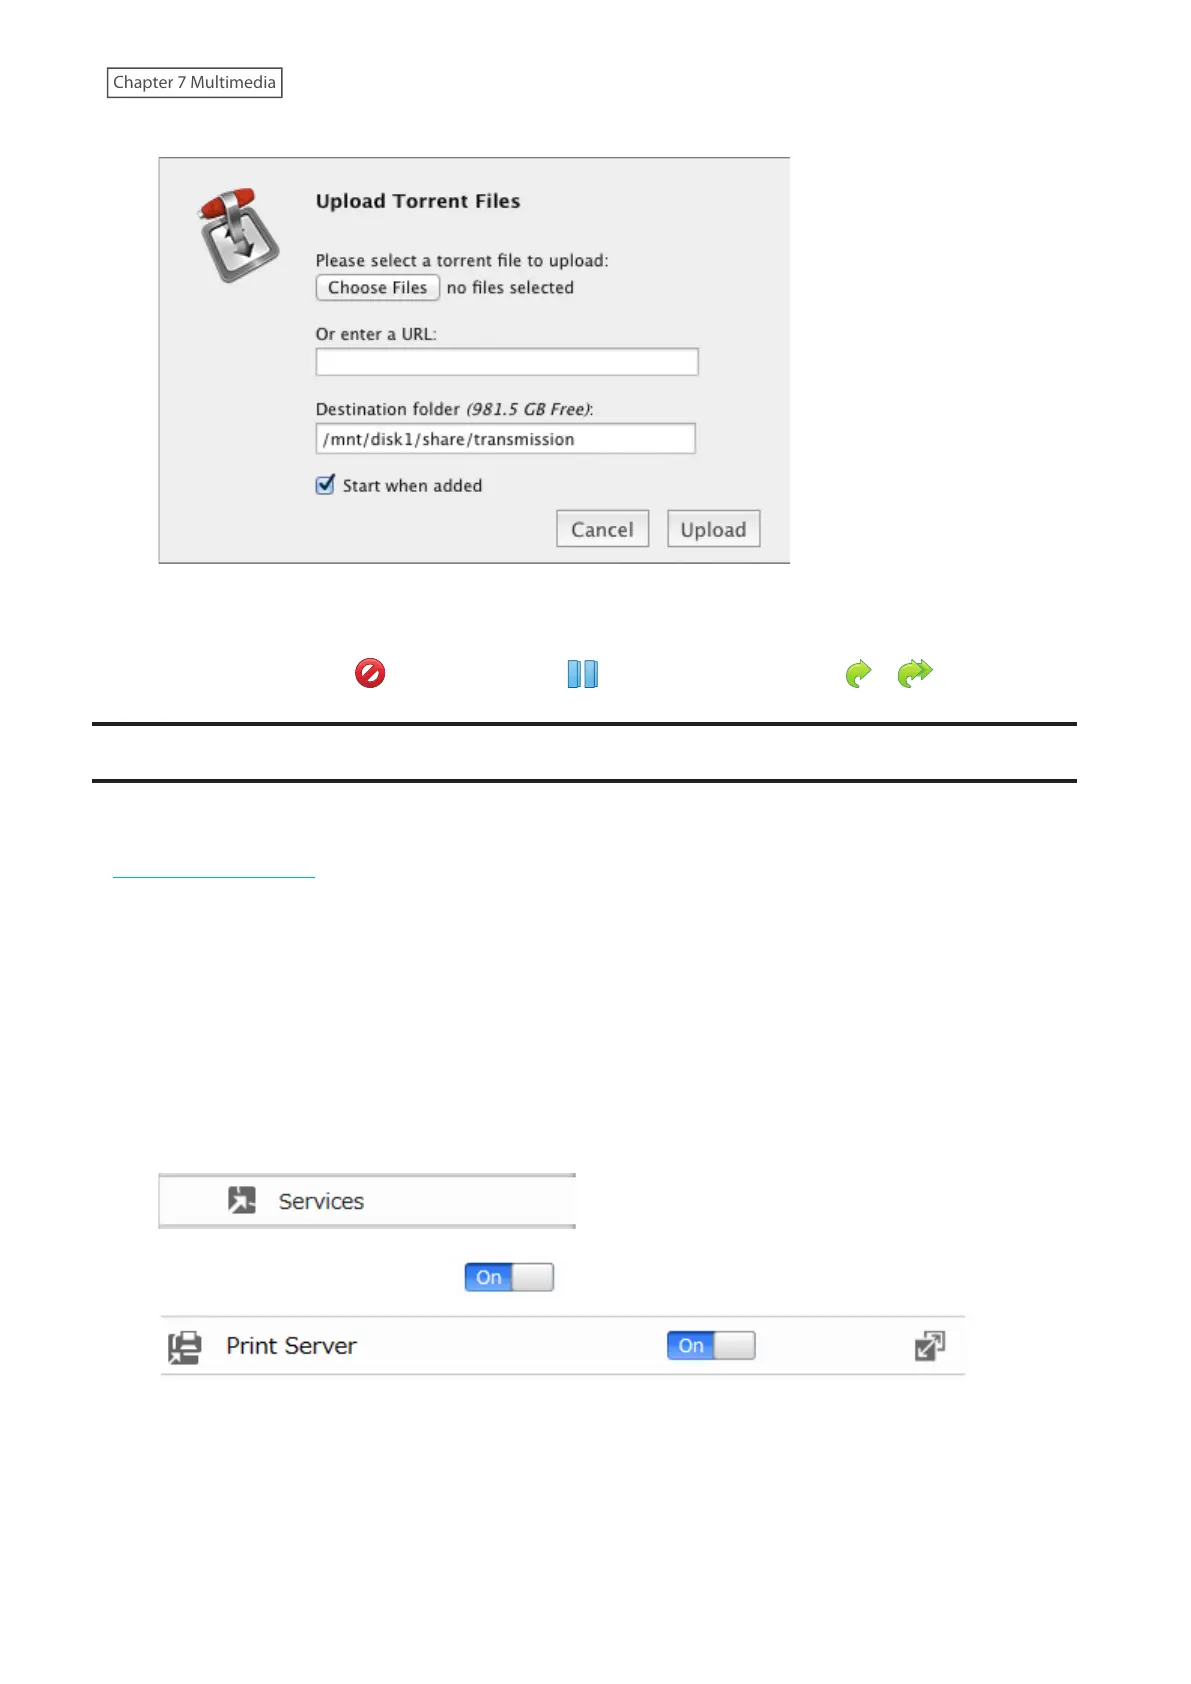
Select “Start when added” to start downloading immediately after clicking [Upload].
4 The download will start.
To cancel downloading, click , then [Remove]. Click to pause the download. Click or to resume.
Connecting a Printer
You can connect a printer to the USB port on the LinkStation.
Follow the procedure below to configure a print server. To configure a print server from a mobile device, refer to the
“Enabling a Print Server” section in chapter 9.
Notes:
• Only one USB printer can be connected to the LinkStation.
• Bidirectional communication is not supported i.e., remaining ink quantities and other printer status information is
not displayed.
• Don’t disable the SMB protocol while the print server is enabled. If you do, you will need to enable SMB again and
reconfigure the print server from scratch.
1 Connect a printer to the LinkStation’s USB port, then turn the printer on.
2 From Advanced Settings, click [Services].
3 Move the print server switch to the position to enable the print server.
4 Refer to the manual supplied with the printer and install the printer drivers.
5 Launch NAS Navigator2. Double-click your LinkStation’s icon.
6 Double-click the icon of the connected printer (the shared name is displayed).



 To Next Page