❷
❸
❶
❶
❷
Page
16 - Manual FA01869-EN - 08/2022 - © CAME S.p.A. - The contents of this manual may be changed, at any time, and without notice. - Translation of the original instructions
SD TYPE (BATTERIES) CAN BE USED, SPECIFIC TO THE OUTPUT TERMINALS
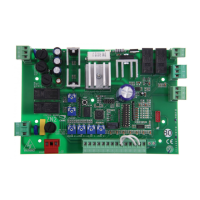
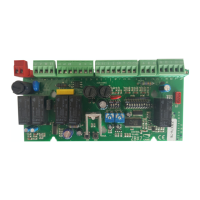
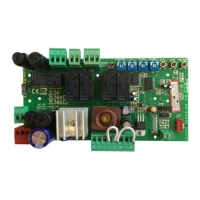
CONTROL UNIT MODEL PXC2-32 PXC2-64 PXC2-212
Type of SD (buffer bat-
tery)
Battery type
Rechargeable lead battery with flammability class of the casing UL94-V2 or
better
Nominal voltage 12V
Nominal capacity 7Ah 7Ah 18Ah 7Ah 18Ah
Loading time 24h (80% charge)
Maximum internal resistance 1.5 Ohm 1.5 Ohm 0.5 Ohm 1.5 Ohm 0.5 Ohm
Maximum current deliv-
erable at 12V
Total 2A 3A 5A
BUS output 0.5A 1A 1.5A
Connection points output 0.5A 0.75A 1.5A
Auxiliary output 0.75A 0.75A 1.5A
Maximum current deliv-
erable at 5V
USB output 0.5A 0.5A 0.5A
Maximum current per connection point
as an output
100mA 100mA 100mA
Motherboard consumption 150mA 150mA 150mA
Modules consumption on motherboard (3G in coupling) 800mA 800mA 800mA
3G consumption on call 300mA 300mA 300mA
PSTN 30mA 30mA 30mA
WiFi dongle 230mA 230mA 230mA
TAMPER
CONTROL UNIT TAMPER ENABLED (JP1 on 0)
To guarantee compliance with standard EN50131 grade 3, the
tamper CANNOT be disabled.
ANTI-OPENING TAMPER-PROOF INSTALLATION
CONTROL UNIT TAMPER DISABLED (JP1 on C)
❶ Drill the container on the right side of the control unit with a drill
for iron so that the tamper can be fixed with the screw (short) in a
horizontal position.
❷ Fix the tamper on the right side of the control unit with the sec-
ond screw (short).
ANTI-OPENING AND ANTI-TEAR TAMPER INSTALLATION
❶ Drill the wall (with a tip suitable for the dowel supplied) at the
height of the hole in correspondence with the tamper.
❷ Insert the appropriate screw (long) on the hole on the right side
of the control unit, screw the shim and fix with the locking nut. The
tamper must be able to rotate.
❸ Adjust the height of the plug screw so that when the cover is
closed the tamper lever closes.
To guarantee compliance with standard EN50131 grade 3, the
control unit tamper must be mounted in anti-opening and anti-re-
moval mode.