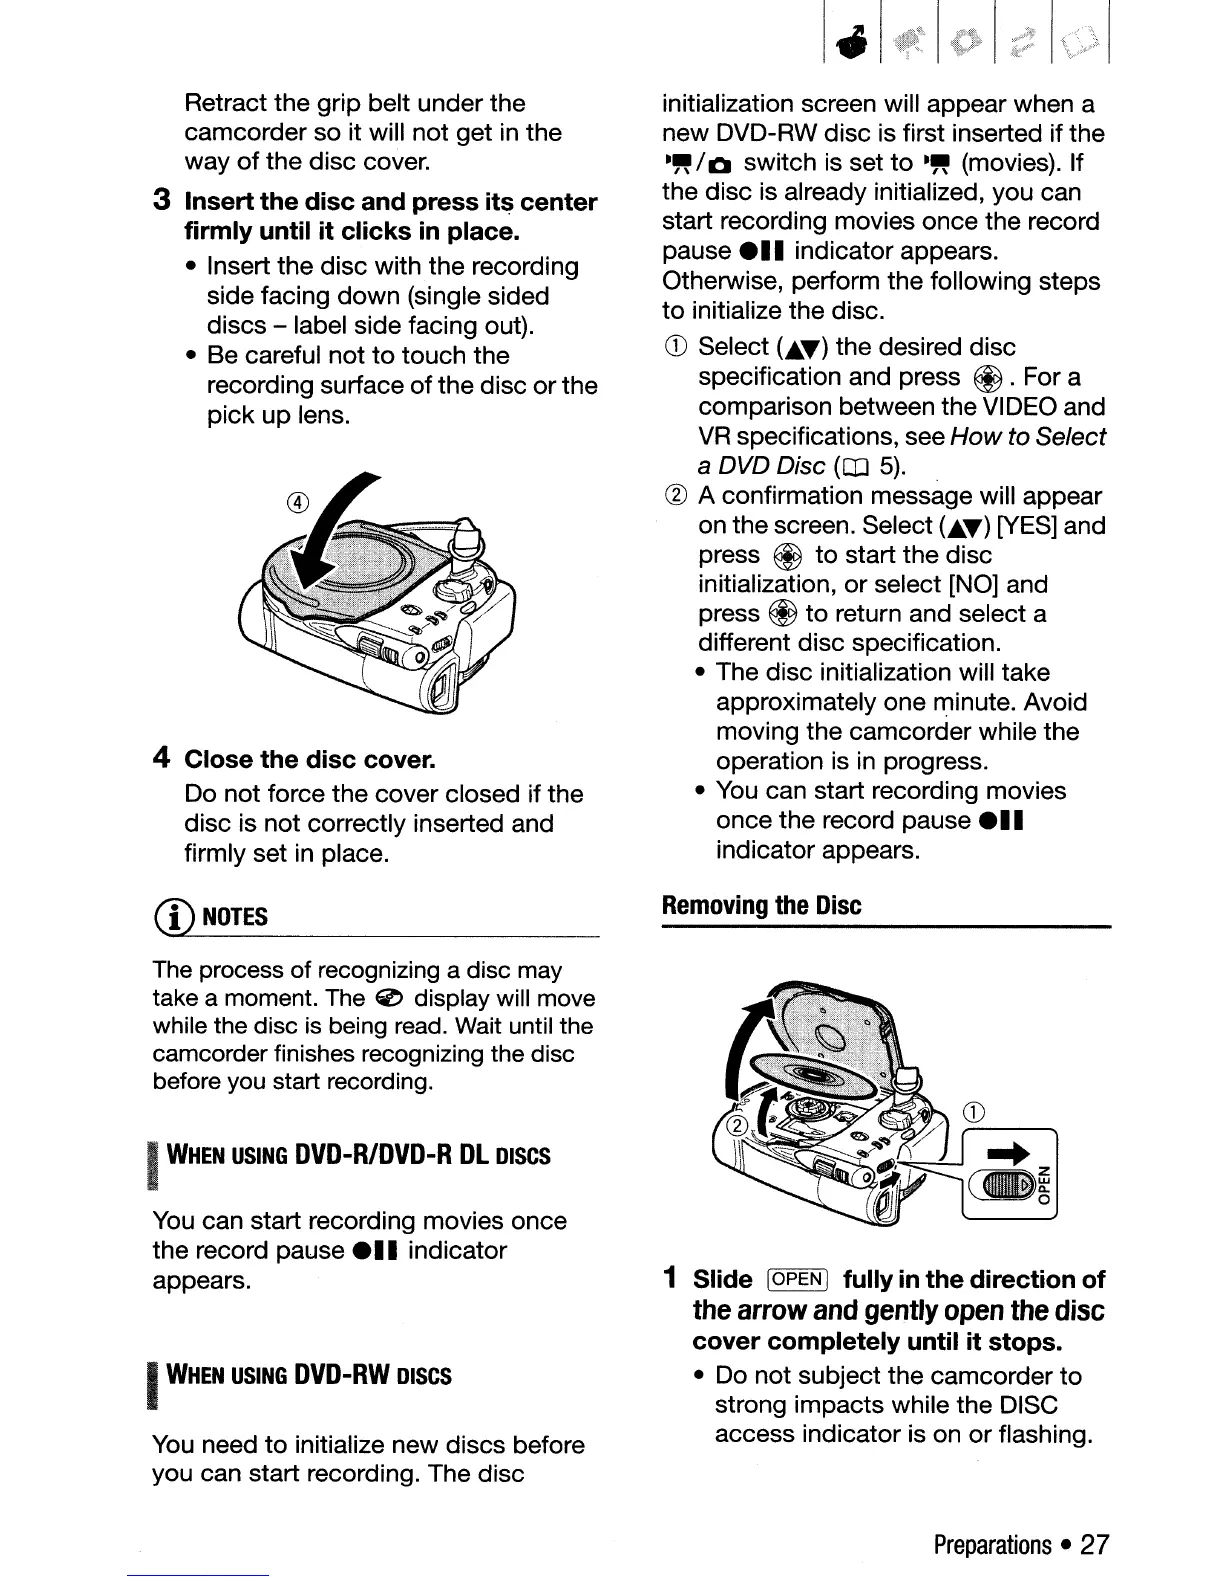
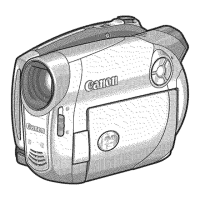
Retract the grip belt under the
camcorder so it will not get
in
the
way
of
the disc cover.
3 Insert the disc and press its center
firmly until it clicks
in
place.
• Insert the disc with the recording
side facing down (single sided
discs - label side facing out).
• Be careful not
to
touch the
recording surface
of
the disc orthe
pick up lens.
4 Close the disc cover.
Do not force the cover closed if the
disc is not correctly inserted and
firmly set
in
place.
CD
NOTES
The
process of recognizing a disc
may
take a moment.
The
0 display will move
while the disc
is
being
read.
Wait
until the
camcorder finishes recognizing the disc
before
you
start recording.
I
WHEN
USING
DVD-RlDVD-R
DL
DISCS
You
can start recording movies once
the record pause
e
••
indicator
appears.
I
WHEN
USING
DVD-RW
DISCS
You
need
to
initialize new discs before
you can start recording. The disc
initialization screen will appear when a
new DVD-RW disc is first inserted if the
-"/0
switch is set
to
-"
(movies). If
the disc is already initialized, you can
start recording movies once the record
pause
e
..
indicator appears.
Otherwise, perform the following steps
to
initialize the disc.
CD
Select
(.
•.
~)
the desired disc
specification and press
@.
For a
comparison between the VIDEO and
VR
specifications, see
How
to Select
a DVD Disc
(CIJ
5).
(g)
A confirmation message will appear
on the screen. Select
C.~)
[YES]
and
press
@
to
start the disc
initialization, or select [NO] and
press
@
to
return and select a
different disc specification.
• The disc initialization will take
approximately one minute. Avoid
moving the camcorder while the
operation is
in
progress.
•
You
can start recording movies
once the record pause
e
••
indicator appears.
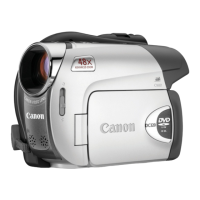
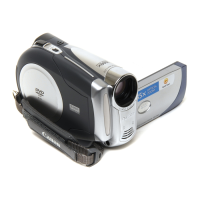
Removing
the
Disc
1 Slide IOPEN I fully
in
the direction
of
the
arrow
and
gently
open
the
disc
cover completely until it stops.
• Do not subject the camcorder
to
strong impacts while the DISC
access indicator is on or flashing.
Preparations
•
27