Chapter 3
3-11
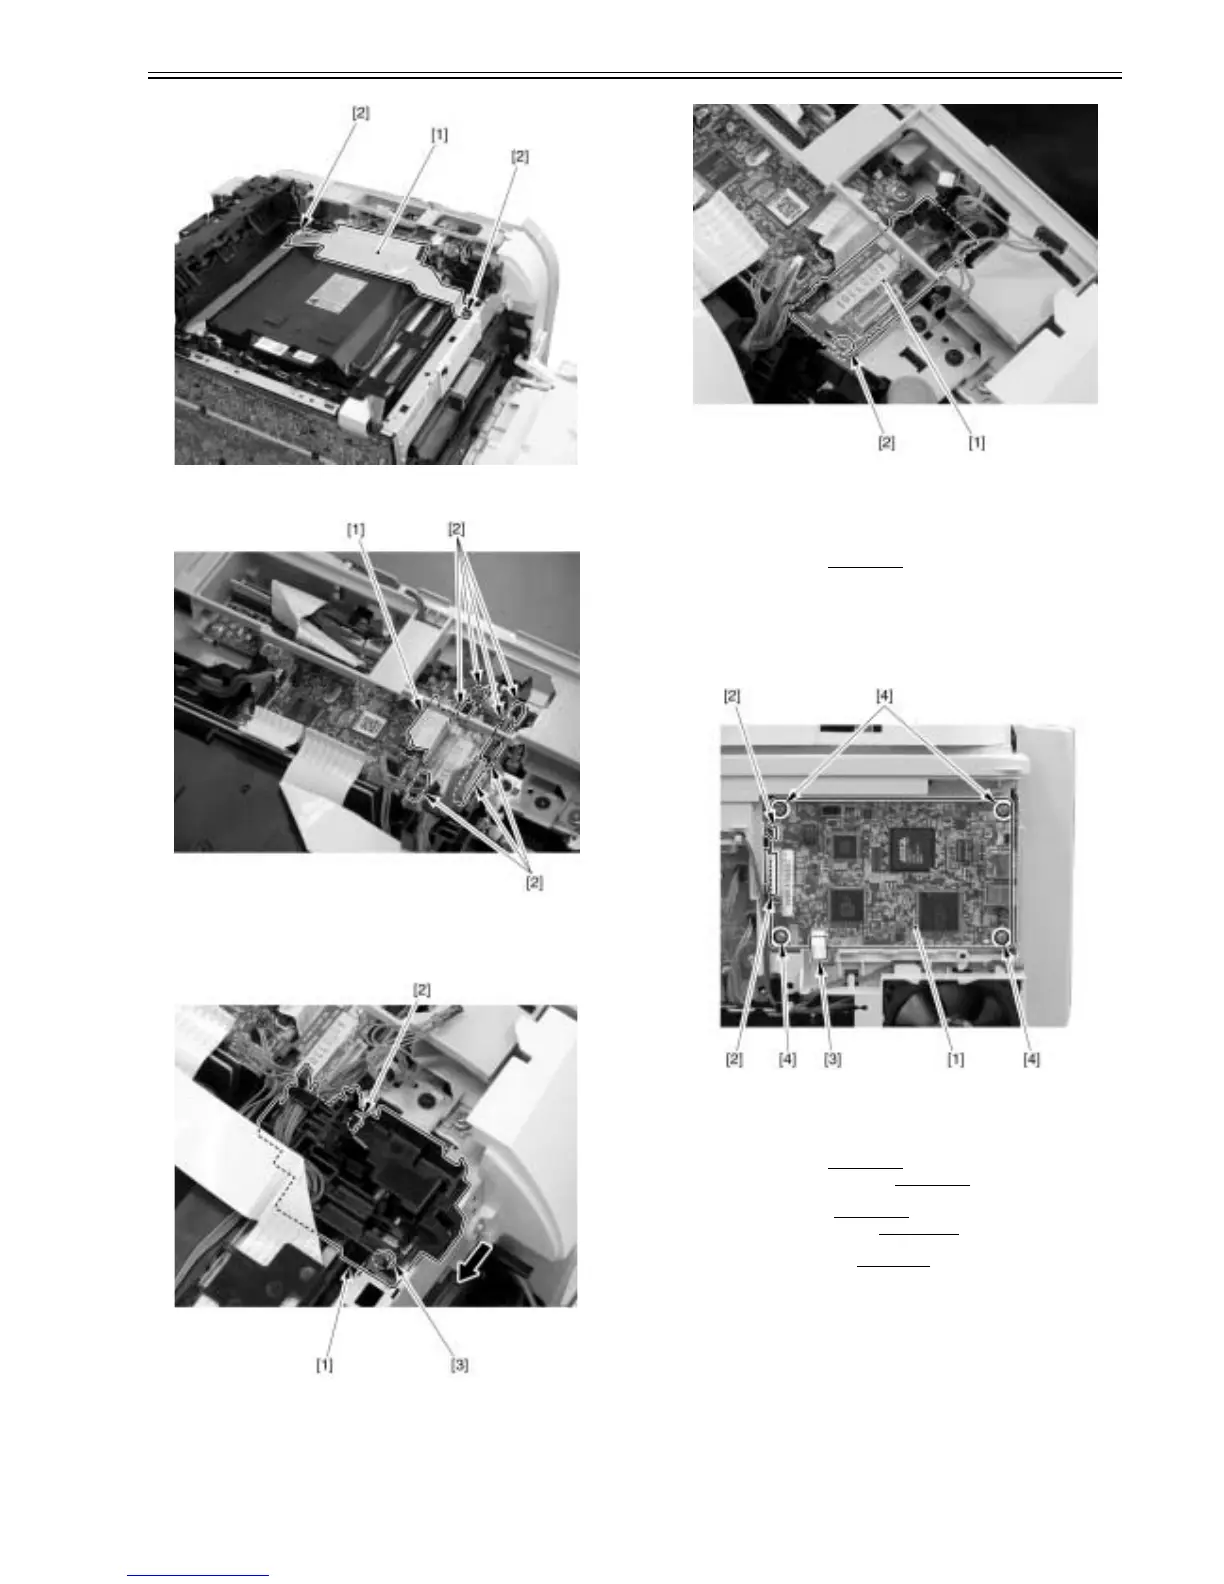
F-3-43
2) Remove 1 flat cable [1] and 7 connectors [2] on the PCB.
F-3-44
3) Move the cable guide [1].
- 1 connector [2]
- 1 screw [3]
F-3-45
4) Remove the relay PCB [1].
- 1 screw [2]
F-3-46
3.1.12 Main Controller PCB
3.1.12.1 Pre-procedure for removing main controller PCB
0021-3981
1) Remove the right cover.(page 3-3)Reference[Removing right cover]
3.1.12.2 Removing main controller PCB
0021-3982
1) Remove the main controller PCB [1].
- 2 flat cables [2]
- 1 connector [3]
- 4 screws [4]
F-3-47
3.1.12.3 Pre-procedure for removing sub power supply
PCB
0021-4004
1) Remove the right cover.(page 3-3)Reference[Removing right cover]
2) Remove the upper rear cover (left).(page 3-1)
Reference[Removing up-
per rear cover (left)]
3) Remove the upper cover.(page 3-5)
Reference[Removing upper cover]
4) Remove the right frame cover.(page 3-3)
Reference[Removing right
frame cover]
5) Remove the lower rear cover.(page 3-1)
Reference[Removing lower rear
cover]
3.1.12.4 Removing sub power supply PCB
0021-4009
1) Remove the main controller PCB [1].
- 1 flat cable [2]
- 4 screws [3]



 To Next Page