Chapter 3
3-33
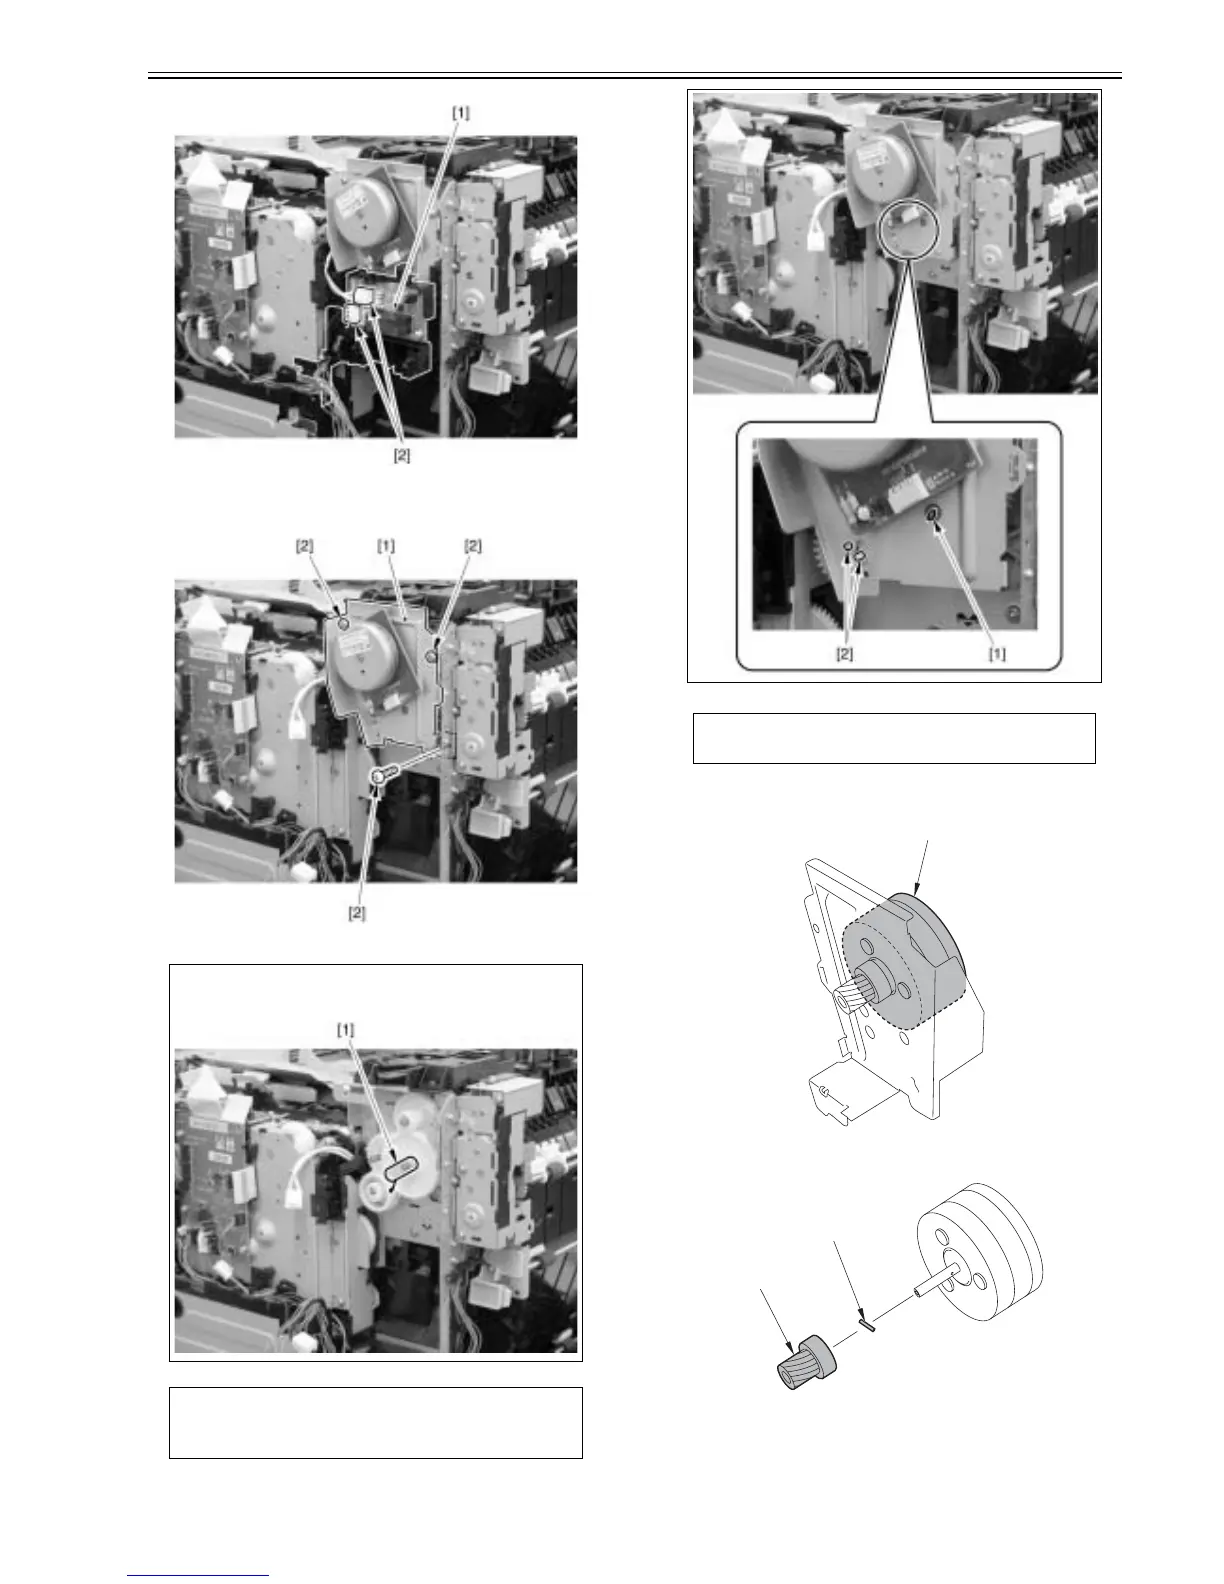
F-3-140
6) Remove the fixing motor unit [1].
- 3 screws [2]
F-3-141
7) Remove the fixing motor [1].
- 3 screws [2]
F-3-142
8) Remove the gear [1] and pin [2] from the fixing motor.
F-3-143
CAUTION:
When you remove the fixing motor unit, do not lose the spring[1] at the rear
side.
CAUTION: Point to note for assembling
Be sure to assemble the unit in a way that the tip [1] of the spring and the
protruded parts [2] of the gear can be seen from the holes on the sheet metal.
MEMO:
When removing the fixing motor unit for removing other units, it is not
necessary to remove the fixing motor.
[1]
[1]
[2]



 To Next Page