20
pGD Touch +030221540 rel. 1.1 - 21.01.2015
ENG
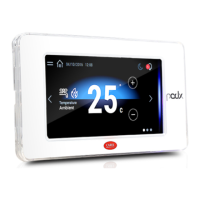
5.3.2 Copying the application program to the
terminal
1. Insert the USB pendrive in the terminal;
2. Touch an inactive area of the screen for a few seconds to open the
pop-up menu;
3. Choose “Update”;
4. Follow the steps in the Wizard and confirm by selecting “Next”;
5. A copy progress bar is shown. Confirm when the process has been
completed.
The application program has now been copied/updated.
Fig. 5.o
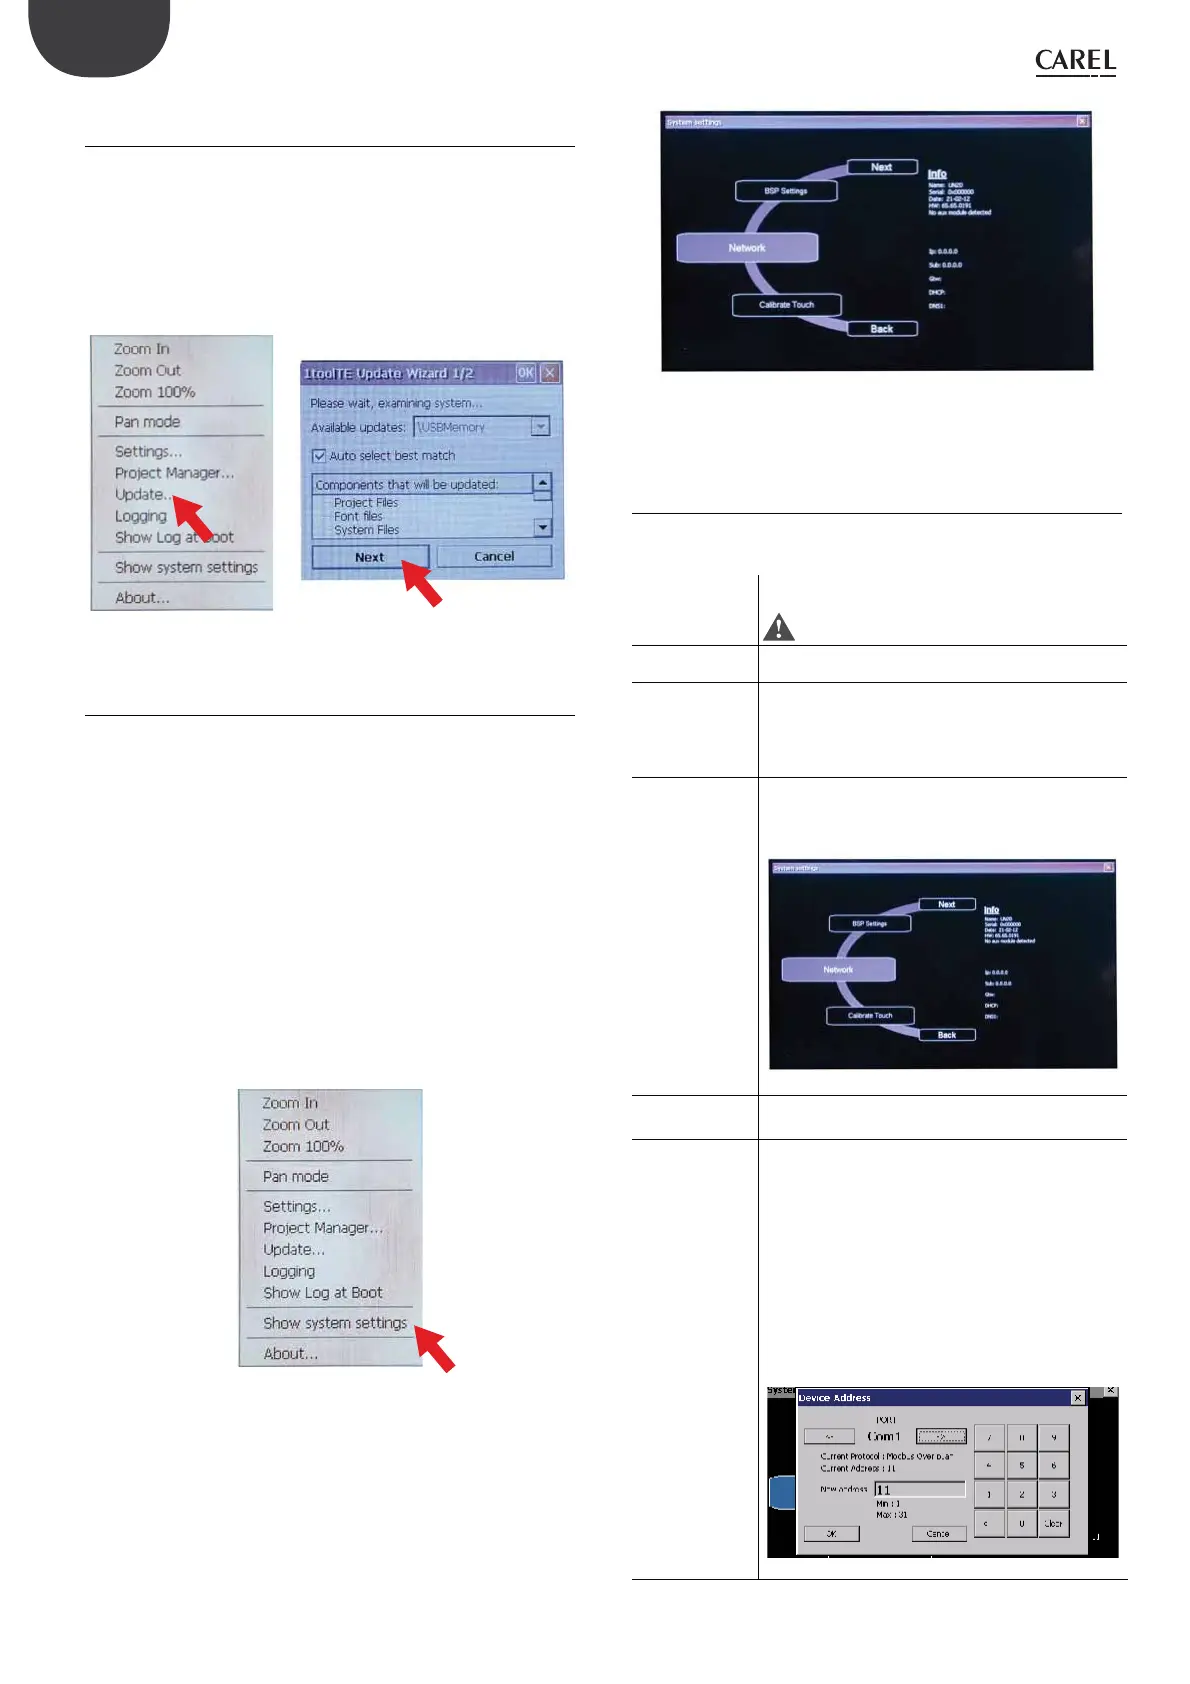
5.4 Terminal settings
pGD Touch terminals feature a system setting tool that is used to
make basic and preliminary settings. The system settings are shown
in a rotating menu with navigation keys at the top and bottom of the
available options. On the left-hand side are the various components and
functions, and for each of these, the panel on the right shows information
on the current version, where applicable. The figure below illustrates the
version of the main component of the operating system.
The system settings feature two operating modes:
• user mode;
• system mode.
The difference between these is the number of options available.
User mode: as already described, the settings can be accessed by
pressing an inactive point on the screen for a few seconds. The default
time is 2 s, which can be set runtime. The system settings in “User mode”
are accessed from the rotating menu.
Fig. 5.p
Fig. 5.q
System mode: emergency procedures, for reserved use.
5.4.1 User mode
“User mode” is the simplest way for any user to access the basic terminal
settings:
Display settings Accesses the system menu to set the backlighting auto-
off time and adjust intensity. Default = 5 s.
Important: Do not disable the auto-o setting.
Time Used to set the system clock and time zones (always set
GMT)
BSP (Board
Support Package)
settings
Version: shows the operating system version.
Timers: shows the system and backlighting operating
hours.
Buzzer: used to activate the buzzer when touching the
display.
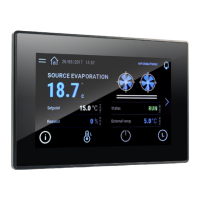
Network Shows the current system IP data (address, subnet,
Gateway, DHCP, DNS) and allows access to the Ethernet
port configuration menu
Fig. 5.r
Calibrate Touch Used to calibrate the terminal. Use a stylus to press the
exact point on the screen indicated by the crosses.
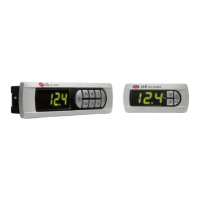
Set device address IDevice address setting for protocols that require this
(Modbus RTU Server, BACnet). The address can only be
set for protocols that are running. Select the commu-
nication port (Ethernet, Com1, Com2) using the arrow
keys at the top. Make sure the right protocol is selected.
Use the numeric keypad to enter the address, between
the minimum and maximum values. The Í key cancels
the last number entered, the Clear key clears the field.
The default value is assigned by 1ToolTE. The Cancel
key cancels the changes, while OK, if the value entered
is valid, makes the new settings effective, otherwise an
error message is displayed.
Fig. 5.s