Before starting your i-Vu CCN Pro
4 i-Vu CCN Pro 4.2
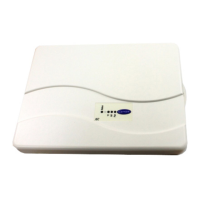
Step 2: Install i-Vu CCN device managers
Refer to the i-Vu CCN Router or i-Vu Link Installation Guide for mounting and wiring instructions. Download
these from the
Documentation CD.
You will need the instructions in that document for the following:
• Mounting and wiring the router
• Wiring the ports for communication and configuration
• Setting up IP addressing
Step 3: Use Network Service Tool V to ensure hardware is
communicating on the CCN network
1 Connect the 3-terminal connector of the Network Service Tool's USB to CCN Converter to Port S1 on the i-
Vu device manager.
Carrier USB to CCN converter
(top CCN Port)
(Port S1)
+ Net+ (Pin 1)
G Signal Ground (Pin 5)
- Net- (Pin 2)
2 Launch Network Service Tool and connect to the i-Vu device manager. Each i-Vu device manager
defaults to Gateway functionality and has a CCN address of
0,1.
CAUTION! Every CCN device must have a unique CCN address on the CCN network! Do not use Bus 0,
Element
238, as it is automatically assigned to i-Vu CCN Pro.
3 Upload the i-Vu device manager.
4 Change the address of the i-Vu device manager using the Display/Set Properties function.
5 Access Service Configuration Table IP_CONF to enter the following configuration options.
NOTE A static IP address is required, as DHCP is not supported.
○ Host IP Address - enter the IP address for the device manager, as provided by the LAN
administrator. (allowable entries for xxx.xxx.xxx.xxx: xxx is a decimal number between 0 - 255)
○ Subnet Mask - enter the IP address for the device manager, as provided by the LAN administrator.
(allowable entries for xxx.xxx.xxx.xxx: xxx is a decimal number between 0 - 255)
○ Default Gateway - enter the IP address of the default gateway on the Ethernet LAN for the device
manager, as provided by the LAN administrator.
CCN ENET Configuration
Device Type
○ Select 0 if this device manager is the Gateway. (NOTE Only one gateway is permitted per system.)
○ Select 1 if this device manager is the Bridge.
 Loading...