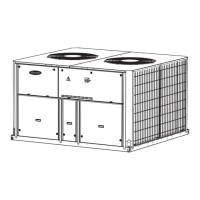
Monitor and control equipment
62 i-Vu CCN Pro 4.2
By default, i-Vu CCN Pro performs an alarm action when the alarm source
generates an alarm
when it returns to normal. Under
you can
choose to:
• Run the alarm action only when the alarm source generates an alarm
when
it returns to normal.
• Wait for the specified amount of time, then run the alarm action if the alarm
has not been acknowledged or has not returned to normal. *
• Run if the alarm occurs during the occupied hours defined for a schedule
group or run if the alarm occurs during the unoccupied hours defined for a
schedule group. *
EXAMPLE: To have i-Vu CCN Pro perform one alarm action during work hours
and a different alarm action after work hours:
1. Create a schedule group (page 49), but do not assign members to it.
2. Create a schedule for the group. Set the occupied hours to be the same as
the work hours.
3. Create the alarm action that you want i-Vu CCN Pro to perform during work
hours. Under
, select
Run if schedule group <your new
group> is Occupied
.
Create the alarm action that you want i-Vu CCN Pro to perform during after hours.
Under
, select
Run if schedule group <your new group> is
Unoccupied
.
NOTE You should not assign this alarm action to frequently-occurring alarms as this may cause problems on
your network or the Internet.
To set up a dial-up networking connection
i-Vu CCN Pro can use a dial-up internet connection through a modem to deliver e-mail for the Send E-mail or
Send Alphanumeric Page alarm action.
To set up the dial-up connection:
1 Set up your modem to dial out to your Internet Service Provider. See your modem documentation.
2 On the i-Vu CCN Pro server, open Internet Explorer.
3 Select Tools > Internet Options.
4 On the Connections tab, click Setup.
5 Follow the instructions in the wizard. See Windows Help for assistance.
6 In a text editor such as Windows
Notepad, open i-Vu CCN Prox.x\webroot\<system>\ system.properties.
7 At the end of the file, type the following line:
repactions.connection.name=<name of connection>
where <name of connection> is the ISP name you entered in the wizard in step 2.
8 Open Internet Explorer, then select Tools > Internet Options > Connections tab.
9 If the box under Dial-up and Virtual Private Network settings shows more than one connection, select
the connection you just created, then click
Set Default.
10 Select Always dial my default connection.
 Loading...