27Bottle Setup & Conguration
Delete Solvent
Only solvents created by the user can be deleted.
1. Select the System Menu icon in the bottom right corner of the screen.
2. Select Settings.
3. Select Solvents.
4. Select the solvent to delete.
5. Select the Delete icon at the top of the screen.
6. Select “Yes” to delete or “No” to return to previous screen.
7. Select the Save icon at the top of the screen.
Assign Solvent Bottle Positions
Add Solvent or Solvent Mixtures to appropriate bottle positions before assigning solvents to bottle positions. The
option to prime lines will appear once bottle positions have been assigned and changes have been saved.
1. Select System Menu icon in the bottom right corner of the screen.
2. Select Settings.
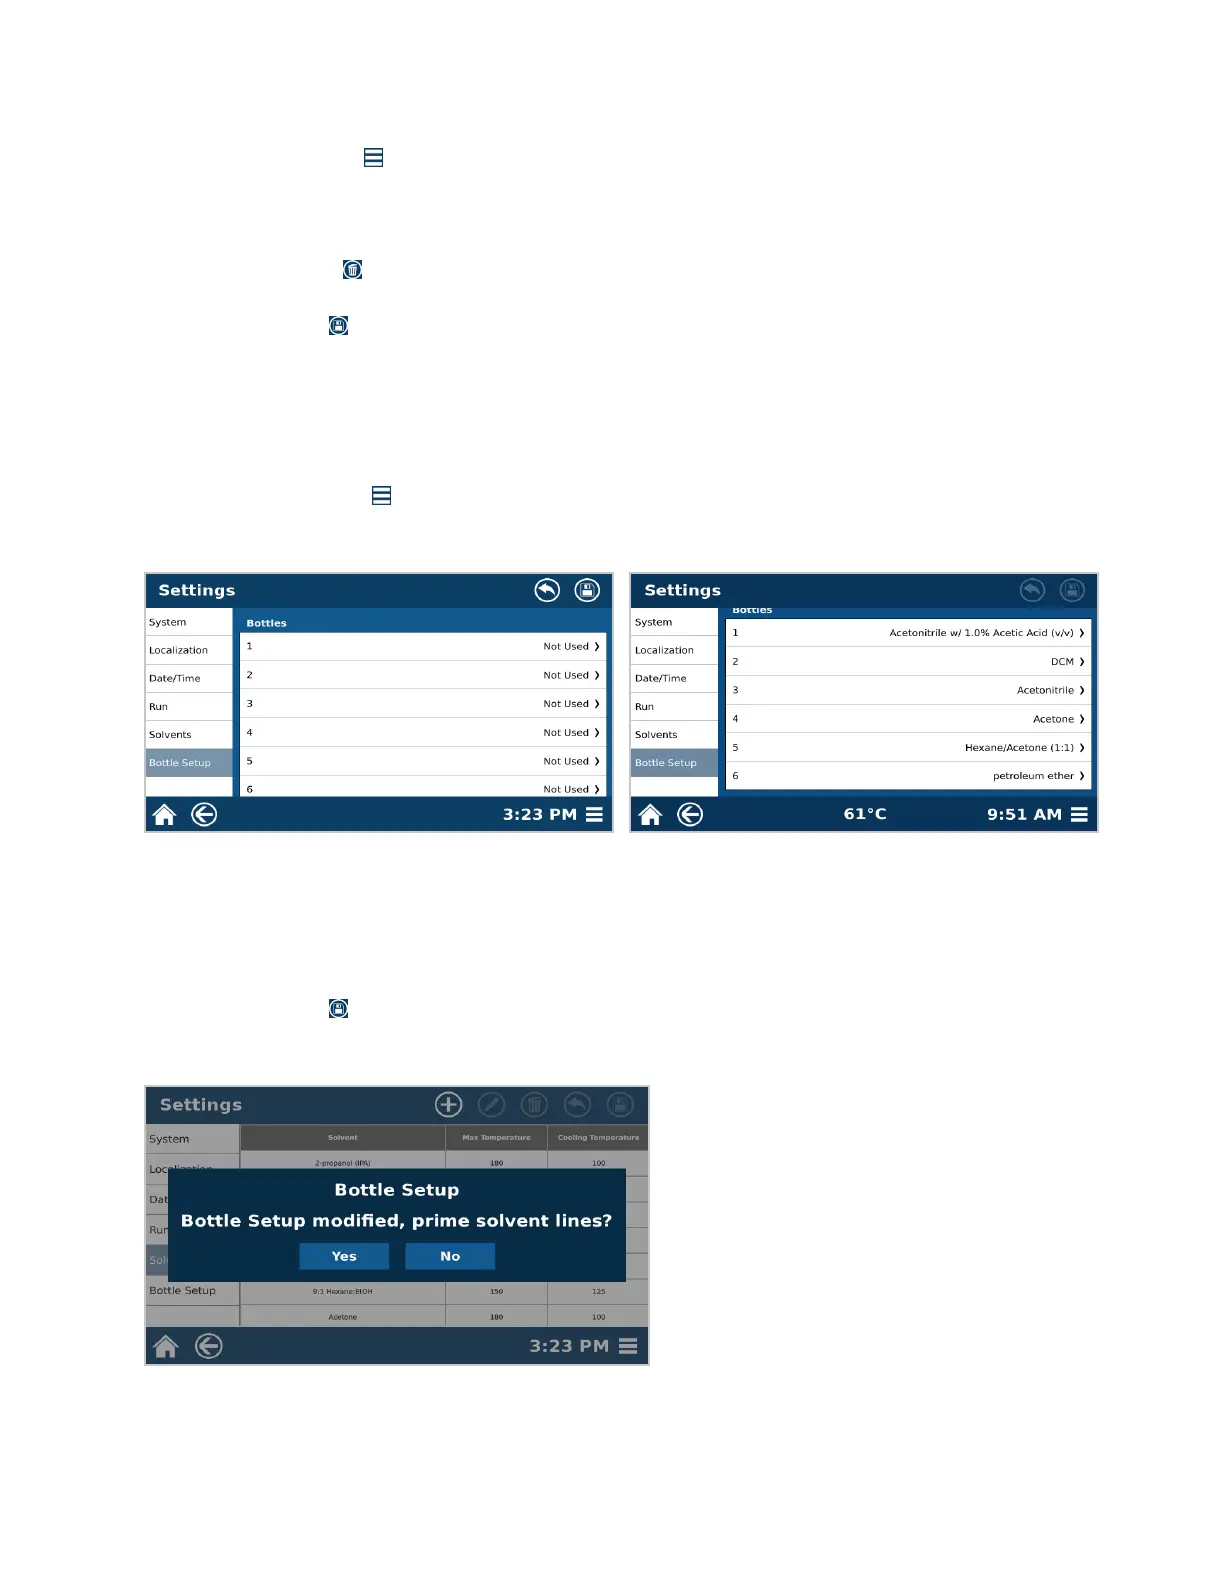
3. Select Bottle Setup.
4. Select “Not Used” or the solvent name you wish to replace in a bottle position.
5. Select the solvent to assign it to that bottle position. If the solvent you wish to add is not in the drop-down list,
add your solvent or solvent mixture as outlined in the “Add Solvent” section of this manual.
6. Select “OK.”
7. Repeat steps 4-6 until desired positions have been assigned.
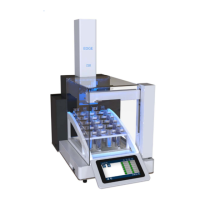
8. Select the Save icon at the top of the screen.
9. Upon saving, a prompt will ask you to prime solvent lines. This draws solvent through the lines and empties
into the waste bottle to ensure the lines are primed prior to running samples. Select “Yes” to prime the lines.