Mounting the Quantum Maestro Orchestrator MHO-175 in a Rack
Quantum Maestro Getting Started Guide|66
Step 8: Initial Power On
The power cords should be standard 3-wire AC power cords including a safety ground and rated for 15A
or higher.
Check all boards, power supplies, and fan tray modules for proper insertion before plugging in a power
cable.
The Quantum Maestro Orchestrator powers on automatically, when an AC power is applied.
Step Instructions
1 Plug in the first power cable to the first PSU.
2 Plug in the second power cable to the second PSU.
3 Wait for the System Status LED to turn green (see
"System Status LED" on page32
).
It can take up to five minutes to power on the Quantum Maestro Orchestrator.
If after five minutes the System Status LED is lit in red color, unplug the power cords and
contact
Check Point Support
.
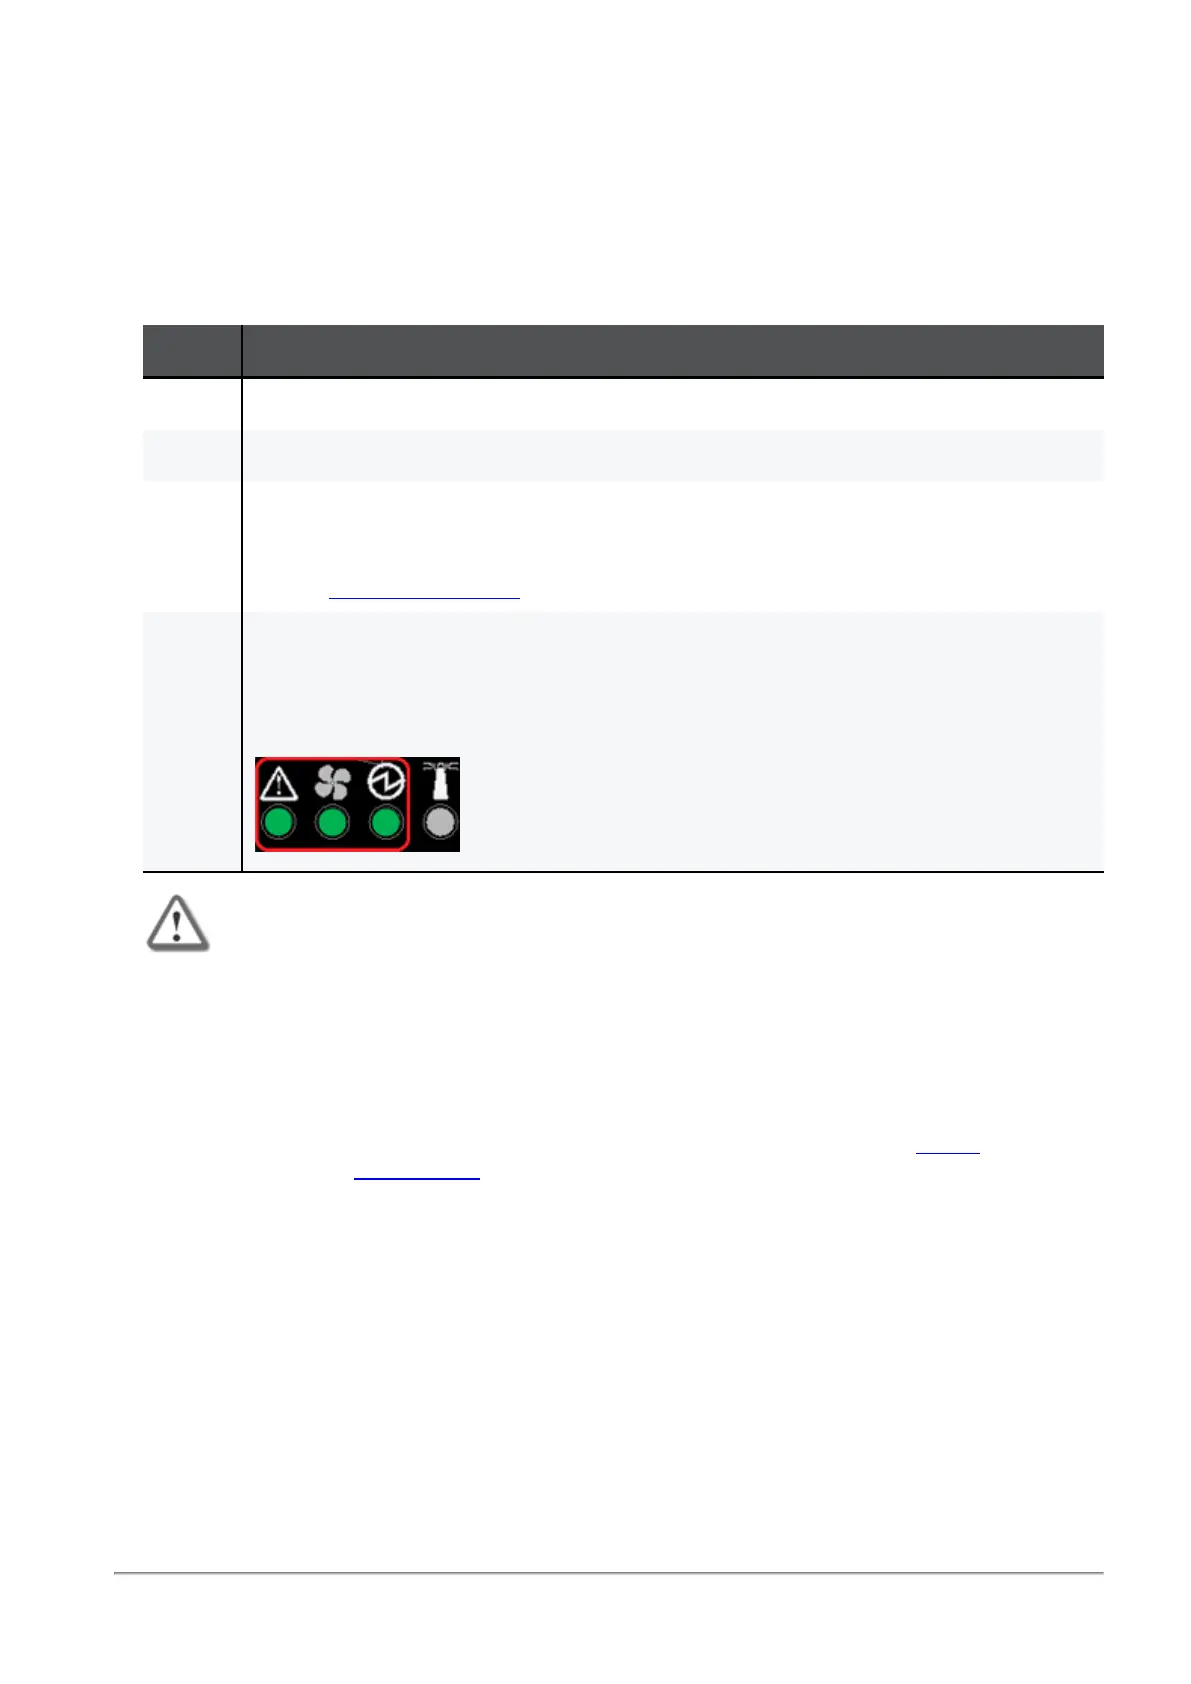
4 Check the status of the Quantum Maestro Orchestrator LEDs (see
"LED Notifications" on
page31
).
All of the LEDs must show status lights that are consistent with normal operation (initially
flashes, and then lights in a steady color).
Example:
Important:
n
After you insert a power cable and confirm the System Status LED is lit in
steady green color, make sure that the Fan Status LED is also lit in steady
green color.
n
If the Fan Status LED is not green (see
"Fan Status LED" on page34
):
1. Unplug the power cable.
2. Make sure that the mating connector of the fan unit is free of any dirt
and obstacles.
3. Make sure that the fan unit is inserted properly.
If no obstacles were found, and the problem persists, contact
Check
Point Support
.