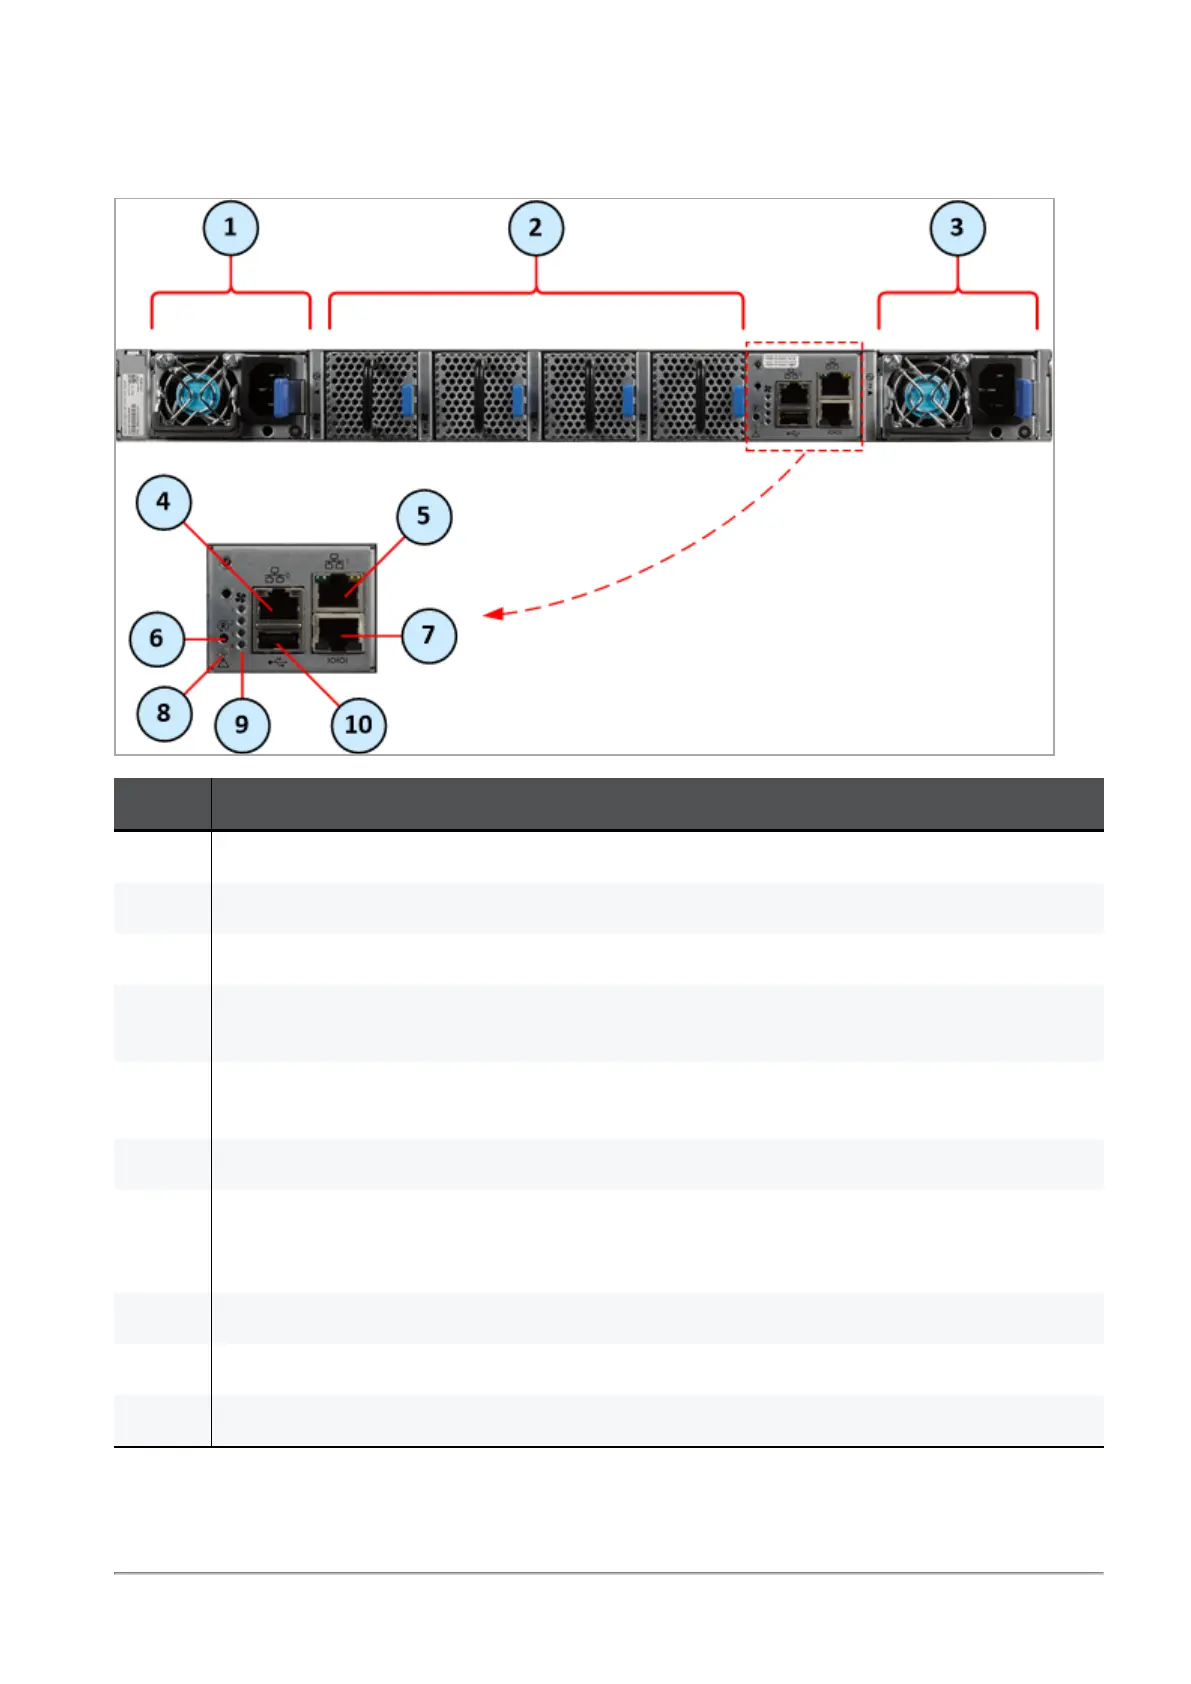
MHO-140 Rear Panel
Quantum Maestro Getting Started Guide|30
MHO-140 Rear Panel
Item Description
1 First Power Supply Unit. See
"Replacing Power Supply Units" on page50
.
2 Fan Units 1, 2, 3 and 4 (from left to right). See
"Replacing Fan Units" on page52
.
3 Second Power Supply Unit. See
"Replacing Power Supply Units" on page50
.
4 RJ45 port labeled 0, through which you configure the Gaia Operating System on the Quantum
Maestro Orchestrator (Gaia Portal and Gaia Clish).
5 RJ45 port labeled 1, through which it is also possible to configure the Gaia Operating System
on the Quantum Maestro Orchestrator (Gaia Portal and Gaia Clish).
6 Reset button labeled R. See
"Reset Button" on page49
.
7 RJ45 port with the label CONSOLE. See
"Console Port" on page48
.
To this port you connect a client, from which you connect to the Gaia Operating System on the
Quantum Maestro Orchestrator (in Gaia Clish).
8
"System Status LED" on page32
.
9
"Fan Status LED" on page34
.
10 USB 2.0 port. See
"USB Port" on page47
.
For more information about the RJ45 ports labeled 0 and 1, see
"MGMT Ports" on page45
.