Section 3: Operation
Christie ACT User Manual 3-3
020-100129-05 Rev. 1 (02-2010)
Viewing a Specific Christie ACT
To browse for available Christie ACT devices,
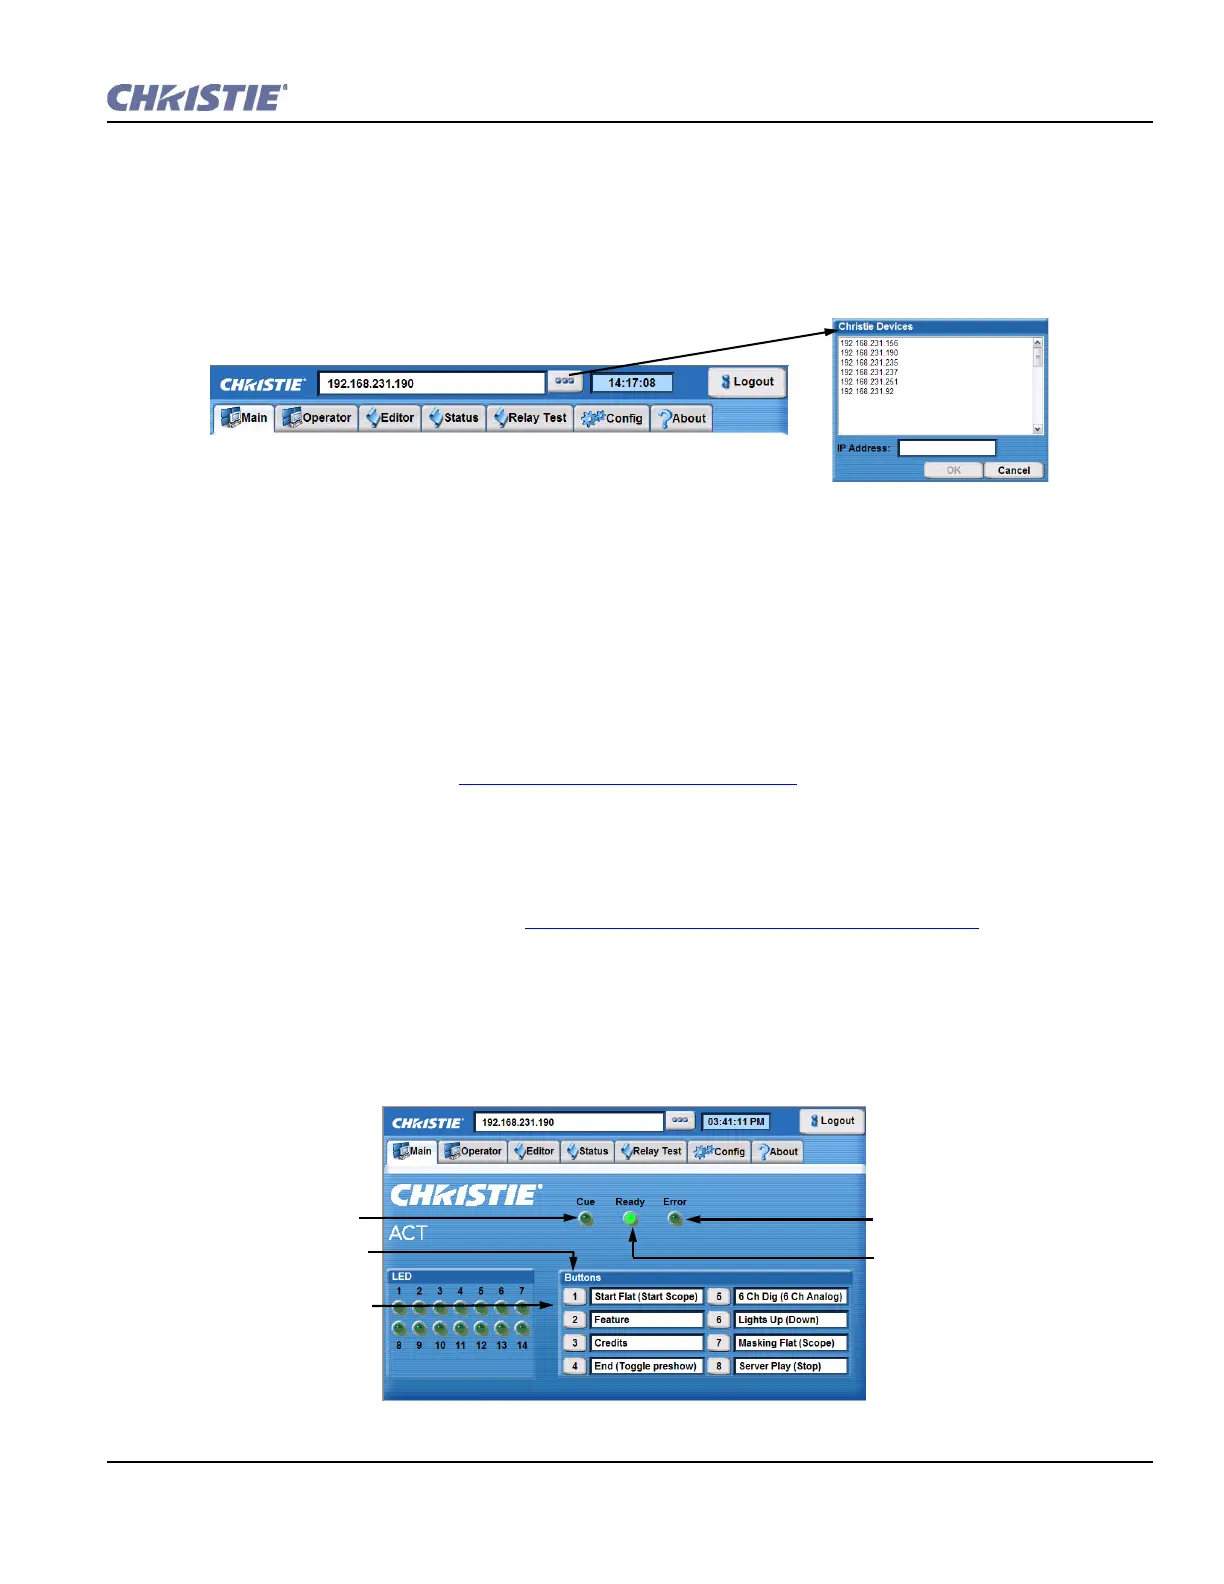
1. Click the Device button to open the Christie Devices window (Figure 3-3).
2. Select an address from the displayed list of IP addresses.
Viewing the Current Status
When a tab is clicked, the information for that selection is displayed in the center of the window. When the
Editor, Status and Config tabs are selected, additional sub tabs are presented at the bottom of the window.
Each sub tab opens a new window that is relative to the original tab selection.
3.3 Setting Christie ACT’s Configuration
Christie ACT must be configured before it can be used. Use the Setup and Configuration Manual to configure
Christie ACT. For now, refer to Section 3.7 Configuring Christie ACT
to configure Christie ACT.
3.4 Basic Operation
This section discusses the four basic tabs that an operator can view: Main tab, Operator tab, Status tab, and
About tab. Other tabs are discussed in Section 3.6 Advanced Operation and Configuration
.
3.4.1 Main Tab
The Main tab provides a series of programmable buttons that mimic the front of Christie ACT. There are a
series of 14 LED lights that turn ON and OFF depending on the state of the selected button. They are for
display only and cannot be turned ON or OFF from this tab.
Figure 3-3 List of Christie Devices
Buttons that mimic the
front panel.
Flashes when an event is
active.
Indicates when Christie ACT is
ready. Flashes when loading.
Select to initiate the start of
a single isolated event that
has been configured.
Indicates when an error has
occurred within the Web UI.
Figure 3-4 Main Tab