Section 3: Operation
Christie ACT User Manual 3-19
020-100129-05 Rev. 1 (02-2010)
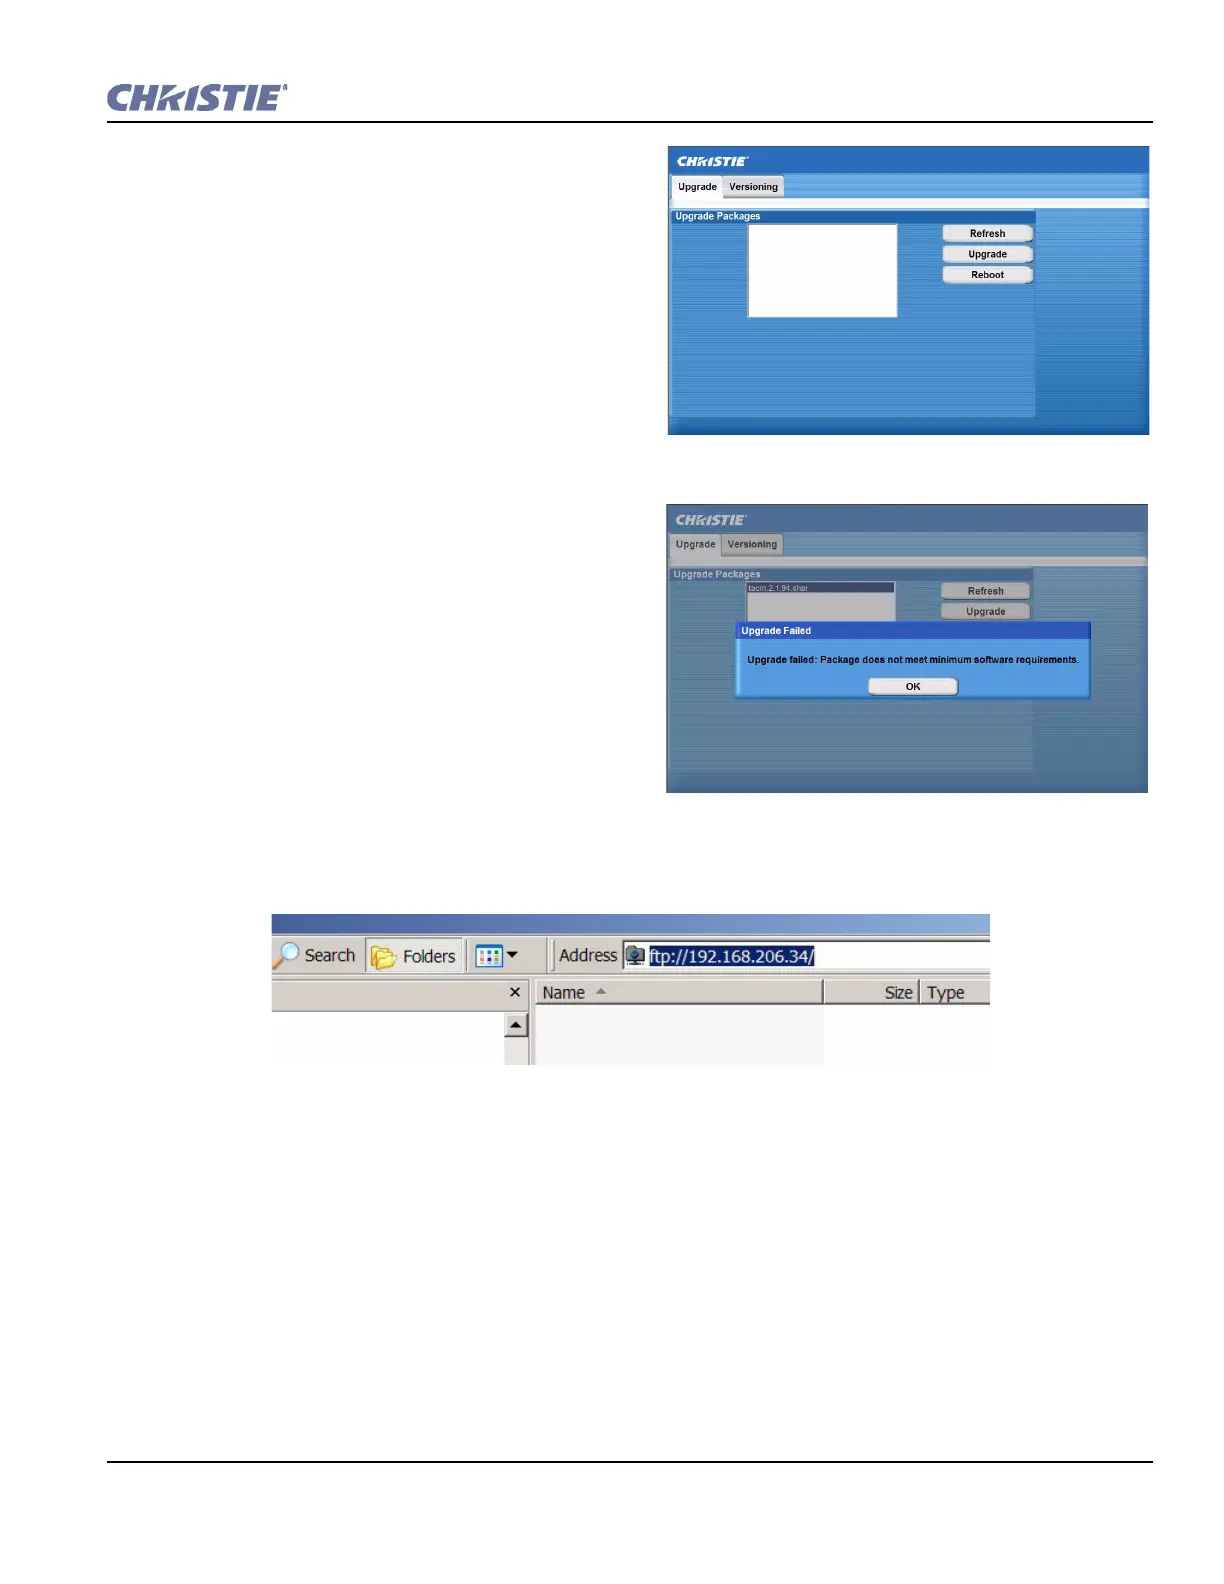
3.8 Upgrading Christie ACT Software
The software installed on Christie ACT can be
upgraded by using the Config: File Management
tab. You must have the required access level to
upgrade Christie ACT. The upgrading process may
take between 7 -10 minutes depending on your
computer and network. To upgrade Christie ACT:
1. Login into Christie ACT using the Service login
and password.
2. Go to the Config: File Management tab (Figure
3-20).
3. Click Reboot to Failsafe and then click Yes
when you see the confirmation dialog with the
following text, “Are you sure you want to reboot
ito Failsafe?” The Upgrade/Versioning
window displays as shown in Figure 3-21.
NOTE: If you try to download to an older package
assuming you’re using the new board, an error
should return.
(Figure 3-22).
4. Download the new .shar file onto your C
drive from the Christie Website.
5. Open a Windows Explorer window.
6. In the Explorer window, type FTP://
YOUR ACT
IP
ADDRESS and press ENTER.
7. Drag and drop the upgrade file into the Explorer window.
8. In the Christie ACT Upgrade/Versioning window, click Refresh. The file that was selected appears.
9. Click the file to highlight it and click Upgrade.
During the upgrade process, a status message will show the progress of the operation.
10. When the upgrade is complete, click Reboot to restart Christie ACT.
Figure 3-21 Upgrade/Versioning Window
Figure 3-22 Downgrade Error
Figure 3-23 Enter Your Christie ACT IP Address in Windows Explorer