Section 3: Operation
Christie ACT User Manual 3-29
020-100129-05 Rev. 1 (02-2010)
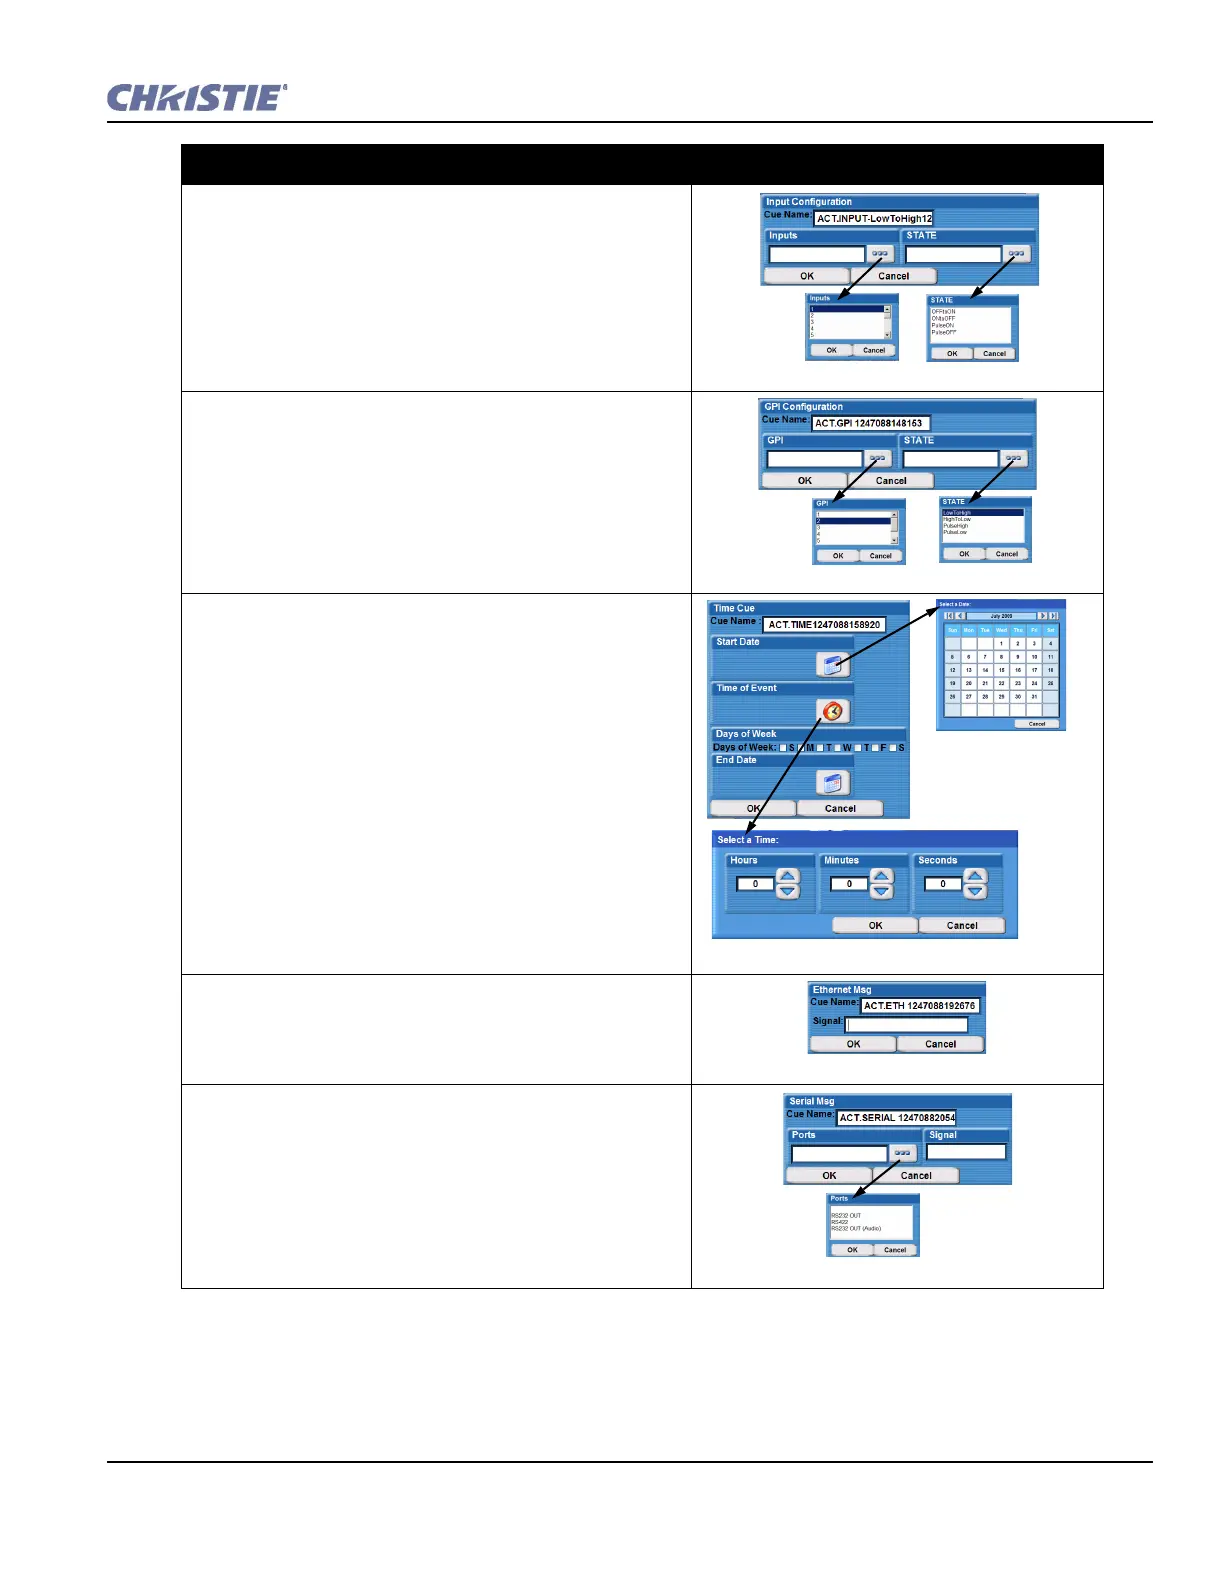
Input
1. Select the inputs number from the drop-down list
(numbered 1-16) and click OK.
2. Select the state from the State drop-down list (OFFtoON,
ONtoOFF, PulseON, PulseOFF) and click OK.
GPI
1. Select the GPI number from the drop-down list (numbered
1-7) and click OK.
2. Select the state from the State drop-down list (Low
ToHigh, HighToLow, PulseHigh, PulseLow) and click
OK. Only pulses greater than 15 ms will be detected.
Pulses less than 15 ms in duration are considered to be
noise.
Time
1. Click the Start Date button to open the Select a Date
window. Select a date.
2. Click the Time of Event button to open the Select a Time
window. Enter the duration using the arrow buttons to
scroll through the times. Click OK.
3. Select the days of the week by clicking to add a checkmark
(you can check more than one).
4. Click the End Date button to open the Select a Date
window. Select a date.
5. Click OK.
Ethernet
1. Enter the signal in the Signal text region.
2. Click OK.
Serial
1. Select the Port number from the drop-down list (RS232 IN,
RS232 OUT, RS422, RS232 OUT (Audio)).
2. Type the signal.
3. Click OK.
Adding Script Cues - Options and Commands
 Loading...