3-9
Cisco IP Phone Administration Guide for Cisco CallManager, Cisco IP Phone 7961G/7961G-GE and 7941G/7941G-GE
OL-6966-01
Chapter 3 Setting Up the Cisco IP Phone
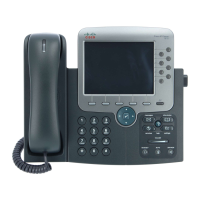
Installing the Cisco IP Phone
To install a Cisco IP Phone, perform these steps:
Procedure Notes Reference
Step 1
Connect the handset to the
Handset port.
——
Step 2
Connect a headset to the
Headset port.
Optional. You can add a
headset later if you do not
connect one now.
See the “Headset” section on
page 3-4 for supported
headsets.
Step 3
Connect the power supply to the
Cisco DC Adapter port.
Optional. See the “Adding Phones to
the Cisco CallManager
Database” section on
page 2-11 for guidelines.
Step 4
Connect a Category 3 or 5
straight-through Ethernet cable
from the switch to the network
port labeled 10/100 SW on the
Cisco IP Phone 7961G/7941G,
or to the network port labeled
10/100/1000 SW on the
Cisco IP Phone
7961G-GE/7941G-GE.
Each Cisco IP Phone ships
with one Ethernet cable in
the box.
See the “Network and
Access Ports” section on
page 3-3 for guidelines.
Step 5
Connect a Category 3 or 5
straight-through Ethernet cable
from another network device,
such as a desktop computer, to
the access port labeled 10/100
PC port on the Cisco IP Phone
7961G/7941G, or to the access
port labeled 10/100/1000 PC on
the Cisco IP Phone
7961G-GE/7941G-GE.
Optional. You can connect
another network device later
if you do not connect one
now.
See the “Network and
Access Ports” section on
page 3-3 for guidelines.
 Loading...