Introduction
Mounting Options
Cisco Small Business RV0xx Series Routers Administration Guide 14
1
STEP 2 Insert a screw into each hole, leaving a gap between the surface and the base of
the screw head of 1 to 1.2 mm.
STEP 3 Place the router wall-mount slots over the screws and slide the router down until
the screws fit snugly into the wall-mount slots.
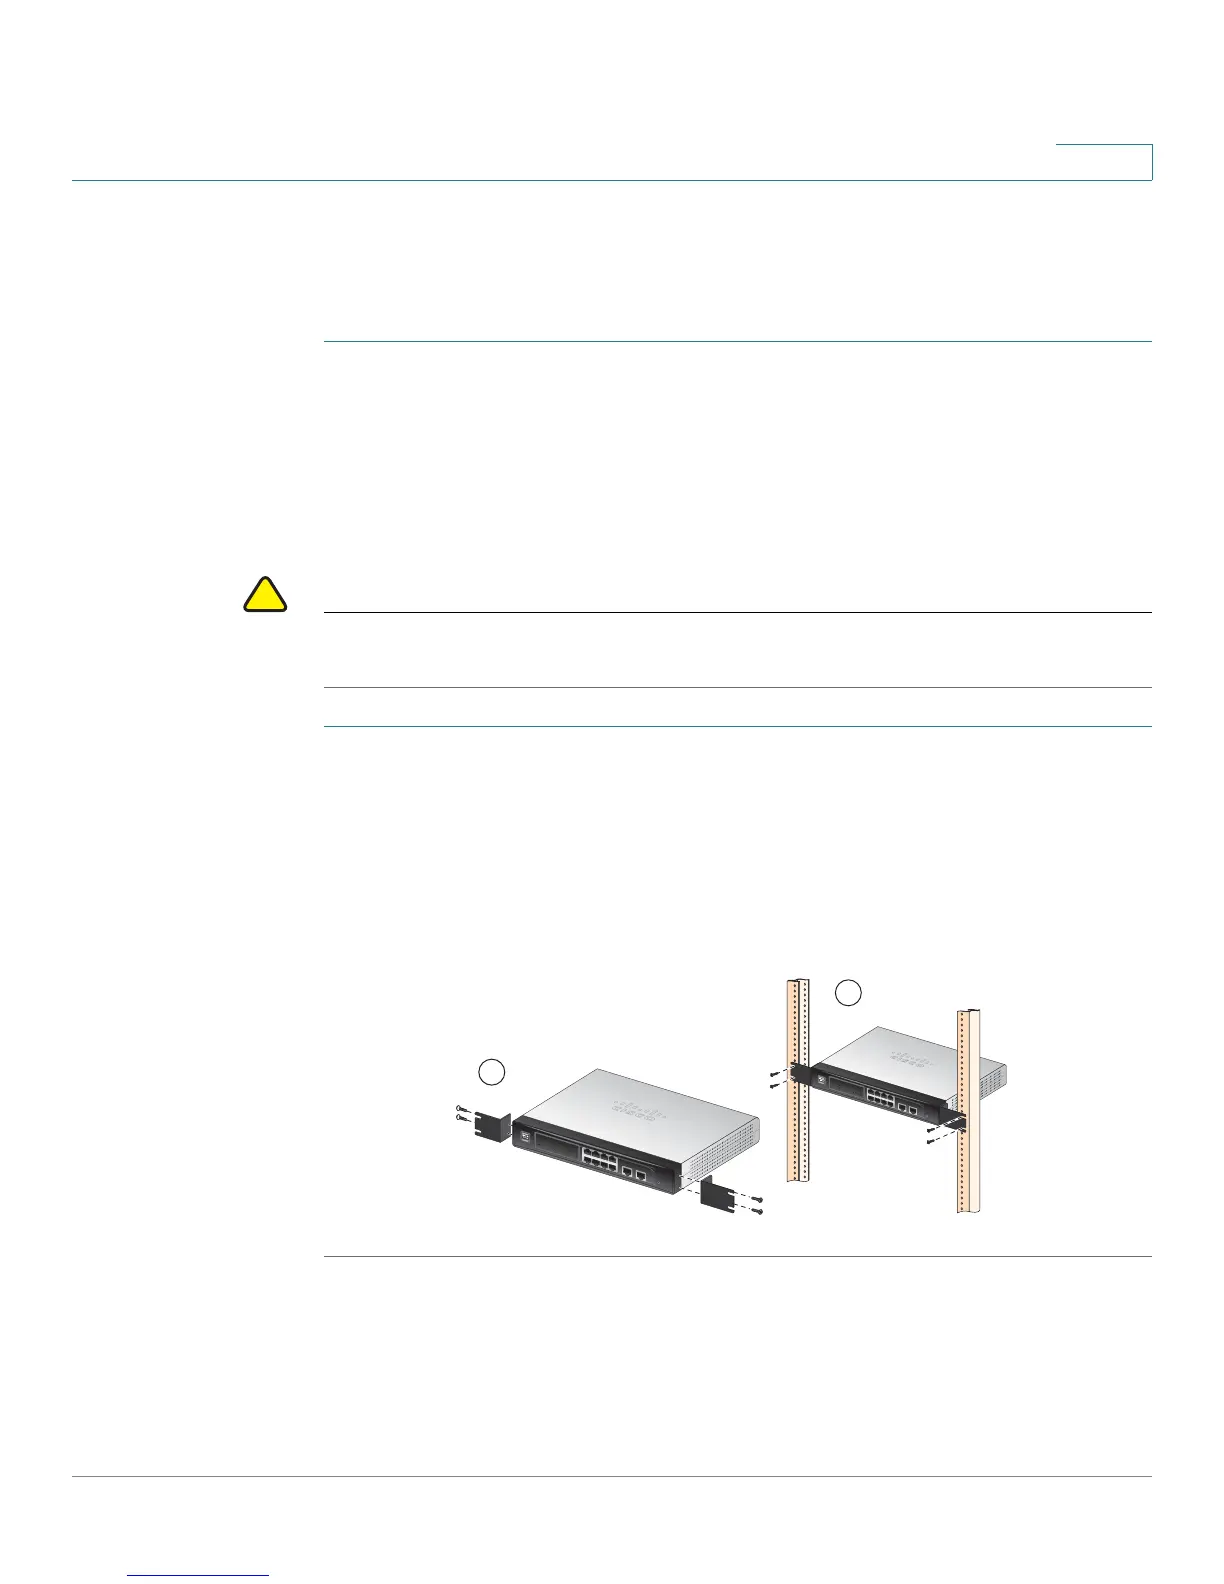
Rack Mounting RV082 or RV016
You can mount the RV082 or RV016 in a standard size, 19-inch (about 48 cm) wide
rack. The router requires 1 rack unit (RU) of space, which is 1.75 inches (44.45mm)
high. Mounting brackets are provided.
CAUTION Do not overload the power outlet or circuit when installing multiple devices in a
rack.
STEP 1 Place the router on a hard, flat surface.
STEP 2 Attach one of the supplied rack–mount brackets to one side of the router with the
supplied screws. Secure the bracket tightly.
STEP 3 Follow the same steps to attach the other bracket to the opposite side.
STEP 4 Use suitable screws to securely attach the brackets to any standard 19-inch rack.
1 2 3 4
5 6
7 8
DMZ/InternetInternet
123 4
5 6 7 8
DI
AG
S
y
s
te
m
Internet
DM
Z
Internet
DMZ
Mode
Cisco Small B
usin
ess
RV
082
10/100
16-P
ort VPN
Rou
t
er
278825
1
2
12 3 4
56 78
DMZ/Int
e
rnet Inte
rnet
1
234
5
6 7
8
D
IA
G
Sy
s
tem
I
nterne
t
DMZ
I
nterne
t
D
MZ
Mode
Cisco Sma
ll Busin
ess
RV
082
10/100
16-
P
ort VP
N Rou
te
r
 Loading...