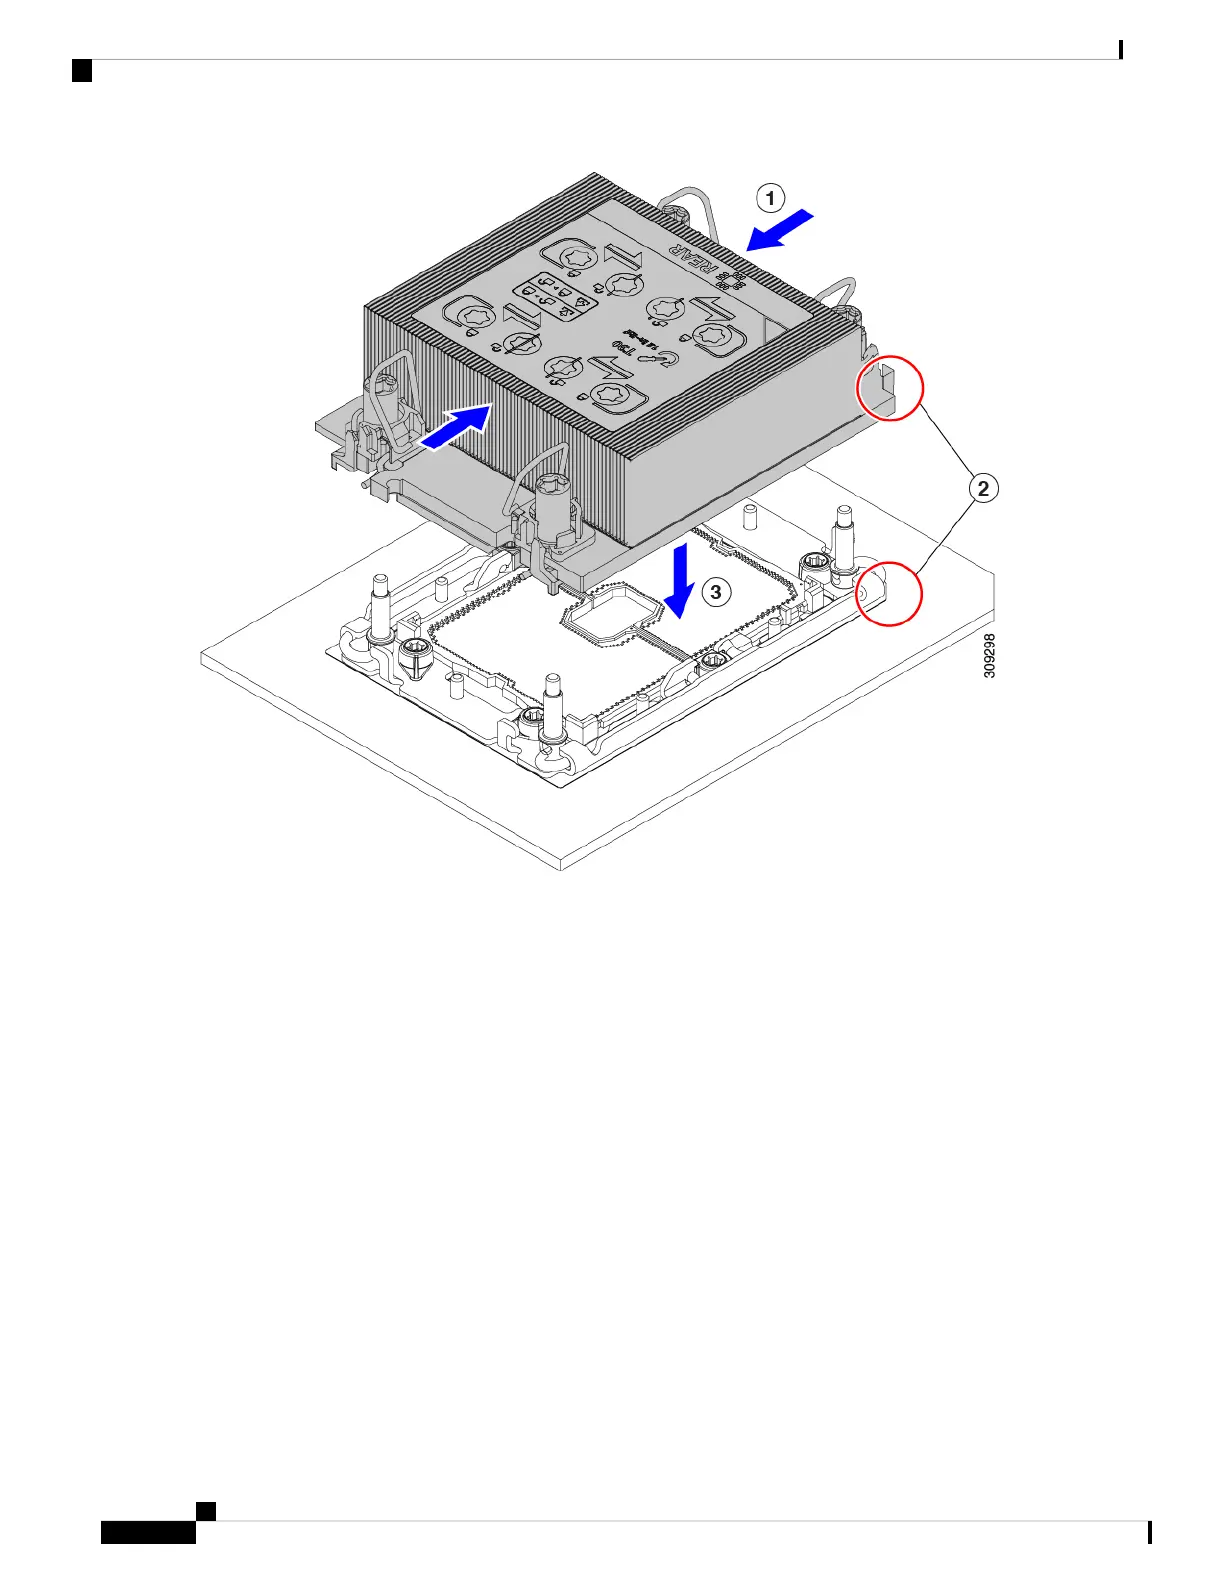
c) Push the rotating wires away from each other to lock the CPU assembly into the CPU socket (1 in the following
illustration).
Make sure that you close the rotating wires completely before using the Torx driver to tighten the securing
nuts.
Caution
d) Set the T30 Torx driver to 12 in-lb of torque and tighten the 4 securing nuts to secure the CPU to the motherboard
(2). You can start with any nut, but make sure to tighten the securing nuts in a diagonal pattern.
Cisco UCS X210c M6 Compute Node Installation and Service Note
46
Servicing a Compute Node
Installing the CPU and Heatsink

 Loading...