Press the grey clip of the female connector to disconnect the tube and then pull slightly and
progressively from the tank.
During the cleaning process, it is recommended to keep the applicator on higher position so that
the liquid injected with the cleaning tool supplied with the equipment, not return.
Then insert the end of the cannula tube into the internal input of the applicator and inject the
distilled water contained in the cannula. Remove the tube from the hole. Fill the cannula with air
and inject it in the same way in order to clean thicker gel residues.
Repeat these operations (first distilled water and then air) until flows clean water on the back of
the equipment.
Important: Be careful during the cleaning process not to overfill the tank on the back of the
machine, corresponding to the applicator being cleaned, otherwise will damage the paper filter.
Always empty before filling.
At the end of the cleaning, perform several more operations with air only, to blow out any water
left in the hose.
Then empty and clean the tank. To do this, remove the cap and wash out all the gel residues.
Replace the cover.
The tank should be closed properly: carefully tighten all tank clips (otherwise will be observed
vacuum drops during the treatment).
Once the applicator or applicators have been cleaned, as well as the tank, proceed to reconnect
the tanks, as explained in section 2 of the equipment installation. Remember that tanks have a
single connecting position. Take into account that the color band of tank and equipment match
and the paper filter is on the right of the reservoir.
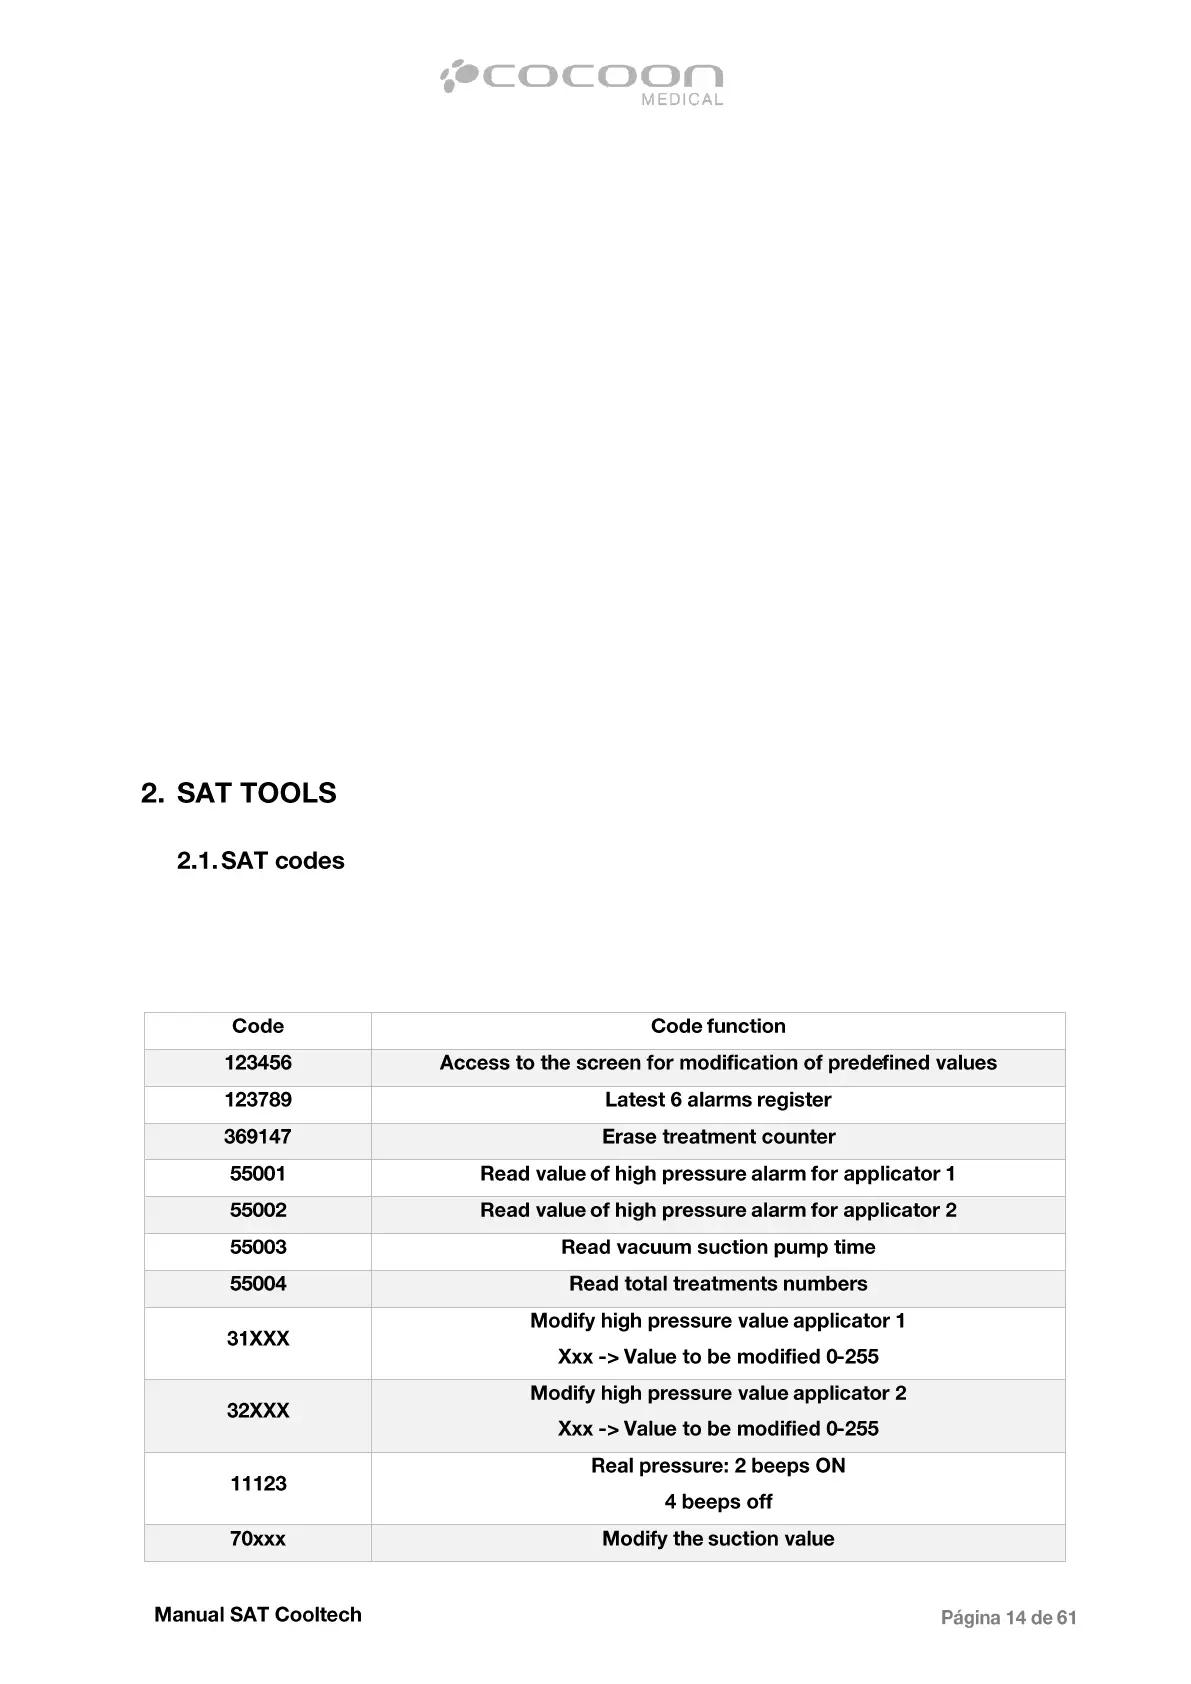
Codes, enabling access to different functions, specific settings and parameters of the equipment, that
could be monitored and modified. To do this enter the code screen, then enter the relevant code and
press 'Enter'.