36 Installation Manual 3P291714-2B
DCM601A71 intelligent Touch Manager
English
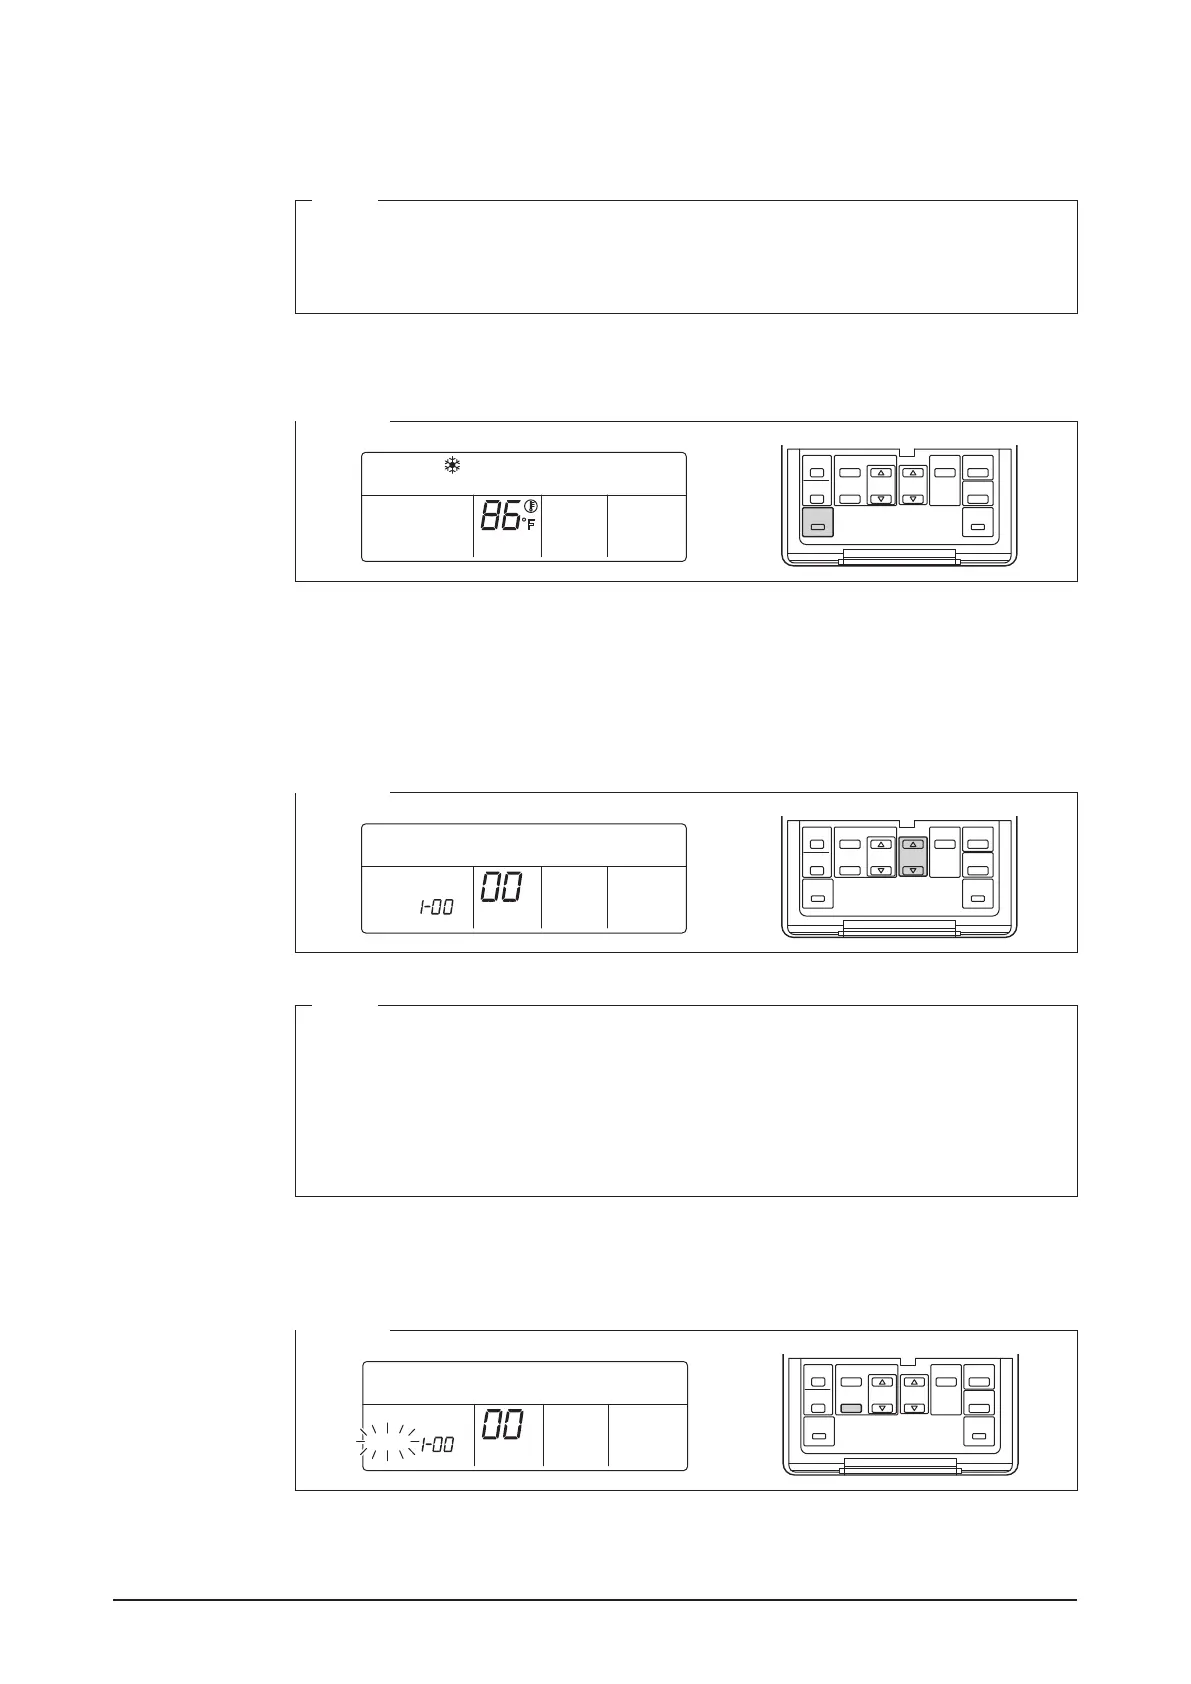
4.7.2 Setting address with wired remote controller
The operation procedure of the wired remote controller is as follows.
NOTE
After power-on, the controller shows the symbol “
88” for about 1 minute after displaying
all information on its display. During this period, it may not accept your operation. If so,
try operating the remote controller again after “88” disappears.
1. Press and hold the Inspection/Test Operation button for 4 seconds or more.
<Step 1>
HH
F
2. “SETTING” appears in the center of remote controller display.
Using the Temperature Setting buttons, change the value shown in the parameter num-
ber display area to “00”.
In the address display area, the current address setting is displayed. (This area will
show “–” if no address is set.)
<Step 2>
SETTING
GROUP
NOTE
The parameter number cannot be changed to “
00” when the intelligent Touch Manager
is not powered on.
Power on the intelligent Touch Manager and wait for a while before trying to operate the
remote controller. You cannot change the parameter number to “00” also when the intel-
ligent Touch Manager is not communicating with the indoor units normally. Check that
the cables are connected correctly.
3. Press the SCHEDULE button to make the “GROUP” indicator blink.
You are now ready to change the DIII-NET address.
<Step 3>
SETTING
GROUP