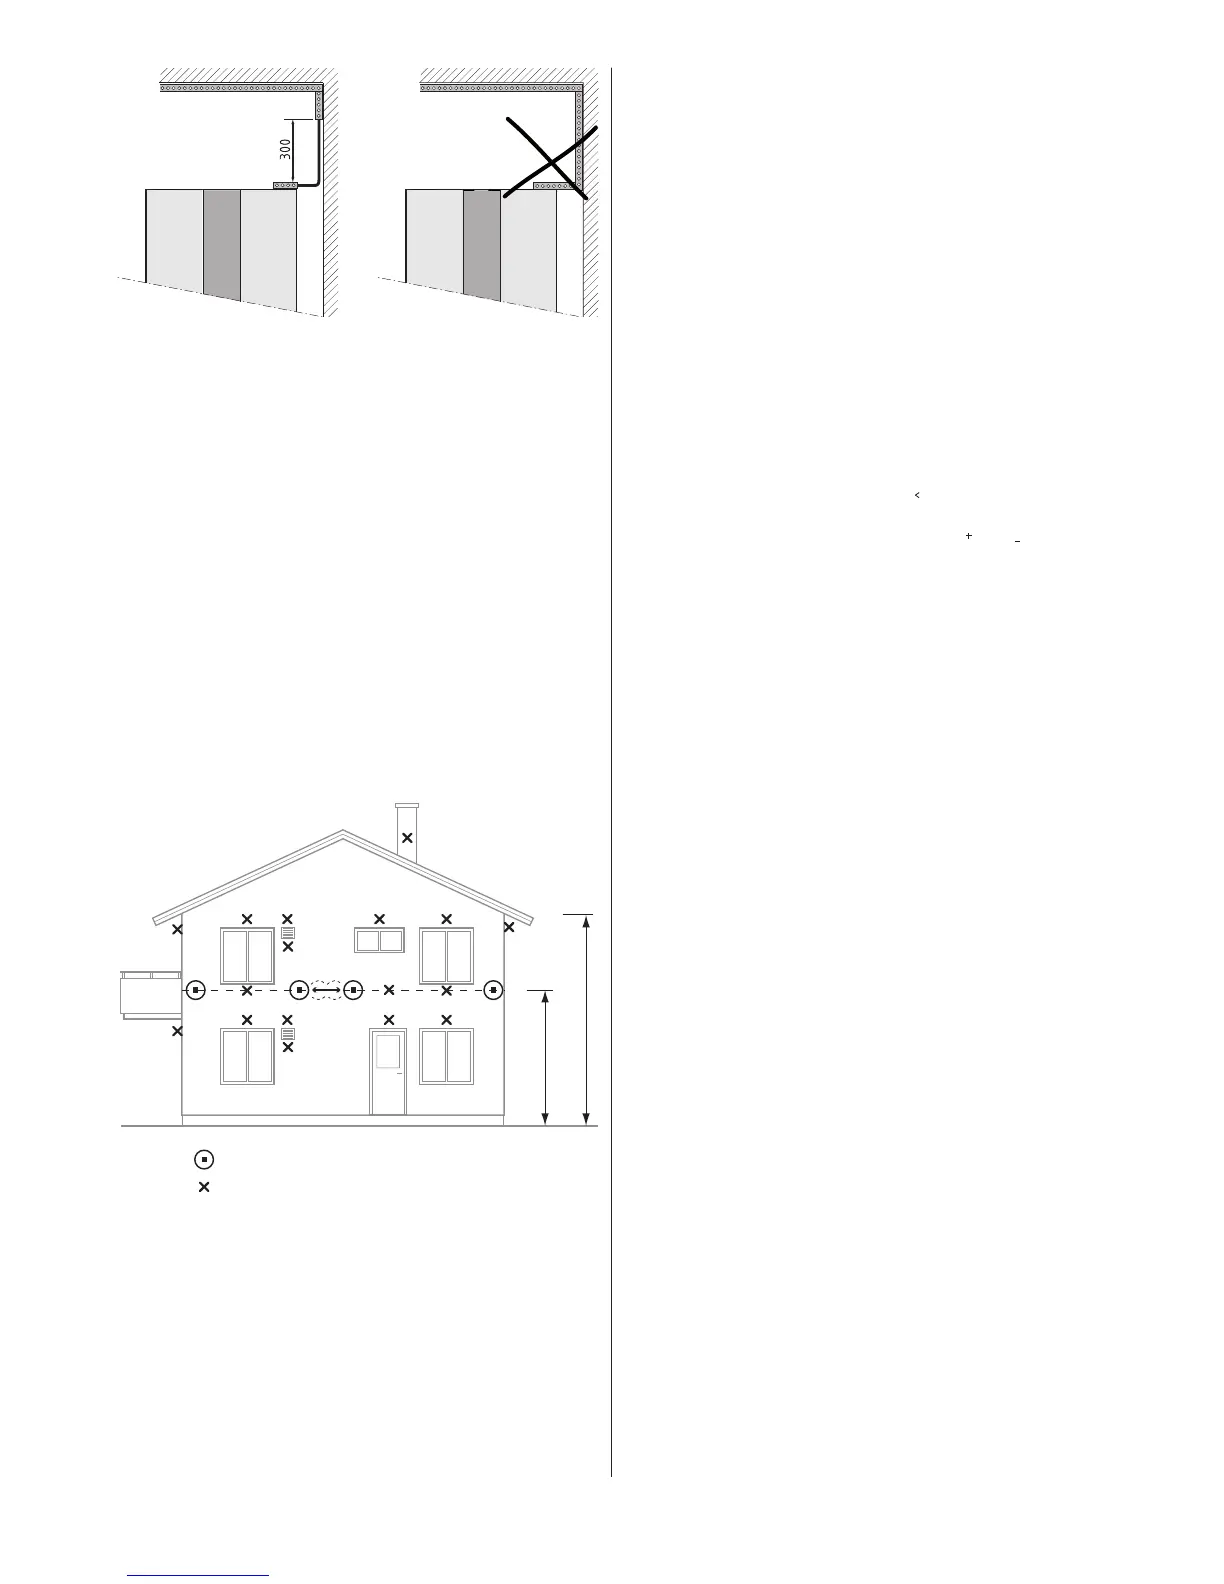
Recommended distance between trunking on the wall and Figure 56:
trunking on the heat pump is 300mm.
7.1 Connect power supply, 400V 3N
⚠
NOTE! The power cable may only be connected to the termi-
nal block intended for this purpose. No other terminal blocks
may be used!
7.2 Connect power supply, 230V 1N SP
⚠
NOTE! The power cable may only be connected to the termi-
nal block intended for this purpose. No other terminal blocks
may be used!
1. Route the power cable through the opening in the top panel of
the heat pump to the terminal blocks.
2. Connect the power cable to the terminal block.
7.3 Position and connect outdoor sensors
⚠
NOTE! The outdoor sensor is connected with extra low pro-
tection voltage. Follow the specific installation instructions
for the outdoor sensor!
Positioning the outdoor sensor.Figure 57:
• Positiontheoutdoorsensoronthenorthornorthwestsideof
the house.
• Tomeasuretheoutdoortemperatureasaccuratelyaspossible,
the sensor must be positioned 2/3 of the way up the facade on
houses up to three storeys high. For higher buildings, the sensor
should be positioned between the second and third storeys. Its
location must not be completely protected from the wind but
not in a direct draft. The outdoor sensor should not be placed on
reflective panel walls.
• Thesensormustbepositionedatleast1mfromopeningsinthe
walls that emit hot air.
• Ifthesensorcableisconnectedthroughapipe,thepipemustbe
sealed so that the sensor is not affected by outgoing air.
The outdoor sensor is connected by a two core cable. For a cross
section of 0.75 mm
2
a maximum cable length of 50 m applies. For
greater lengths a cross section of 1.5 mm
2
is used, up to a maxi-
mum of 120 m.
Then connect the sensor to the heat pump control system in
accordance with the instructions below.
r.
1. Route the outdoor sensor connection cable through the cable
bushing in the top panel to the terminal block.
2. Connect the sensor to the terminal blocks according to the con-
nection diagram.
7.4 Changing the language in the control
computer
If necessary, change the language in the control computer menus.
1. Ensure that the main circuit breaker is on.
2. Open the SERVICE menu by holding
in for five seconds.
3. Change language in the control computer menu SERVICE ->
INSTALLATION -> ENGLISH, select language
and .