Problem – Short operating times despite heating demand
Cause Troubleshooting Remedy
ROOM and/or CURVE set too high in com-
bination with a heating system with poor
circulation due to closed radiator valves, too
small elements or insufficient water volume.
A tight fitting system with poor pipe dimen-
sions may produce the same phenomena.
Check if the heat pumps starts, if the supply
temperature rises quickly whilst nothing
happens to the return temperature.
If this happens and the heat pump is
stopped by the hysteresis function to later
drop in temperature (supply) as quickly to
start again, but cannot due to time condi-
tions in regulation, this means that the heat
pump cannot transport the heat away from
the condenser as it should.
In such a case, hysteresis starts and stops
the heat pump often.
Adjust ROOM and CURVE if necessary,
ensure that there is sufficient flow over the
condenser and the heating circuit.
Problem – Connection of external AH
Cause Troubleshooting Remedy
Incorrectly connected auxiliary heater. Does
not start when the control computer gives
the signal.
Check the connection against the instruc-
tions/wiring diagram. Test the function in
manual mode.
If the auxiliary heater is incorrectly connect-
ed, reconnect according to the instructions.
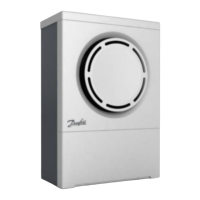
OUTDOOR UNIT
Problem – Noise/loud noise
Cause Troubleshooting Remedy
1. Positioning the outdoor unit. Determine whether the outdoor unit can be
moved to a more suitable location.
When positioning the outdoor unit, its
direction does not affect its performance.
The outdoor unit does not need to be posi-
tioned as close to the heat pump as neces-
sary, it can be positioned as far as 30 ”pipe
metres” way.
2. Connection/wall lead-ins. Check that the unit is installed according to
the instructions.
Is the outdoor unit secured to the wall?
Rigid mountings can generate noise from
the outdoor section via walls in the house.
Problem – Defrosting problems
Cause Troubleshooting Remedy
1. Location/calibration of the outdoor sen-
sor.
Check that the outdoor sensor is installed
according to the installation instructions
and that it is correctly calibrated.
Install according to the instructions and
calibrate, if necessary. Alternatively, the
outdoor sensor can be located behind the
outdoor unit 20 cm out from the rear side of
the outdoor unit.
2. Brine temperature in/out. Measurement check the temperatures with
a thermometer.
If necessary, calibrate BRINE IN and BRINE
OUT in the heat pump’s control computer.
3. The defroster shunt does not regulate as
it should.
Manually test to check if the defroster
shunt opens and closes the flow over the
defroster tank.
If the motor switches position when test-
ing, but defrosting still does not function,
remove the motor and try closing and
opening the valve by hand by pressing in
the control arm.
If the motor is defective, replace it.
If the insert jams, remove and clean/lubri-
cate it, or replace it.

 Loading...


