a. You can set the printer to forward all outgoing or incoming faxes to specified e-mail addresses. Refer to "Fax Forward to E-mail addresses".
Using an Answering Machine
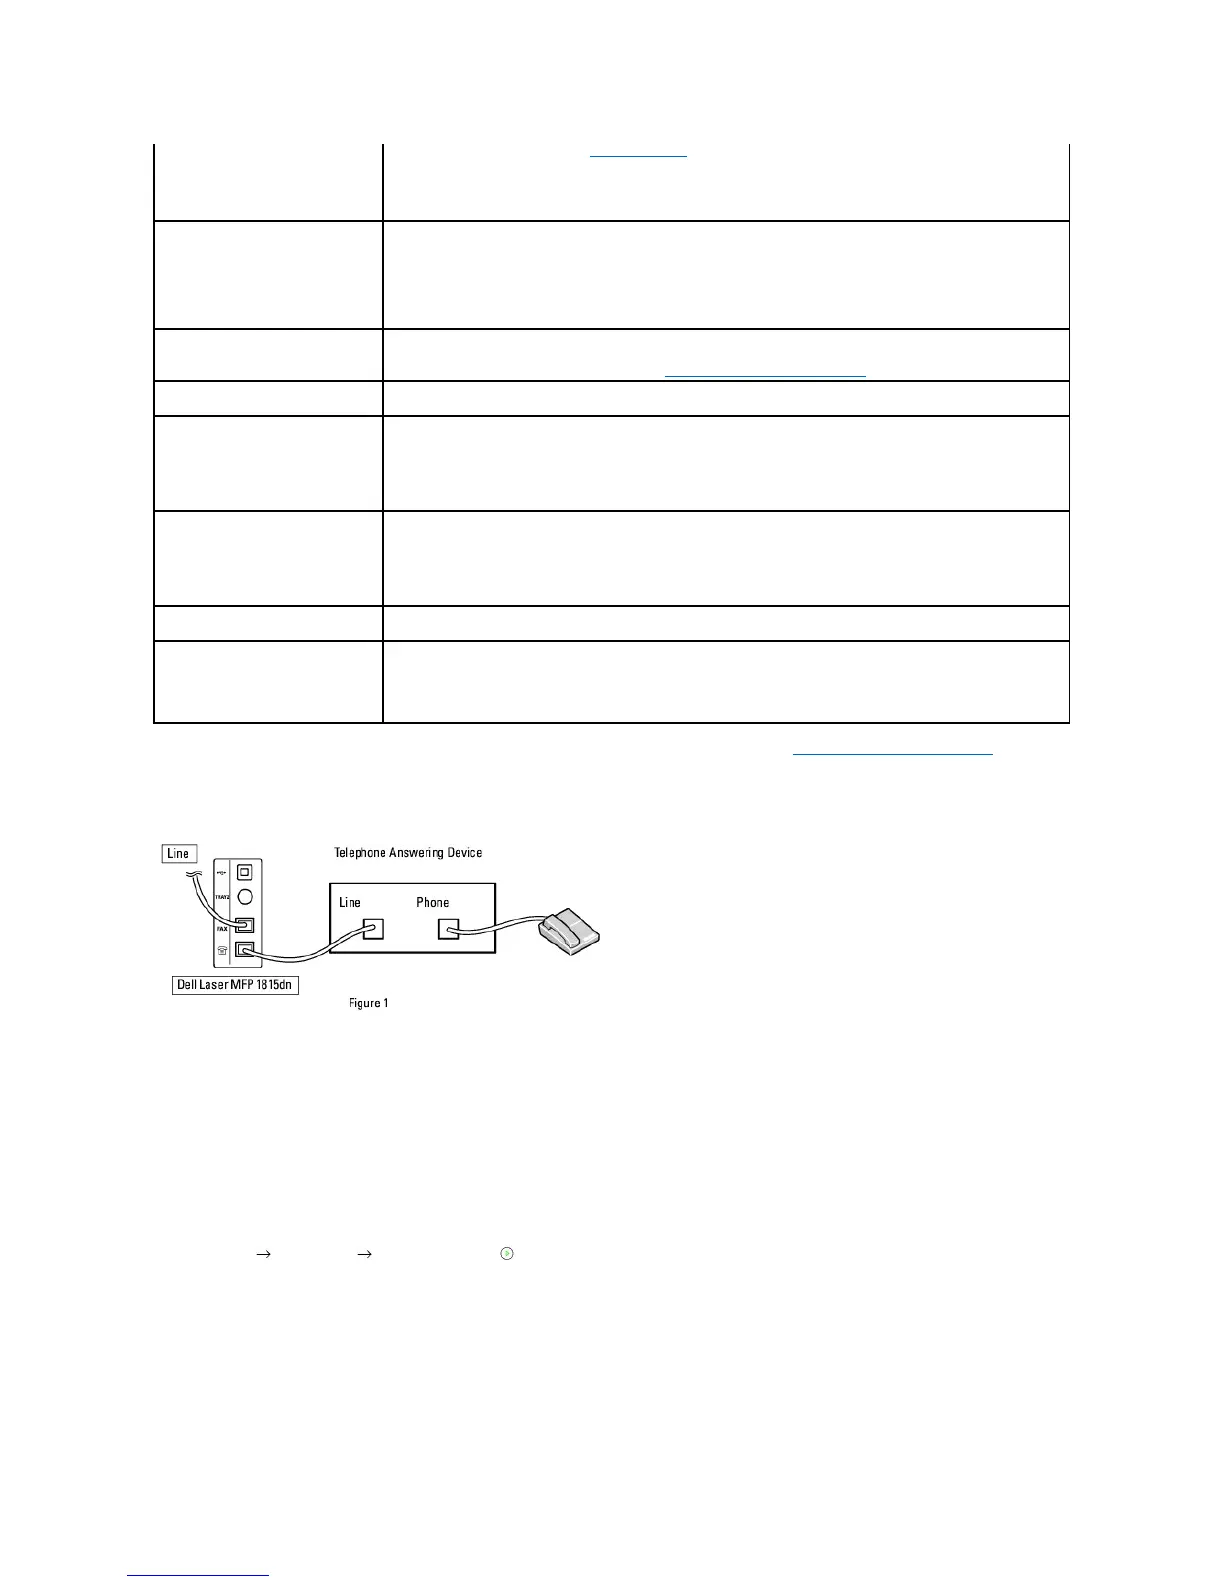
You can connect a telephone answering device (TAD) directly to the back of your printer as shown in Figure 1.
Set your printer to Ans/Fax mode and set the Rings to Answer to a digit greater than the Rings to Answer setting for the TAD.
l When the TAD picks up the call, the printer monitors and takes the line if a fax tone is received and starts receiving the fax.
l If the answering device is off, the printer automatically goes into Fax mode after a predefined number of rings.
l If you answer the call and hear fax tones, the printer may answer the fax call if you
access Fax On Hook Dial Yes and press Start ( ) and then hang up the receiver, or
press the remote receive code *9* and hang up the receiver.
Using a Computer Modem
about sending toll save faxes, see "Toll Save Mode".
Select Off to turn this feature off.
Select On to turn this feature on. You can set the start time and date; and the end time and date for toll save mode.
Using the Junk Fax Setup feature, the system may not accept faxes sent from remote stations. Their numbers are
stored in memory as junk fax numbers. This feature is useful for blocking any unwanted faxes.
Select Off to turn the feature off. Anybody can send you a fax.
Select On to turn the feature on. You can set up to 10 fax numbers as junk fax numbers. After storing the numbers,
you do not receive any faxes from the registered stations.
You can keep your received faxes from being accessed by unauthorized people.
For further details about setting this mode, see "Using the Secure Receiving Mode".
You can set a prefix dial number of up to five digits. This number dials before any auto dial number is started. It is
useful for accessing the PABX exchange.
This option enables the printer to automatically print the page number, and the date and time of the reception at the
bottom of each page of a received document.
Select Off to turn this feature off.
Select On to turn this feature on.
The Error Correction Mode helps with poor line quality and ensures that faxes are sent smoothly to any other ECM-
equipped fax machine. If the line quality is poor, it takes more time to send a fax when you are using the ECM mode.
Select Off to turn this feature off.
Select On to turn this feature on.
Select the maximum modem speed you want if the phone line fails to sustain a higher modem speed. You can select
33.6, 28.8, 14.4, 12.0, 9.6, or 4.8 kbps.
You can set your printer not to receive incoming faxes.
Select Off to turn this feature off.
Select On to turn this feature on.