Static Addressing
To enter the TCP/IP address from your printer's operator panel, take the following steps:
1. Press Scroll ( or ) to highlight Menu and press Select ( ).
2. Press Scroll ( or ) to highlight Network CFG and press Select ( ).
3. Press Scroll ( or ) to highlight Configuration and press Select ( ).
4. Press Scroll ( or ) to highlight TCP/IP and press Select ( ).
The first available menu item, Manual, appears and press Select ( ).
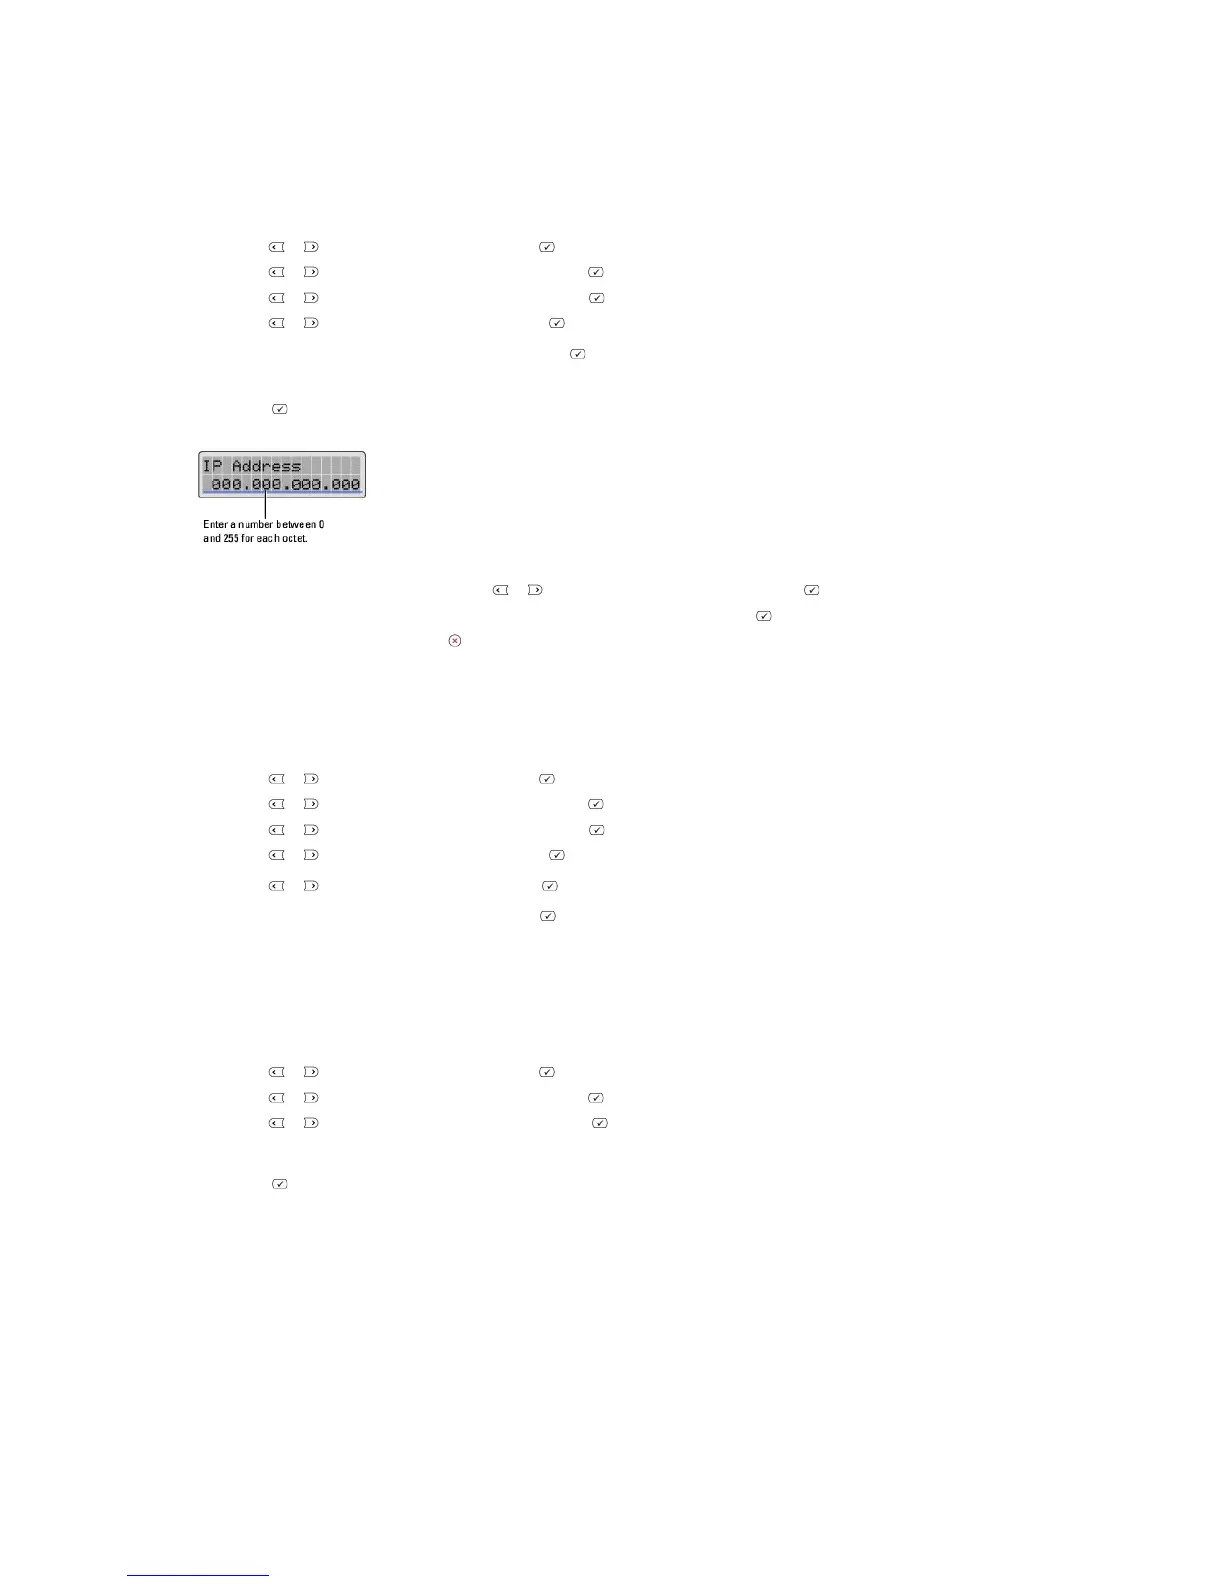
5. The first available menu item, IP Address displays.
6. Press Select ( ) to access the IP Address menu.
7. Enter the numbers from the keypad and use Scroll ( or ) to move between octets and press Select ( ).
8. Enter other parameters, such as the Subnet Mask, GateWay or Primary DNS, and press Select ( ).
9. After entering all parameters, press Cancel ( ) to return to Standby mode.
Dynamic Addressing (BOOTP/DHCP)
To assign the TCP/IP address automatically using a DHCP or BOOTP server on your network.
1. Press Scroll ( or ) to highlight Menu and press Select ( ).
2. Press Scroll ( or ) to highlight Network CFG and press Select ( ).
3. Press Scroll ( or ) to highlight Configuration and press Select ( ).
4. Press Scroll ( or ) to highlight TCP/IP and press Select ( ).
5. Press Scroll ( or ) to highlight DHCP and press Select ( ).
To assign the address from the BOOTP server, press Select ( ) when BOOTP displays.
Restoring the Network Configuration
You can return the network configuration to its default settings.
1. Press Scroll ( or ) to highlight Menu and press Select ( ).
2. Press Scroll ( or ) to highlight Network CFG and press Select ( ).
3. Press Scroll ( or ) to highlight Clear Settings and press Select ( ).
The first available menu item, Yes displays on the bottom line.
4. Press Select ( ) to restore the network configuration.
5. Power the printer off and back on or reset the network interface card.