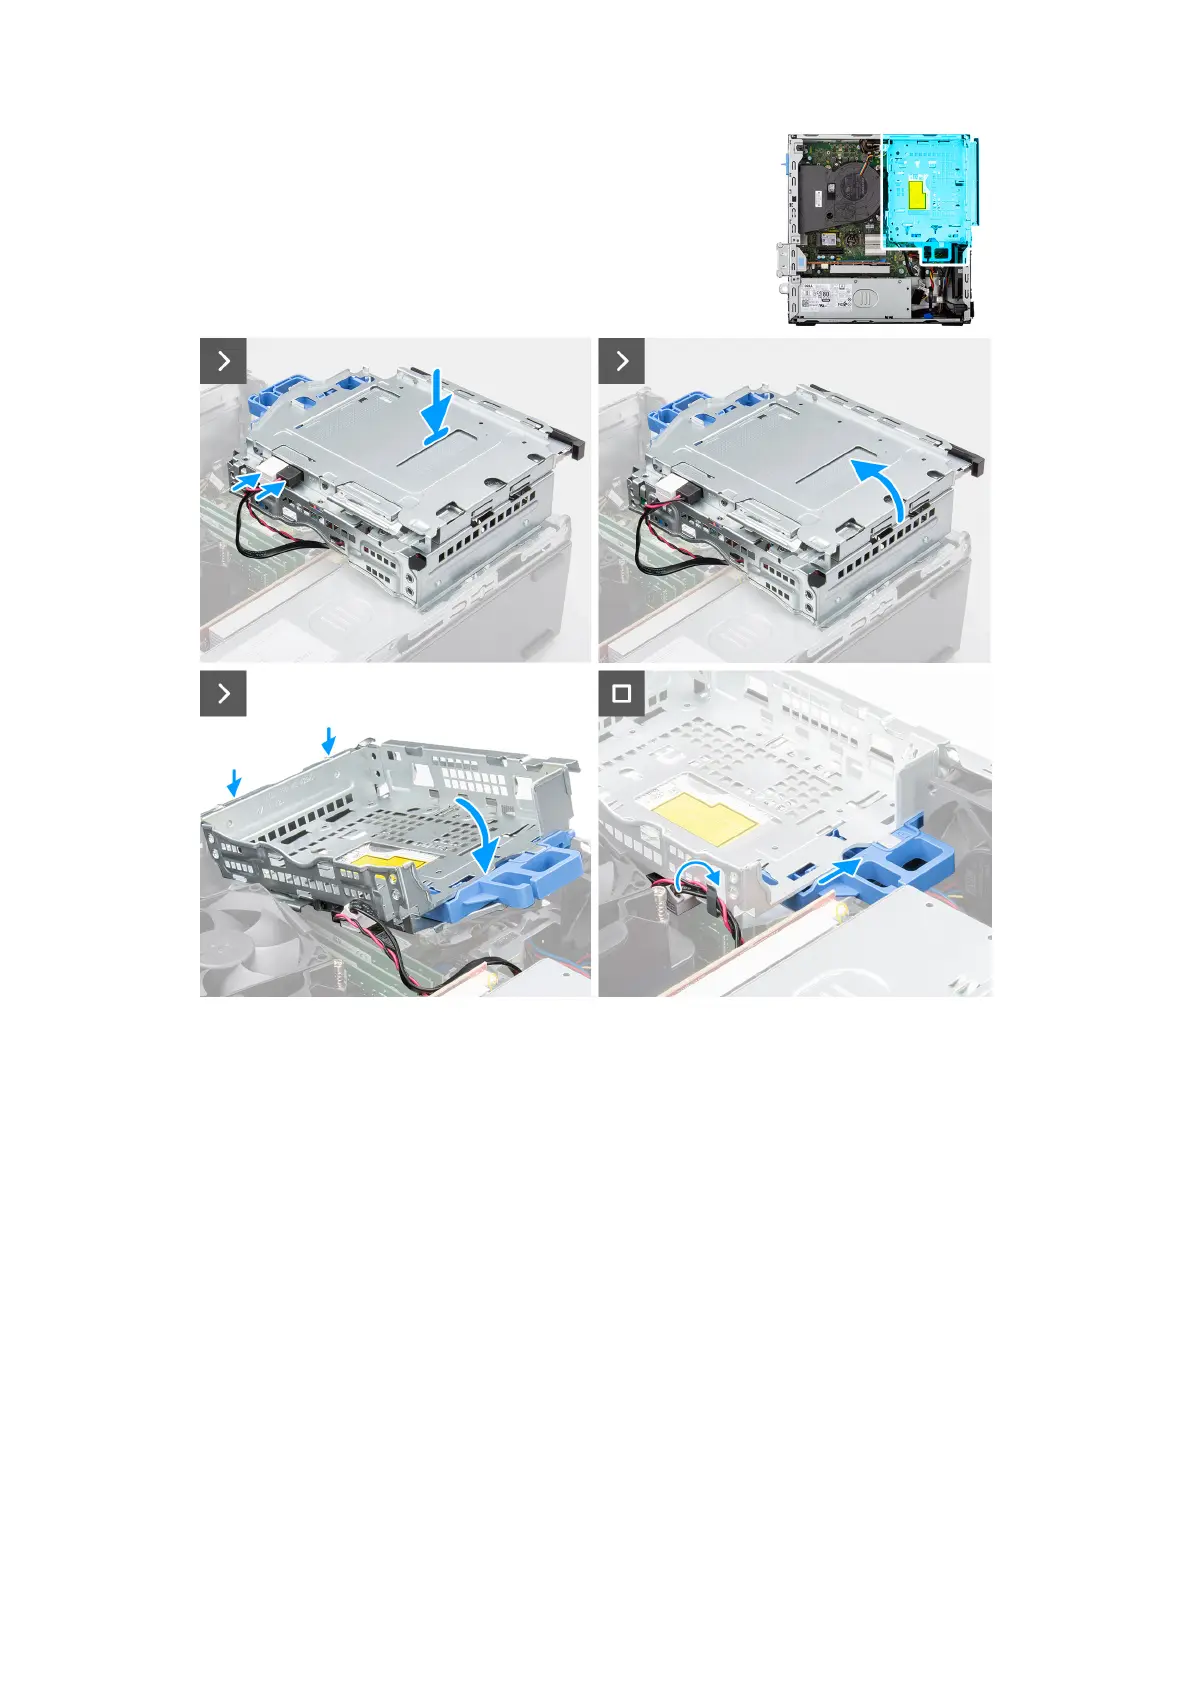
Figure 12. Installing the disk-drive cage
Steps
1. Place the disk-drive cage upside down on the chassis.
2. If the optical drive is installed, connect the data and power cable to the connectors on the optical drive.
3. Rotate the disk-drive cage upside down.
4. Slide the disk-drive cage at a certain angle into its slot on the chassis and align the mounting points on the disk-drive cage
with the slots on the chassis.
5. Rotate the disk-drive cage downwards until it sits in the slot in the chassis.
6. Move the lock handle to lock the disk-drive cage in place.
7. If the optical drive is installed, route the power and data cables through the routing guide on the disk-drive cage.
Next steps
1. Install the 3.5-inch hard drive, if applicable.
2. Install the front bezel.
3. Install the side cover.
4. Follow the procedure in After working inside your computer.
50
Removing and installing Customer Replaceable Units (CRUs)