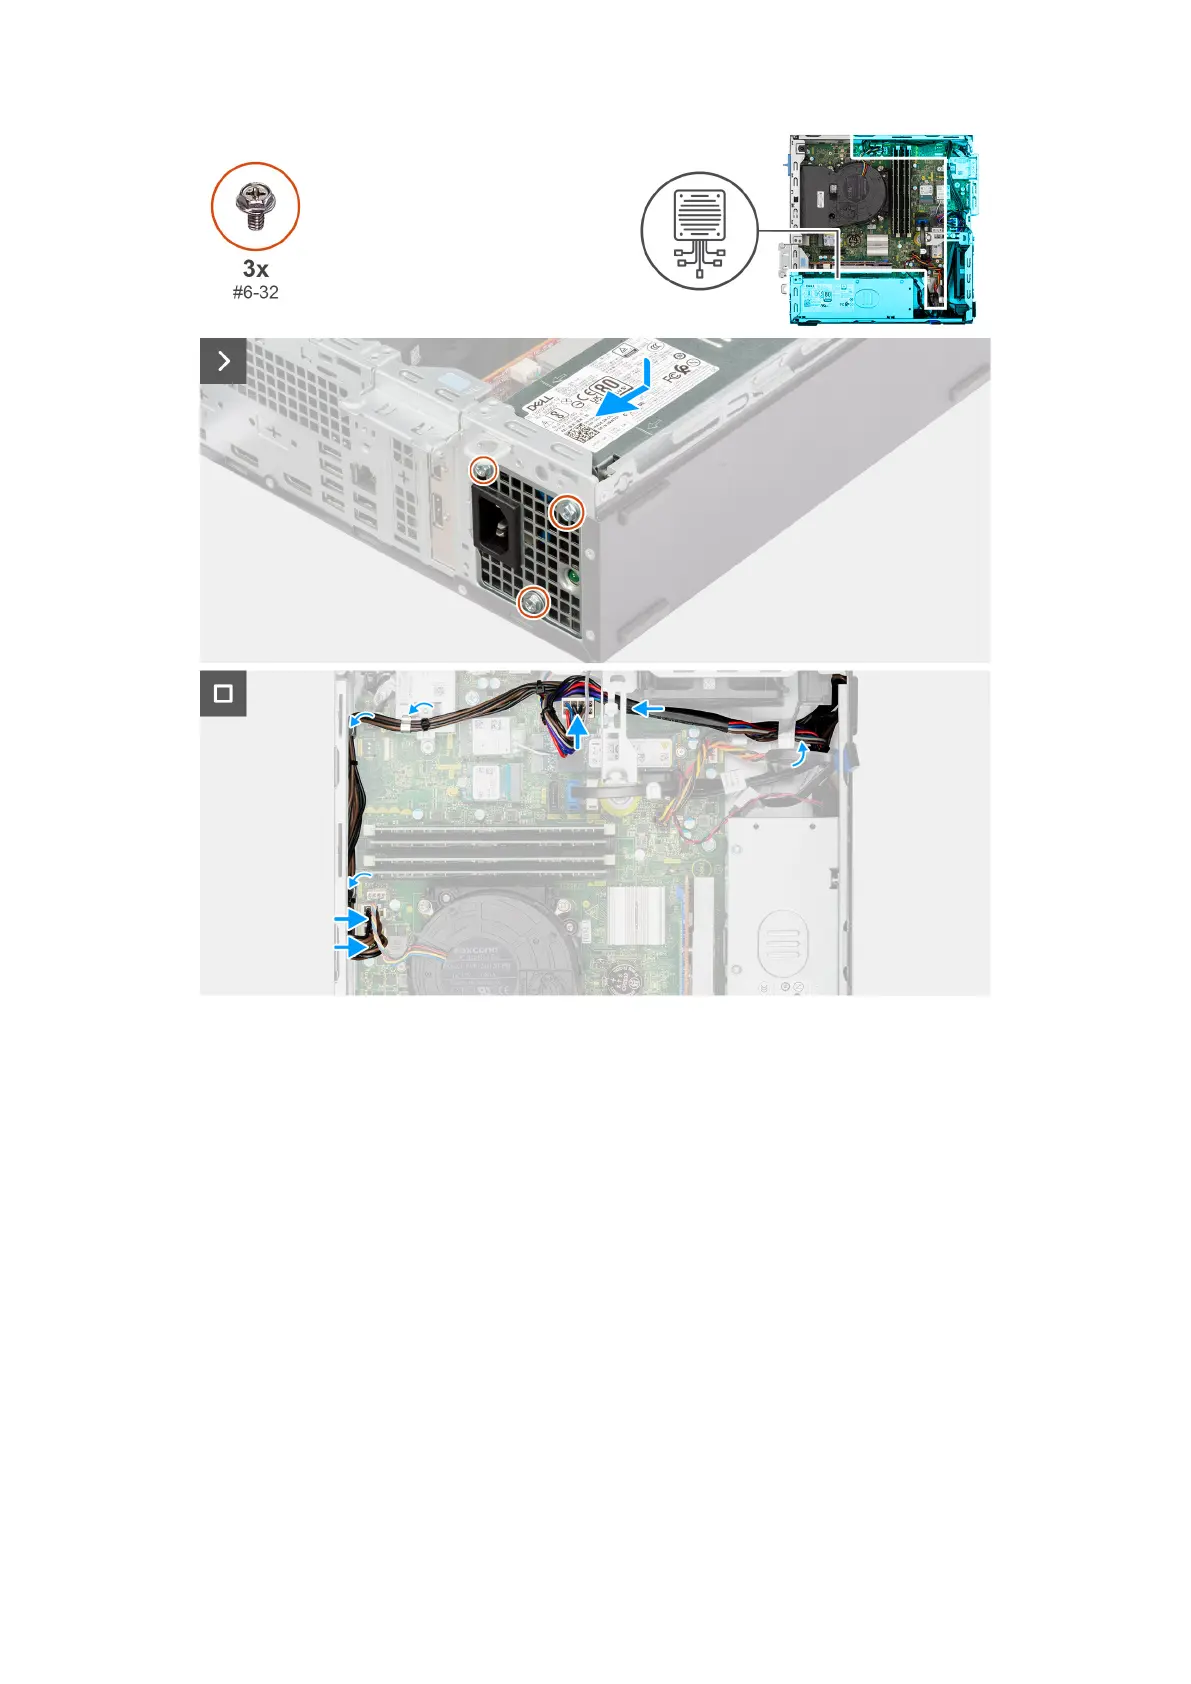
Figure 49. Installing the power-supply unit
Steps
1. Place the power-supply unit on the chassis and slide it towards the back of the chassis.
2. Replace the three screws (#6-32) that secure the power-supply unit to the chassis.
3. Route the power-supply cables through their routing guides on the chassis.
4. Connect the power-supply cables to their connectors (ATX CPU1, ATX CPU2 and ATX SYS) on the system board.
Next steps
1. Install the disk-drive cage.
2. Install the 3.5-inch hard drive, if applicable.
3. Install the front bezel.
4. Install the side cover.
5. Follow the procedure in After working inside your computer.
92
Removing and installing Field Replaceable Units (FRUs)