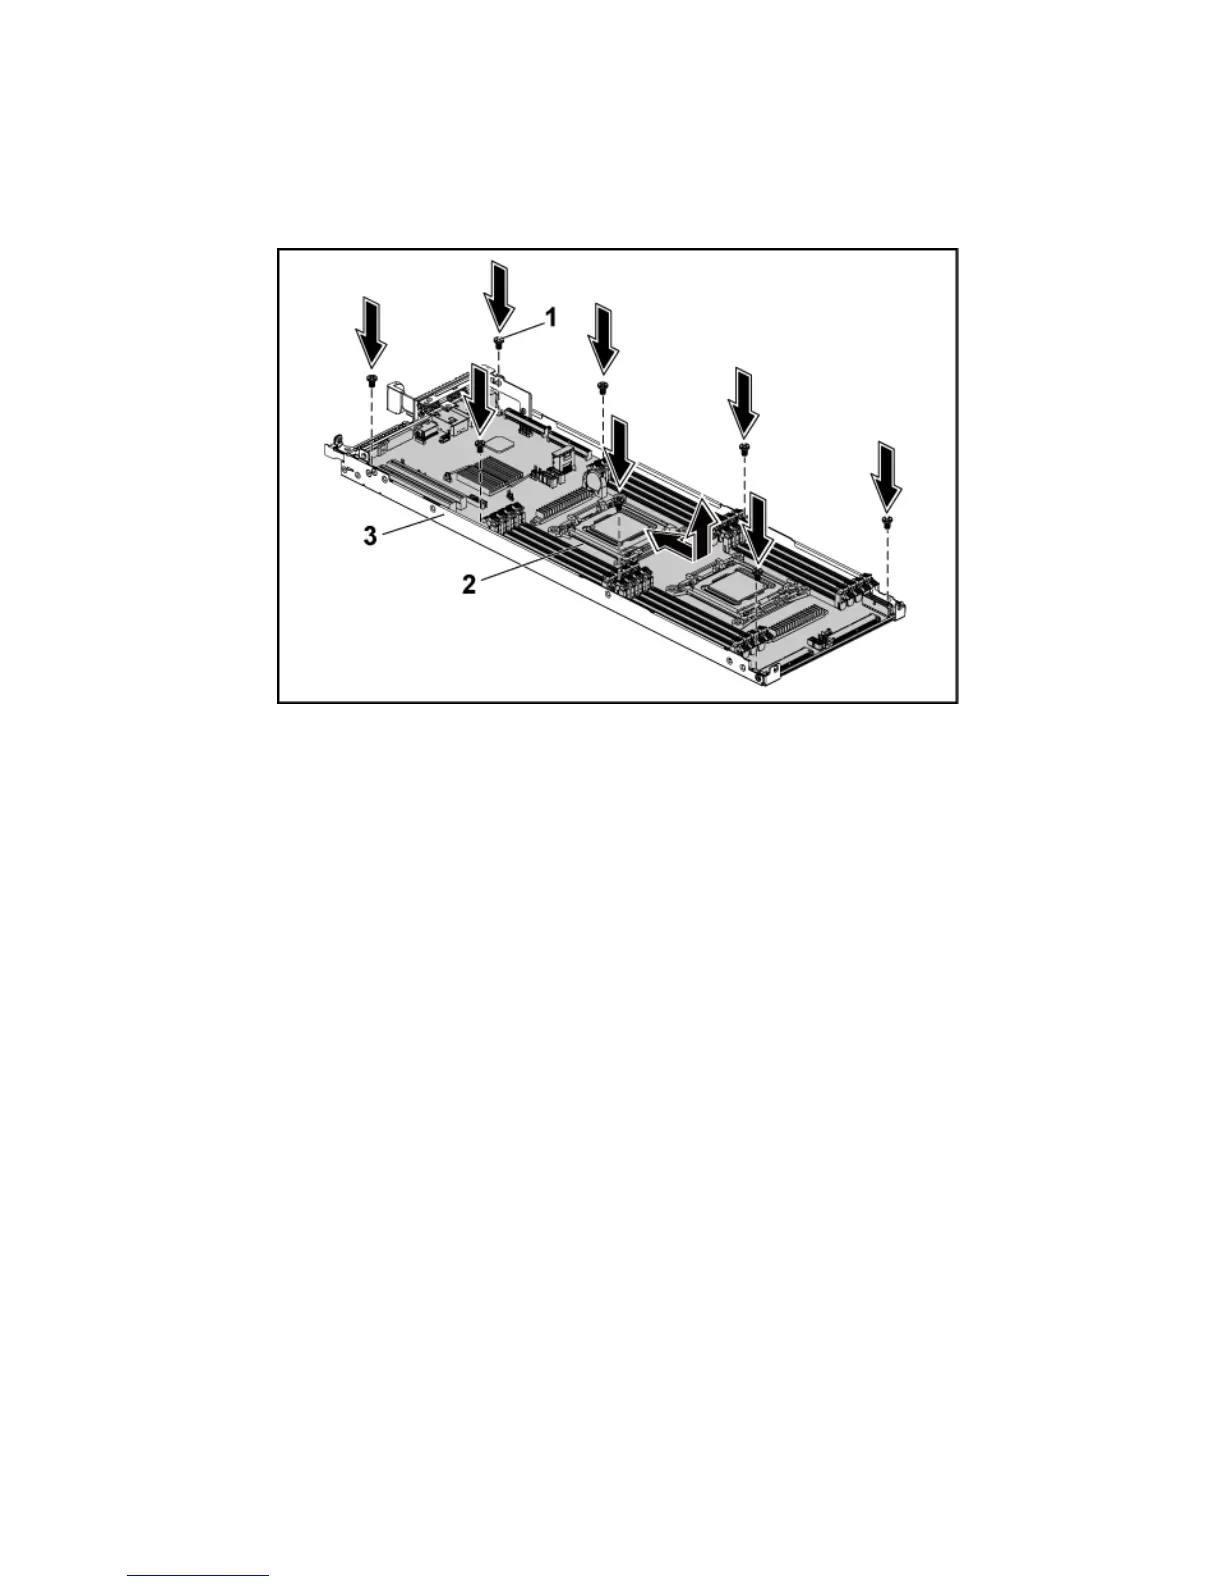
Installing a System Board
1 Unpack the new system board.
2 Holding the system board by the edges, slide the system board into the
system-board assembly.
3 Replace the eight screws to secure the system board to the system-
board assembly.
4 Transfer the processors to the new system board. See “Removing a
Processor” on page 147 and “Installing a Processor” on page 149.
5 Remove the memory modules and transfer them to the same locations
on the new board. See “Removing the Memory Modules” on page 210
and “Installing the Memory Modules” on page 212.
6 Replace the heat sinks. See “Installing the Heat Sink” on page 146.
7 Install the expansion-card assembly. See “Installing the Expansion
Card” on page 157.
 Loading...


