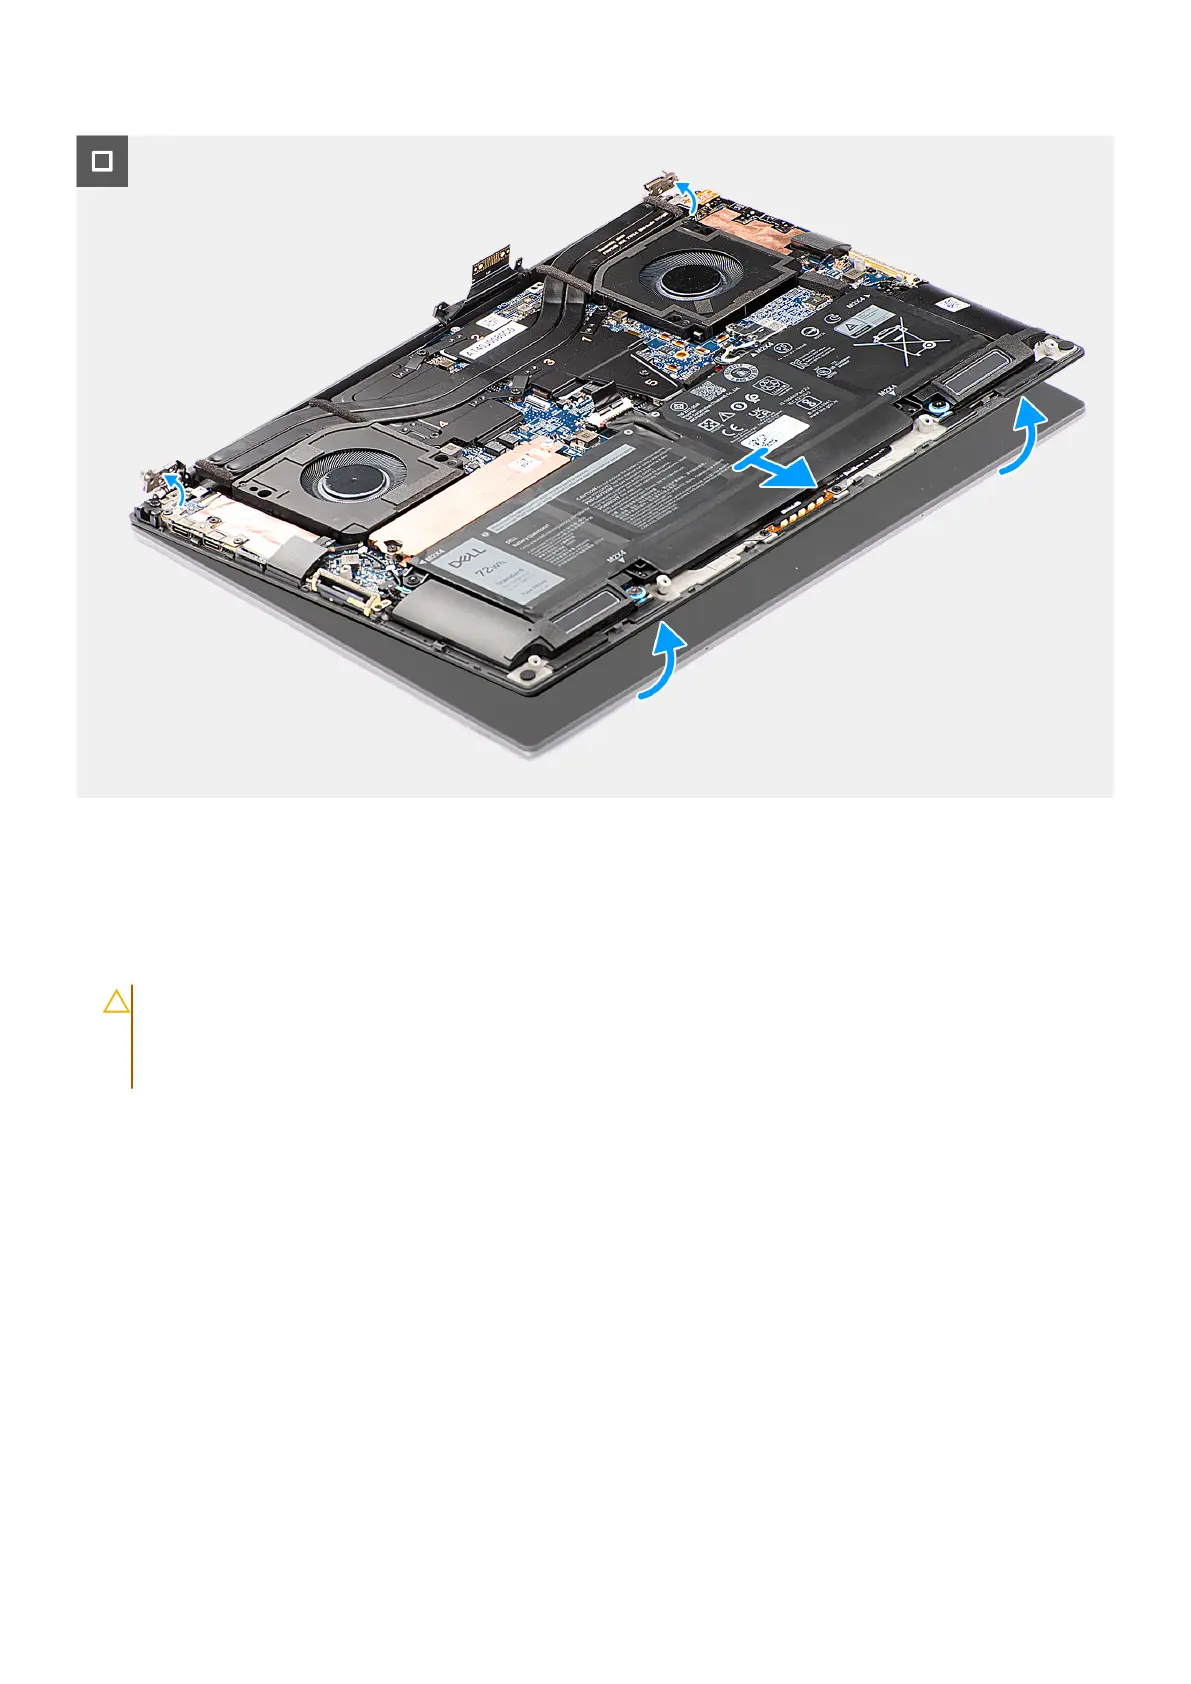
Figure 55. Removing the display assembly
Steps
1. Remove the two Torx screws (T5, M1.4x4) that secure the display FPC holder to the system board.
2. Remove the two Torx screws (T5, M1.4x4) that secure the display FPC to the system board.
3. Disconnect the display FPC from the system board and remove the interposer board.
CAUTION:
The pins on the interposer board are fragile. Do not push or apply pressure to the pins on the
interposer board or perform any action that may scratch the pins, such as rotating or turning the board while
they are in contact with any surface. When handling the interposer board, lift and hold the board from the
edges or the sides.
Removing and installing Field Replaceable Units (FRUs) 75