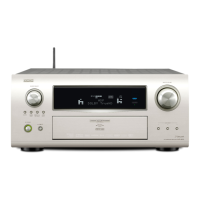
Getting Started Connections Settings Playback Remote ControlMulti-zone Information Troubleshooting SpecificationsGetting Started
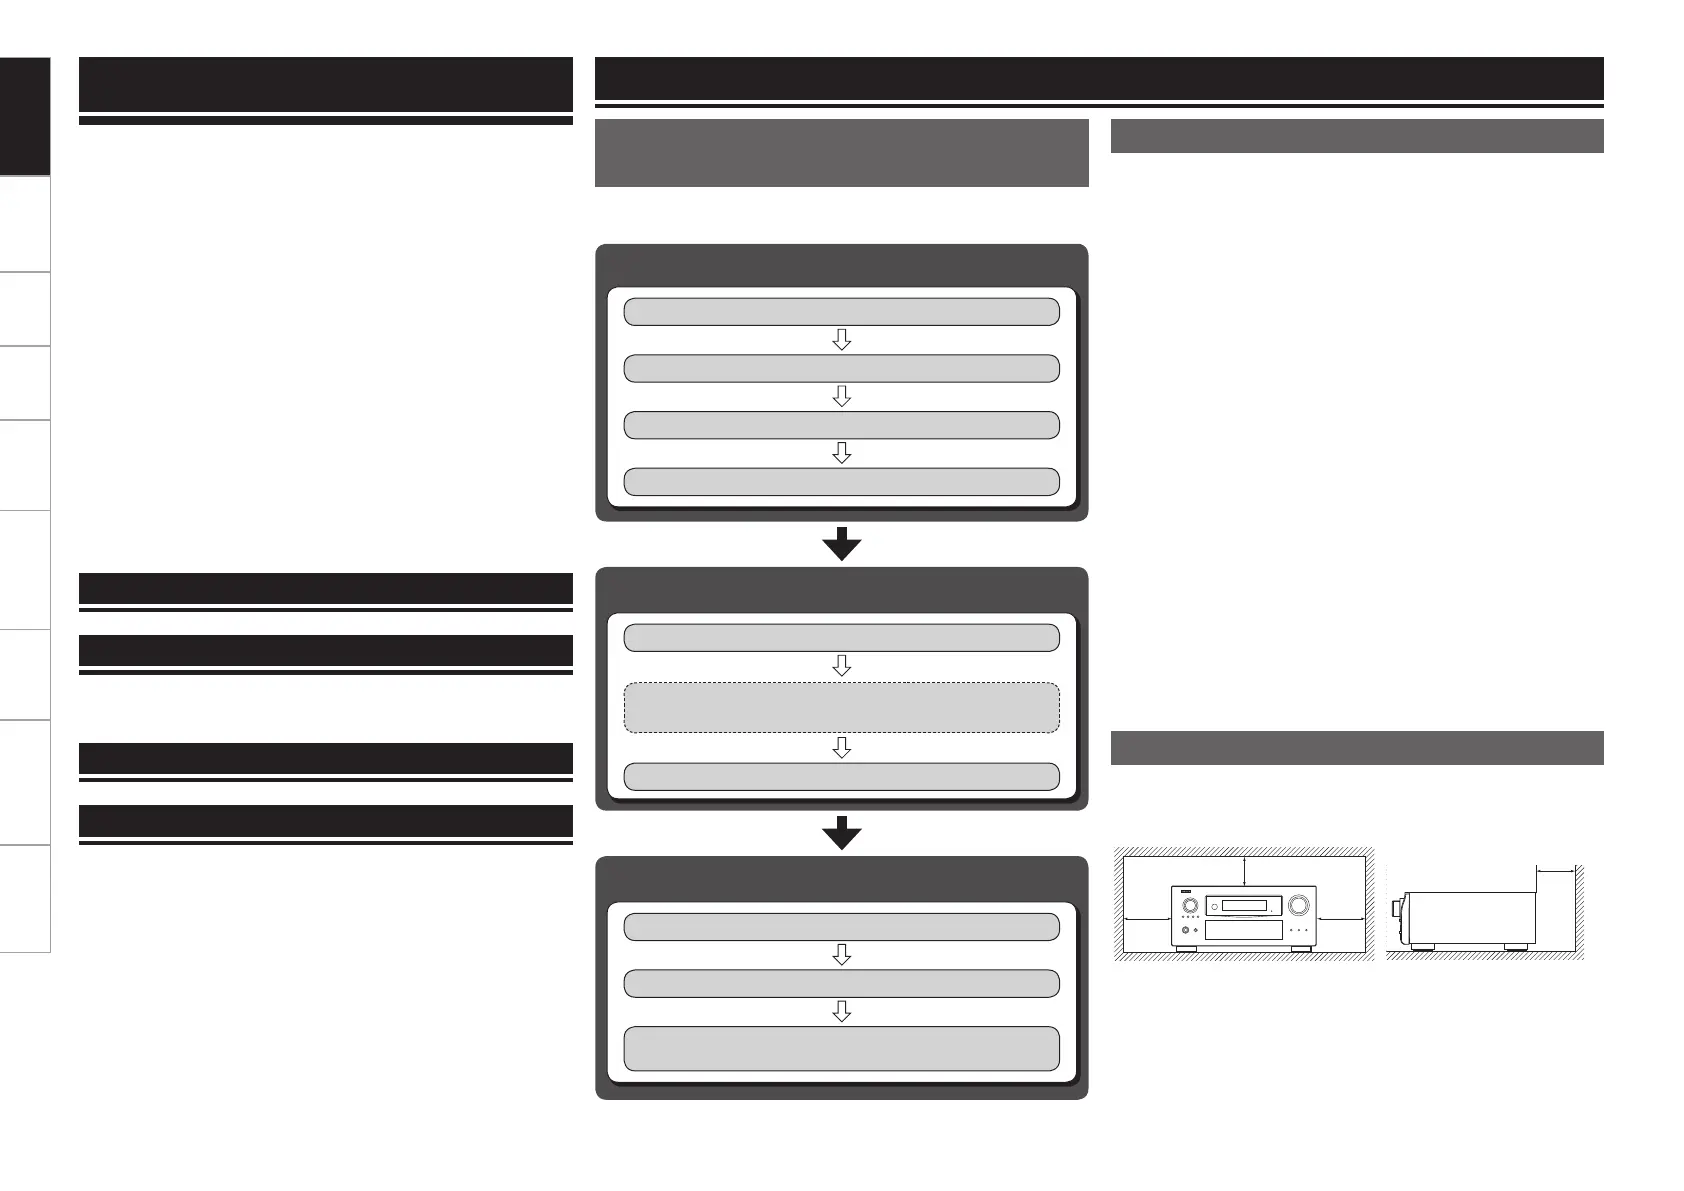
Perform the operations leading to playback on the AVR-4810CI in the
order shown below.
Audyssey™ Auto Setup (vpage 32)
Connections
Installing/Setting the Speakers
(vpage 11)
Speaker Connections (vpage 14)
Connecting Devices (vpage 17)
Turning the Power On (vpage 28)
Settings
Manual Setup (vpage 39)
Perform “Manual Setup” as necessary.b
Source Select (vpage 57)
Playback
Playing Components (vpage 66)
Selecting the Surround Mode (vpage 87)
Adjusting the Sound and Picture Quality
(vpage 90)
Flow of Operations Through
Playback
Cautions on Handling
• Before turning the power switch on
Check once again that all connections are correct and that there are
no problems with the connection cables.
•
Power is supplied to some of the circuitry even when the unit is
set to the standby mode. When traveling or leaving home for long
periods of time, be sure to unplug the power cord from the power
outlet.
• About condensation
If there is a major difference in temperature between the inside of
the unit and the surroundings, condensation (dew) may form on
the operating parts inside the unit, causing the unit not to operate
properly.
If this happens, let the unit sit for an hour or two with the power
turned off and wait until there is little difference in temperature
before using the unit.
• Cautions on using mobile phones
Using a mobile phone near this unit may result in noise. If so, move
the mobile phone away from this unit when it is in use.
• Moving the unit
Turn off the power and unplug the power cord from the power
outlet.
Next, disconnect the connection cables to other system units before
moving the unit.
•
Note that the illustrations in these instructions may differ from the
actual unit for explanation purposes.
Cautions on Installation
Note:
For proper heat dispersal, do not install this unit in a confined
space, such as a bookcase or similar enclosure.
b
b Note
b b
Getting Started
List of preset codes ··································End of this manual
Wall
Operating the Connected Devices by Remote
Control Unit··········································································108
Operating the Main Remote Control Unit ······························ 108
Operating AV Equipment ·························································· 108
Presetting ·················································································· 109
Operating Preset Components ················································· 109
Setting the Remote ID ······························································ 112
Learning Function ····································································· 113
MACRO Function ······································································ 114
Punch Through Function ···························································· 114
Setting the Time the Backlight Stays Lit ··································· 115
Adjusting the Backlight’s Brightness ········································· 115
Specifying the Zone Used with the Main Remote Control Unit
·································································································· 115
Resetting the Main Remote Control Unit ································· 116
Operating the Sub Remote Control Unit ································117
Switching Zones ······································································· 119
Switching the Multi-zone Input Source to the Same
Input Source as Used in the MAIN ZONE ································ 119
Setting the Zone for Which the Sub Remote Control Unit is
Used (ZONE SELECT LOCK Mode) ·········································· 119
Setting the Remote ID ······························································ 119
Resetting the Settings ······························································ 119
Other Information ·····························································120
Troubleshooting·································································130
Restoring All the Settings to as They were at the Time of
Purchase (Resetting the Microprocessor) ······························· 134
Specifications ······································································135
Getting Started
 Loading...