Getting Started Connections Settings Playback Remote ControlMulti-zone Information Troubleshooting SpecificationsGetting Started
In addition to the AVR-4810CI, the included main remote control unit
(RC-1126) can also be used to operate the equipment listed below.
q DENON system components
w Non-DENON system components
To operate component products other than DENON, you must set
the preset code (vpage 109 “Presetting”).
If you are using a non-DENON AV device, or if you cannot operate
the device even after registering the preset code, memorize the
other device’s remote control signal in the AVR-4810CI remote
control unit (vpage 113 “Learning Function”).
•
•
LR6/AA
R03/AAA
(RC-1126) (RC-1121)
w Load the two batteries properly as indicated by the marks in the
battery compartment.
(RC-1126) (RC-1121)
e Put the rear cover back on.
About the Remote Control Unit
Inserting the Batteries
q Lift the clasp and remove the rear lid.
NOTE
Insert the specified batteries in the remote control unit.
Replace the batteries with new ones if the set does not operate
even when the remote control unit is operated close to the unit. (The
supplied batteries are only for verifying operation.)
When inserting the batteries, be sure to do so in the proper direction,
following the “q” and “w” marks in the battery compartment.
To prevent damage or leakage of battery fluid:
Do not use a new battery together with an old one.
Do not use two different types of batteries.
Do not attempt to charge dry batteries.
Do not short-circuit, disassemble, heat or dispose of batteries in
flames.
If the battery fluid should leak, carefully wipe the fluid off the inside
of the battery compartment and insert new batteries.
Remove the batteries from the remote control unit if it will not be in
use for long periods.
Used batteries should be disposed of in accordance with the local
regulations regarding battery disposal.
•
•
•
•
•
•
•
•
•
•
•
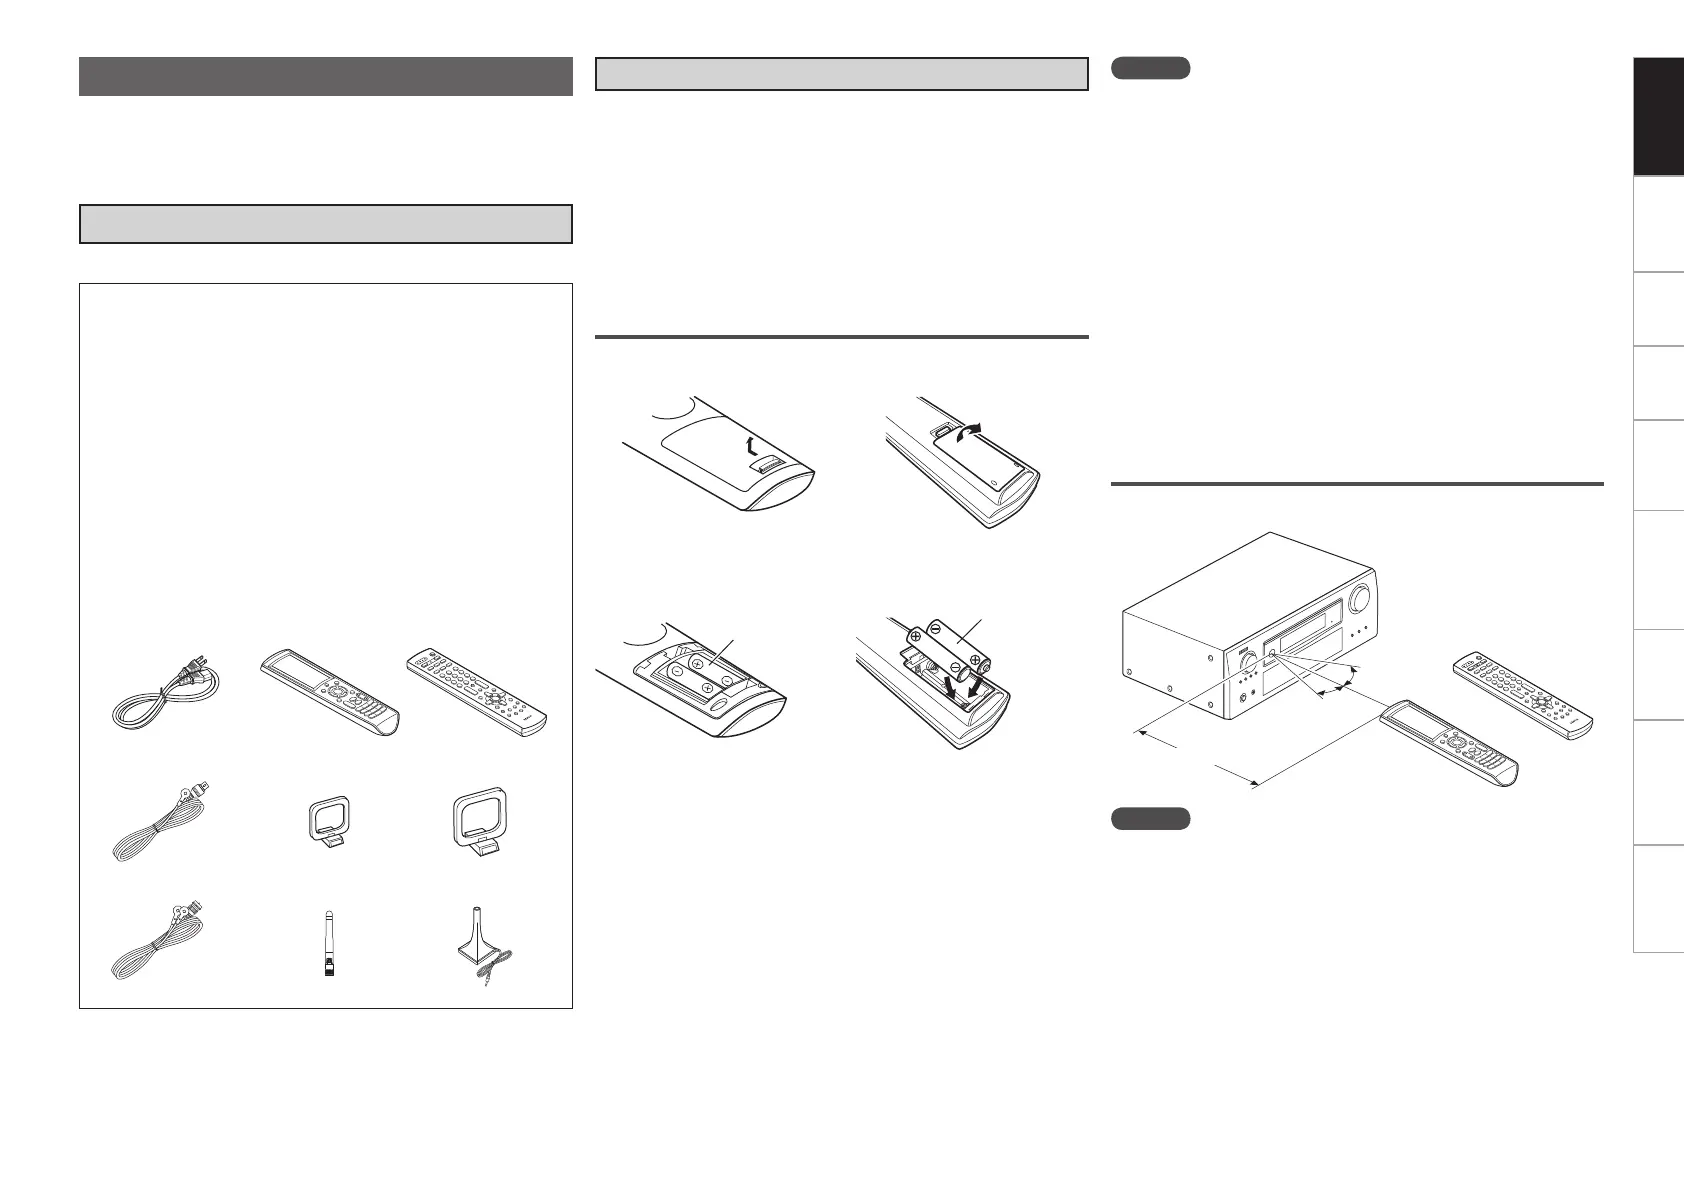
30°
30°
Approx. 23 feet / 7 m
or
(RC-1126)
(RC-1121)
NOTE
The set may function improperly or the remote control unit may not
operate if the remote control sensor is exposed to direct sunlight,
strong artificial light from an inverter type fluorescent lamp or infrared
light.
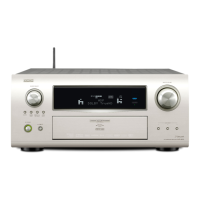
Preparations
q Owner’s manual ...................................................................... 1
w Getting started ........................................................................ 1
e Warranty (for North America model only) ................................ 1
r Service station list ................................................................... 1
t Power cord (Cord length: Approx. 6.2 ft / 1.9 m) .................... 1
y Main remote control unit (RC-1126) ......................................... 1
u LR6/AA batteries (for RC-1126) ................................................ 2
i Sub remote control unit (RC-1121) .......................................... 1
o R03/AAA batteries (for RC-1121) ............................................. 2
Q0 FM indoor antenna .................................................................. 1
Q1 AM loop antenna (small, for AM broadcasts) .......................... 1
Q2 AM loop antenna (large, for HD Radio broadcasts) ................. 1
Q3 Dipole antenna (for HD Radio broadcasts) .............................. 1
Q4 Rod antenna for wireless LAN connection .............................. 1
Q5 Setup microphone
(DM-A409, Cord length: Approx. 25 ft / 7.6 m) ....................... 1
Accessories
Check that the following parts are supplied with the product.
Thank you for purchasing this DENON product. To ensure proper
operation, please read this owner’s manual carefully before using the
product.
After reading them, be sure to keep them for future reference.
Operating Range of the Remote Control Unit
Point the remote control unit at the remote sensor when operating it.
Getting Started
 Loading...