DigiPoS PowerPoS & Millennium Technical Manual
Onboard Diagnostics for the Millennium & Power PoS
Diagnostic Overview
The PowerPoS and the Millennium have built onto the motherboard an area of memory
specifically for diagnostic purposes. This memory area and the program stored in it have
been designed so that system tests can be run without interfering in any way with the
operating system or user applications. The diagnostic tests are designed to cope with the
majority of configurations. To access the diagnostics utility and run the tests it is
necessary to follow the procedure laid out below.
Diagnostic Procedure
1. Close down any applications that are running within your operating system and
double click the DigiPoS Diagnostics Icon. The program will shut down software
that is running and then re-starts the system automatically.
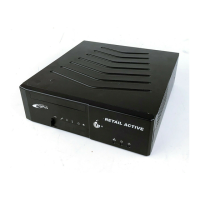
2. When the DigiPoS restarts, the orange diagnostic LED, the LED at the left hand
end of the group of four small LED’s below the power switch, should illuminate
to indicate that the DigiPoS is in diagnostic mode.
3. After the initial BIOS screens have cleared a splash screen should be displayed,
this will clear after a second or two.
4. The main diagnostic screen will now appear and the system will start searching
for connected serial devices. When the search has finished a menu will appear
below the logo and show the serial devices found, as per the diagram below.
Check that the devices found match the devices attached and that the serial
parameters match those defined for the peripherals.
5. Exercise each of the test procedures as described in the following sections.
6. After each test has been completed exit the diagnostic program using the
appropriate menu selection and the DigiPoS will automatically re-boot back into
your operating system.
7. The results of the diagnostic tests can be found in a file called “DIAGRSLT.TXT”
stored in a drive called “Diagnostics” which can be accessed by explorer or my
computer.
An Example of a Diagnostic Test Screen
Page 38 of 38