C1C +,(7/ '%%'/&"( + !"(7&=*.'/&"(7!
!
!
!
Proper installation of your projector will ensure the quality of your display. Whether you are installing a projector tempo-
rarily or permanently, you should take the following into account to ensure your projector performs optimally.
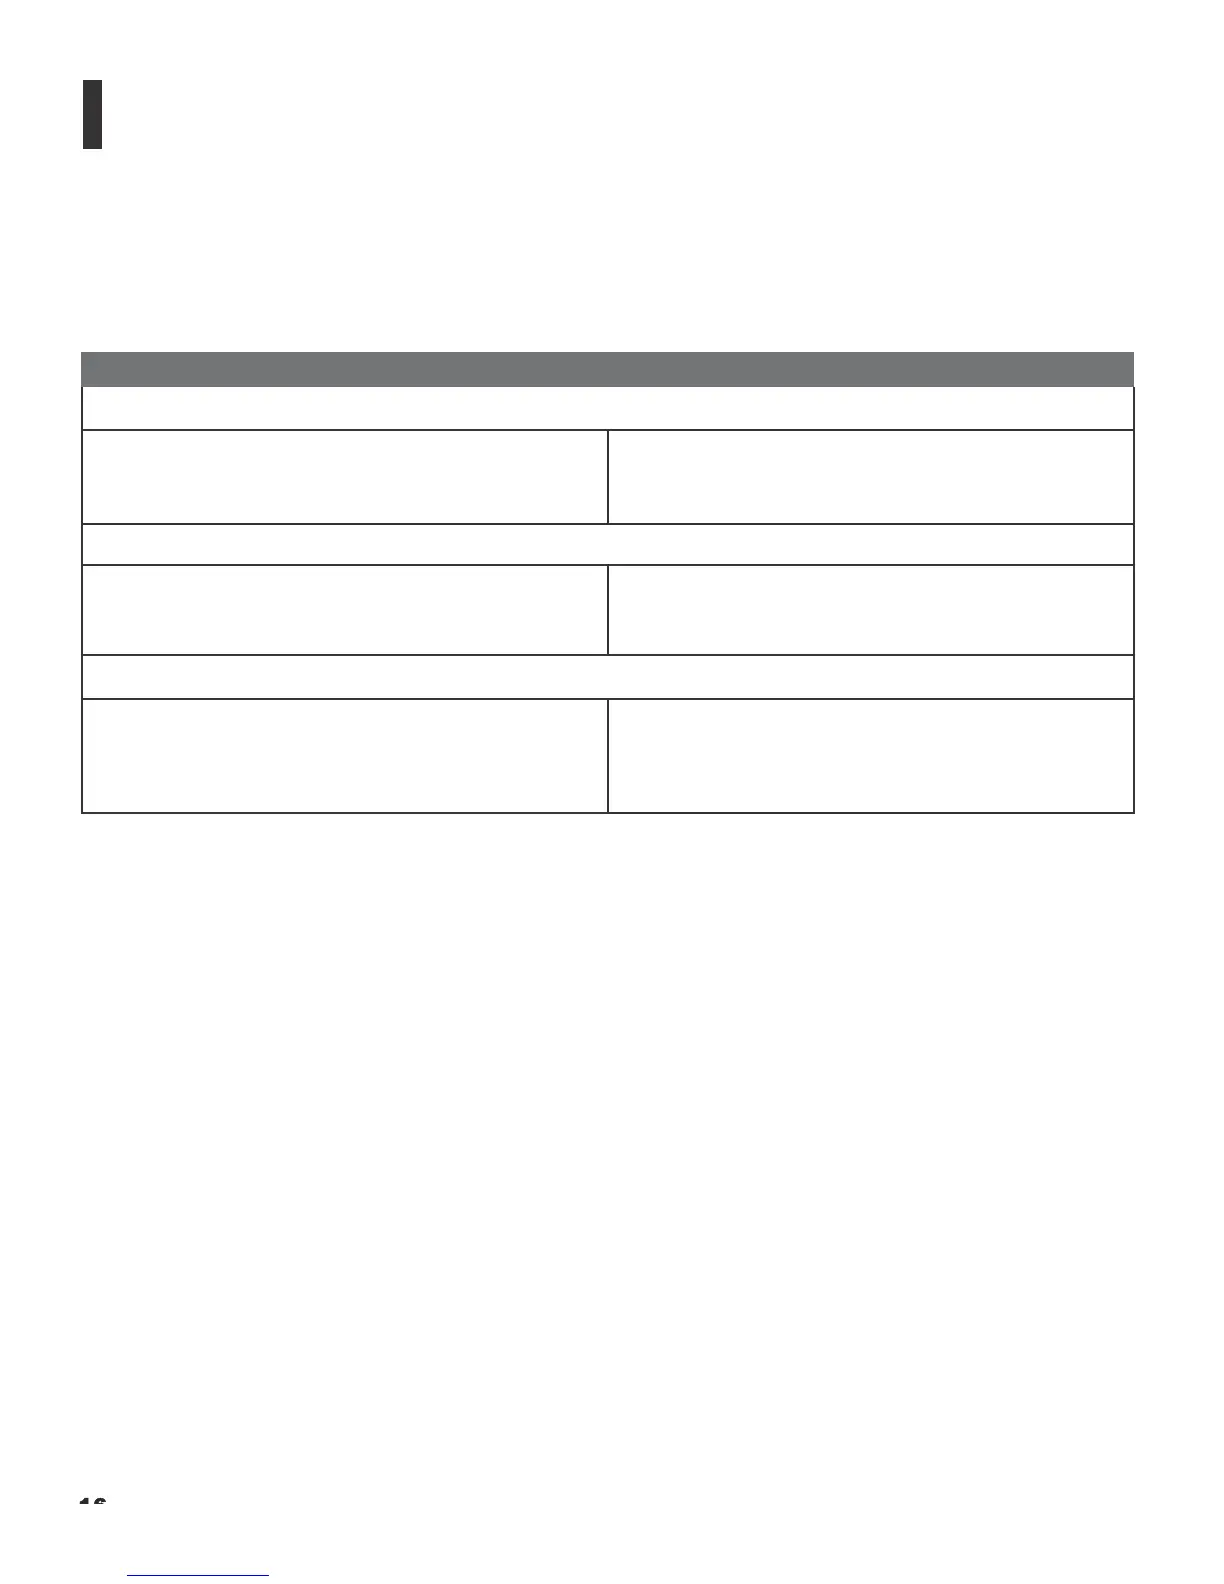
Installation Type
Choose the installation type that best suits your needs: front or rear screen, floor mount or inverted mount. Table 3-2
compares these various installation methods.
Advanta ges Considerations
Front Screen, Floor Mount Installation
• Easy to set up
• Can be moved or changed quickly
• Easy to access
• Shares floor space with audience
Rear Screen, Floor Mount Installation
• Projector is completely hidden
• Projector is easily accessed
• Usually good ambient light rejection
• Requires separate room
• Installation cost is usually higher
Rear Screen, Floor Mount with Mirror
• Projector is completely hidden
• Usually good ambient light rejection
• Requires less space behind screen than other rear
screen installations
• Requires separate room
• Installation cost is usually higher
Ambient Light
Table 3-2: Projector Installation Options
In general, minimize or eliminate light sources directed at the screen. Contrast ratio in your images will be noticeably
reduced if light directly strikes the screen, such as when a shaft of light from a window or floodlight falls on the image.
Images may then appear washed out and less vibrant.