Operation Manual: Evolution Series
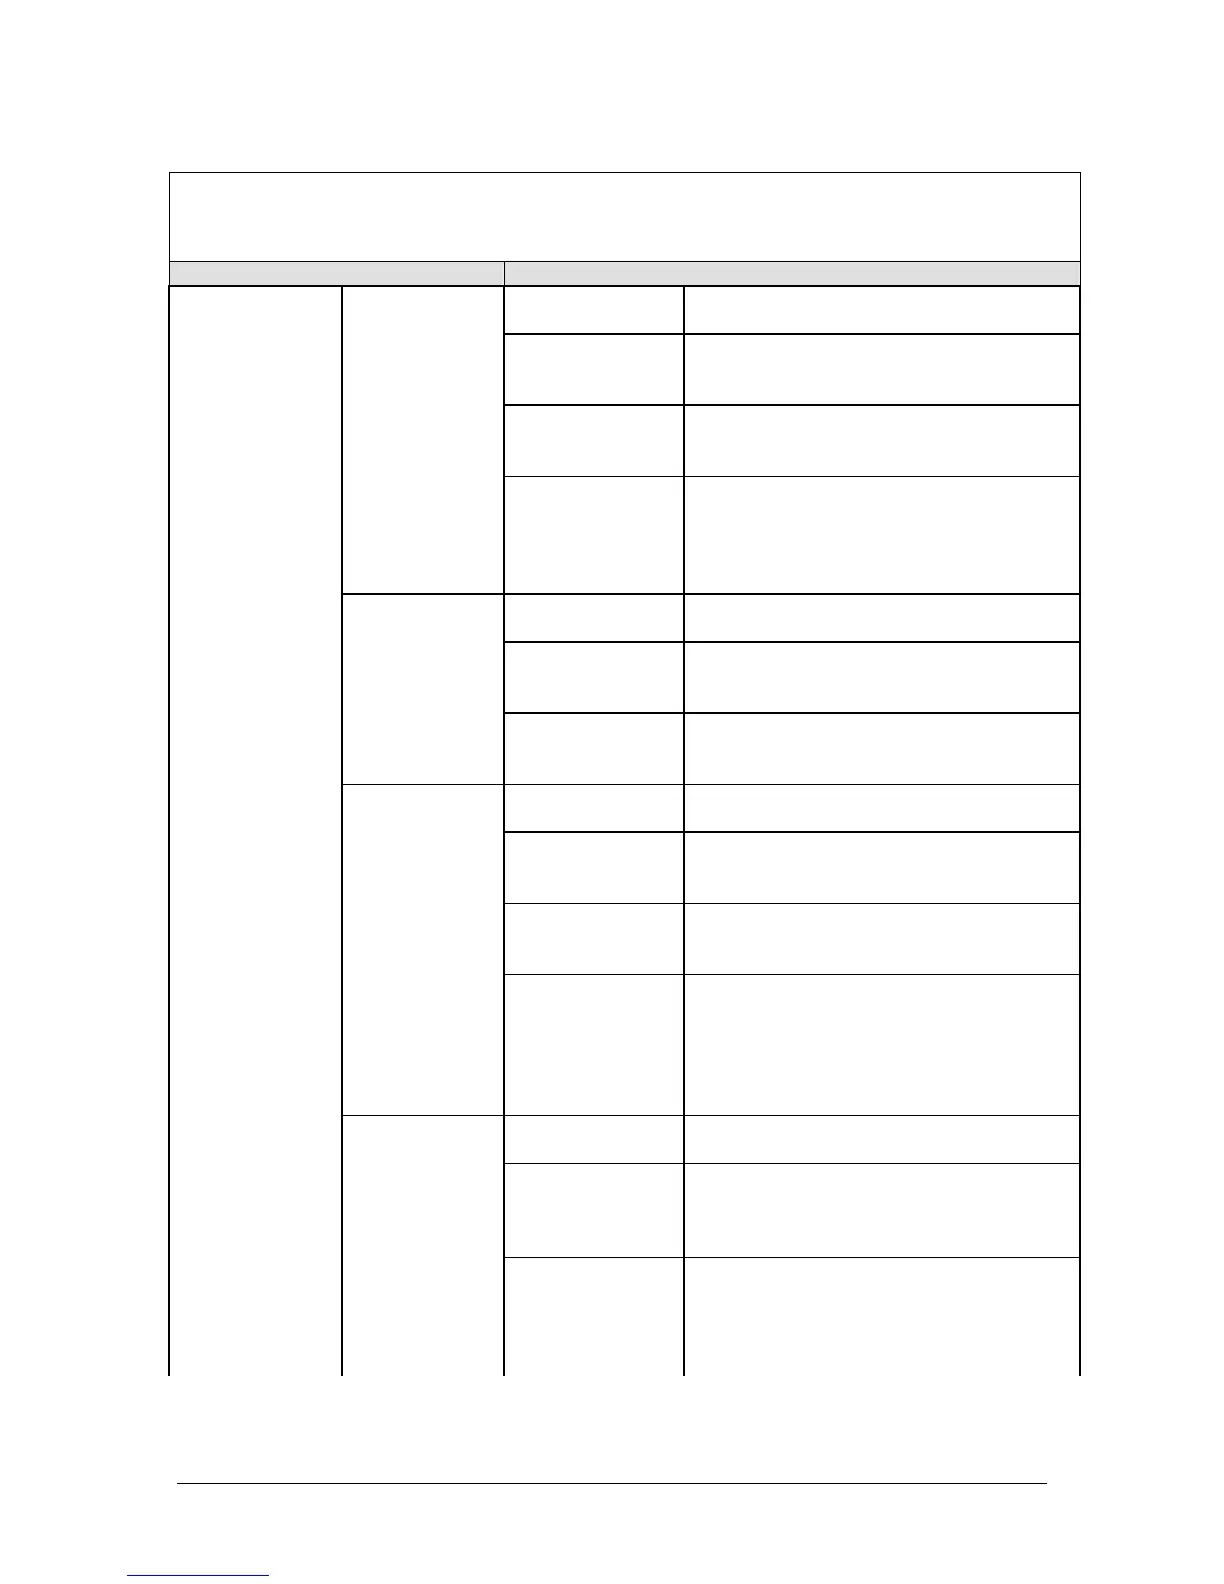
Display/Keypad
PROBLEM POSSIBLE SOLUTION
Adjust display
contrast
Locate and adjust by turning the multi-
turn potentiometer on the stage board.
Display cable Check the ribbon cable that goes from
the LCD connector to the stage board for
any loose wires or crimps.
LCD display Make sure that the display assembly is
mounted securely on the bezel.
Replace the LCD display.
Blurred display
Stage board Check that all socket chips are inserted
properly.
Note: Make sure you do not bend the
leads when removing and reinstalling the
chip.
Display contrast Locate and adjust by turning the multi-
turn potentiometer on the stage board.
Display cable Check the ribbon cable that goes from
the LCD connector to the stage board for
any loose wires and crimps.
Horizontal line
across the LCD
display
LCD display Make sure that the display assembly is
mounted securely on the bezel.
Replace the LCD display.
Display contrast Locate and adjust by turning the multi-
turn potentiometer on the stage board.
Display Cable Check the ribbon cable that goes from
the LCD connector to the stage board for
any loose wires or crimps.
LCD display Make sure that the display assembly is
mounted securely on the bezel.
Replace the LCD display.
No display
Stage board Check that all socket chips are inserted
properly.
Note: Make sure you do not bend the
leads when removing and reinstalling the
chip. Replace the stage board if
necessary.
Power Supply
Cycle the main power off for at least 1
minute then turn it on again.
LCD display
Check the ribbon cable that goes from
the LCD connector to the stage board.
Make sure that the display assembly is
mounted securely on the bezel.
LCD DISPLAY
Scrambled
LCD screen
Stage board
Check that all socket chips are inserted
properly.
Note: Make sure you do not bend the
leads when removing and reinstalling the
chip.