revision: 1
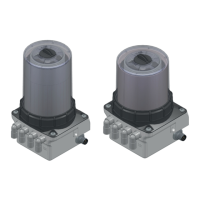
FlexxPump 250/400 DLS
User Manual
23
EN-
6.3 Commissioning
Mount the FlexxPump 250/400 DLS carefully according to the steps described in
chapter 6.2.
Depending on the scope of delivery, you must also carry out the following additional
measures for the rst-time commissioning:
1. Mechanical fastening
Fix the FlexxPump 250/400 DLS mechanically. Pay particular attention to the maximum
tightening torques permissible for the M5 female threads!
2. Electrical connection
Connect the FlexxPump 250/400 DLS to the external controller (PLC) via the M12x1
interface using a suitable cable.
3. Check the assembly
Make sure that the FlexxPump 250/400 DLS is properly and completely assembled. In
particular, the battery must be inserted and a lubricant cartridge must be tted.
4. Execute 12 seconds control signal
Execute the 12 seconds control signal. The detailed description can be found in chapter
8.2.4. FlexxPump 250/400 DLS performs a certain number of strokes and transports
the lubricant from the cartridge to the outlet.
5. Hydraulic connection
Connect the consumer hydraulically to the FlexxPump 250/400 DLS. If you connect
tubes to the FlexxPump 250/400 DLS, make sure that the tubes and connectors are
installed tightly, cleanly and correctly.
Ideally, use tubes prefilled with the appropriate lubricant!
6. Check the settings on FlexxPump 250/400 DLS
Check the basic settings of the FlexxPump 250/400 DLS with the required values
required for the lubrication point and adjust them if necessary. Changes must be made
in the PLC program.