(3) Remove the headliner from the roof panel.
Refer to Headliner in the Removal and Installation
section of Group 23 - Body for the procedures.
(4) Remove the two screws that secure the front of
the overhead console bracket to the roof front header
(Fig. 6).
(5) Using a sharp utility knife, cut through the
double-faced tape that secures the rear flange of the
overhead console bracket to the roof panel.
(6) Remove the overhead console bracket from the
roof panel.
INSTALLATION
OVERHEAD CONSOLE
(1) Position the overhead console near the mount-
ing location on the headliner.
(2) Reconnect the roof wire harness connector to
the overhead console wire harness connector.
(3) Align the locating pin on the rear of the over-
head console housing with the receptacle in the rear
of the overhead console bracket.
(4) Align the two snap clips on the overhead con-
sole housing with their receptacles in the overhead
console bracket.
(5) Push upward firmly and evenly on the sides of
the overhead console housing over both of the snap
clip locations until each of the two snap clips is fully
engaged with its receptacle in the overhead console
bracket.
(6) Install and tighten the screw that secures the
front of the overhead console housing to the overhead
console bracket. Tighten the screw to 1.9 N·m (17 in.
lbs.).
(7) Reconnect the battery negative cable.
OVERHEAD CONSOLE BRACKET
(1) Remove any remnants of the old double-faced
tape from the roof panel and the rear flange of the
overhead console bracket and clean these areas with
a suitable solvent to remove any traces of grease, oil
or adhesive residue. When installing the overhead
console bracket, always apply a new piece of double-
faced tape to the rear flange of the bracket.
(2) Align the two locating pins on the front of the
overhead console bracket with the receptacles in the
roof front header.
(3) Lower the rear flange of the overhead console
bracket from the roof panel far enough to access and
remove the release paper from the double-faced tape.
(4) Push upward firmly and evenly on the rear
flange of the overhead console bracket over the dou-
ble-faced tape to ensure complete adhesion to the
roof panel.
(5) Install and tighten the two screws that secure
the front of the overhead console bracket to the roof
front header. Tighten the screws to 2.2 N·m (20 in.
lbs.).
(6) Install the headliner onto the roof panel. Refer
to Headliner in the Removal and Installation sec-
tion of Group 23 - Body for the procedures.
(7) Install the overhead console onto the overhead
console bracket. Refer to Overhead Console in the
Removal and Installation section of this group for the
procedures.
(8) Reconnect the battery negative cable.
PAPERCLIP
REMOVAL
(1) Disconnect and isolate the battery negative
cable.
(2) Remove the overhead console from the head-
liner. Refer to Overhead Console in the Removal
and Installation section of this group for the proce-
dures.
(3) Remove the four screws that secure the paper-
clip to the overhead console housing.
(4) Pull the paperclip away from the overhead con-
sole far enough to access the wire harness connec-
tors.
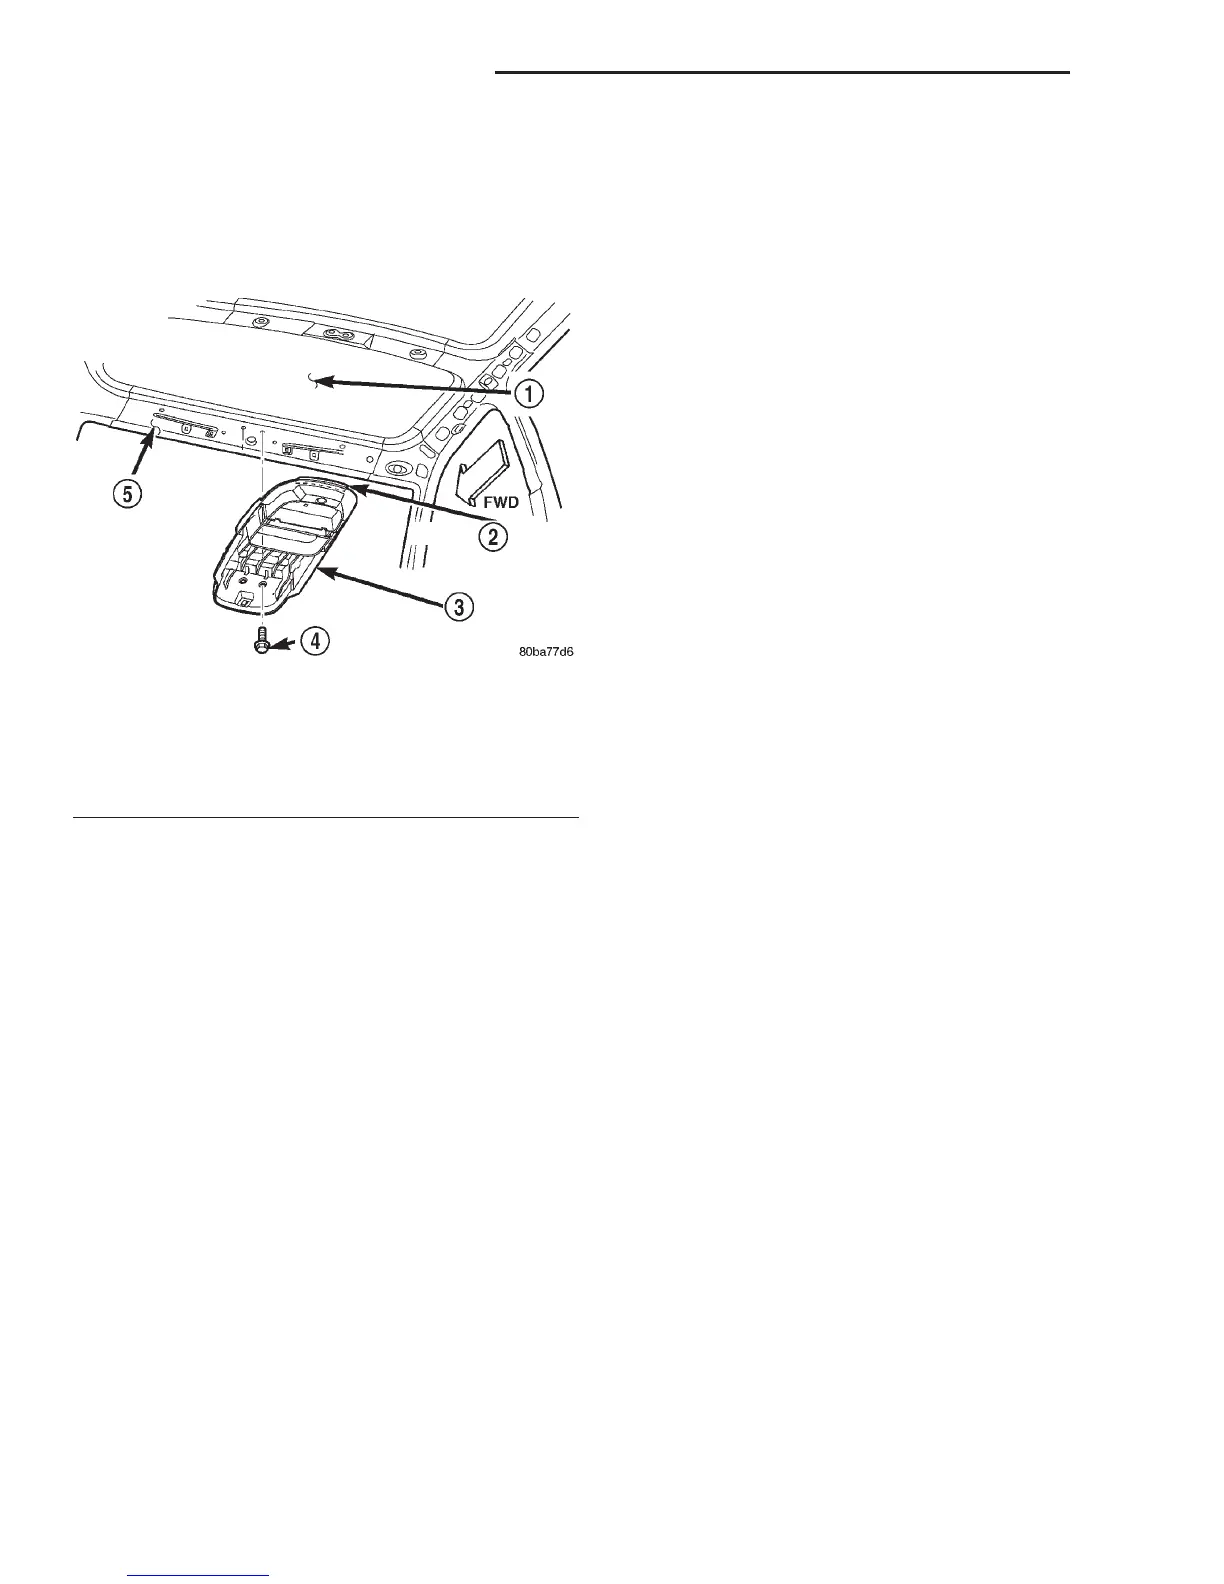
Fig. 6 Overhead Console Bracket Remove/Install
1 – ROOF PANEL
2 – DOUBLE-FACED TAPE
3 – OVERHEAD CONSOLE BRACKET
4 – SCREW (2)
5 – FRONT HEADER
8V - 10 OVERHEAD CONSOLE SYSTEMS DN
REMOVAL AND INSTALLATION (Continued)