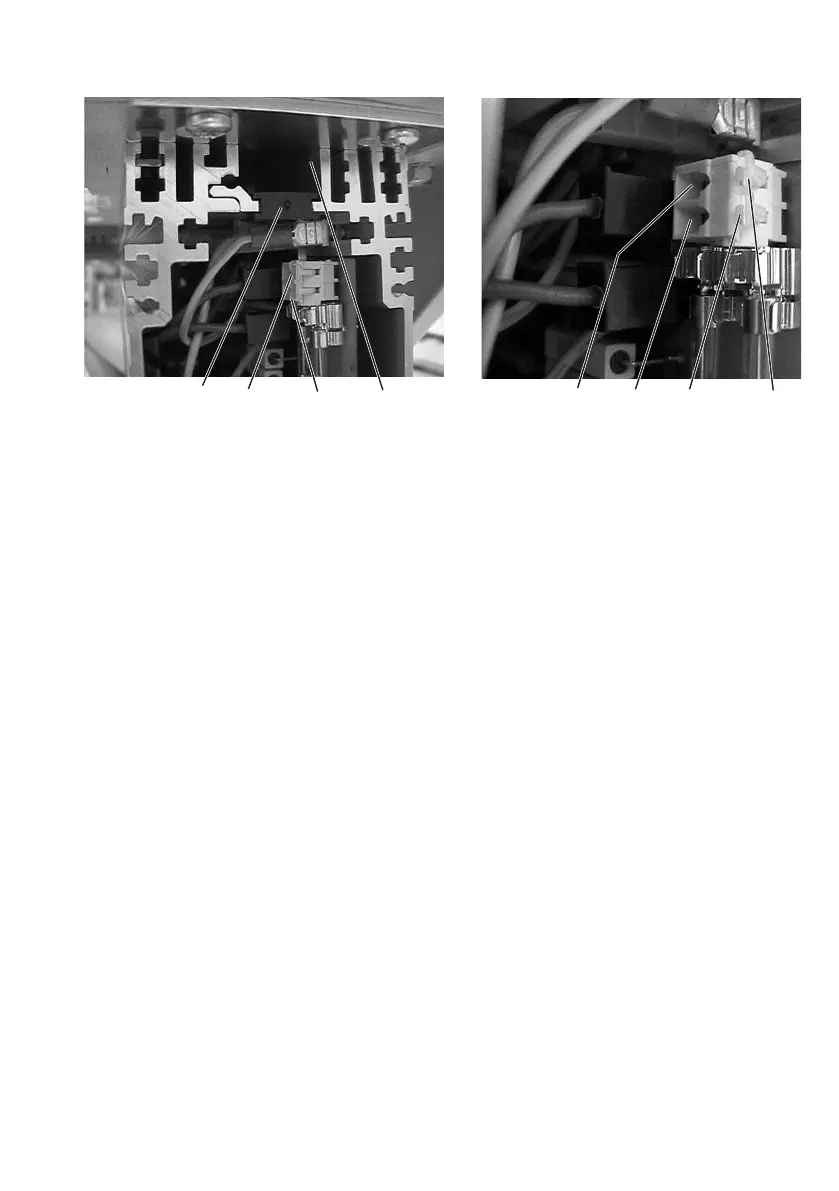
6.8.2 Connection to the DA321G
–
Loosen the 4 screws on the front plate of the controls.
–
Remove the front plate.
–
Push the cable from the back through the cable duct 1 into the
controls.
–
Remove the black rubber grommet 2.
–
Push through the round opening of the rubber grommet with a
screwdriver.
–
Guide the cable of the sewing light transformer through the
resulting opening in the rubber grommet.
–
Inserttherubbergrommetagain.
–
With a small screwdriver press on the terminal openings 4 and 3 to
open the terminals 5 and 6.
–
Connect the blue cable to terminal 6 and the brown cable to
terminal 5.
–
Fasten the front plate with the 4 screws again.
19
26 5 1
654 3