23
23
23
23
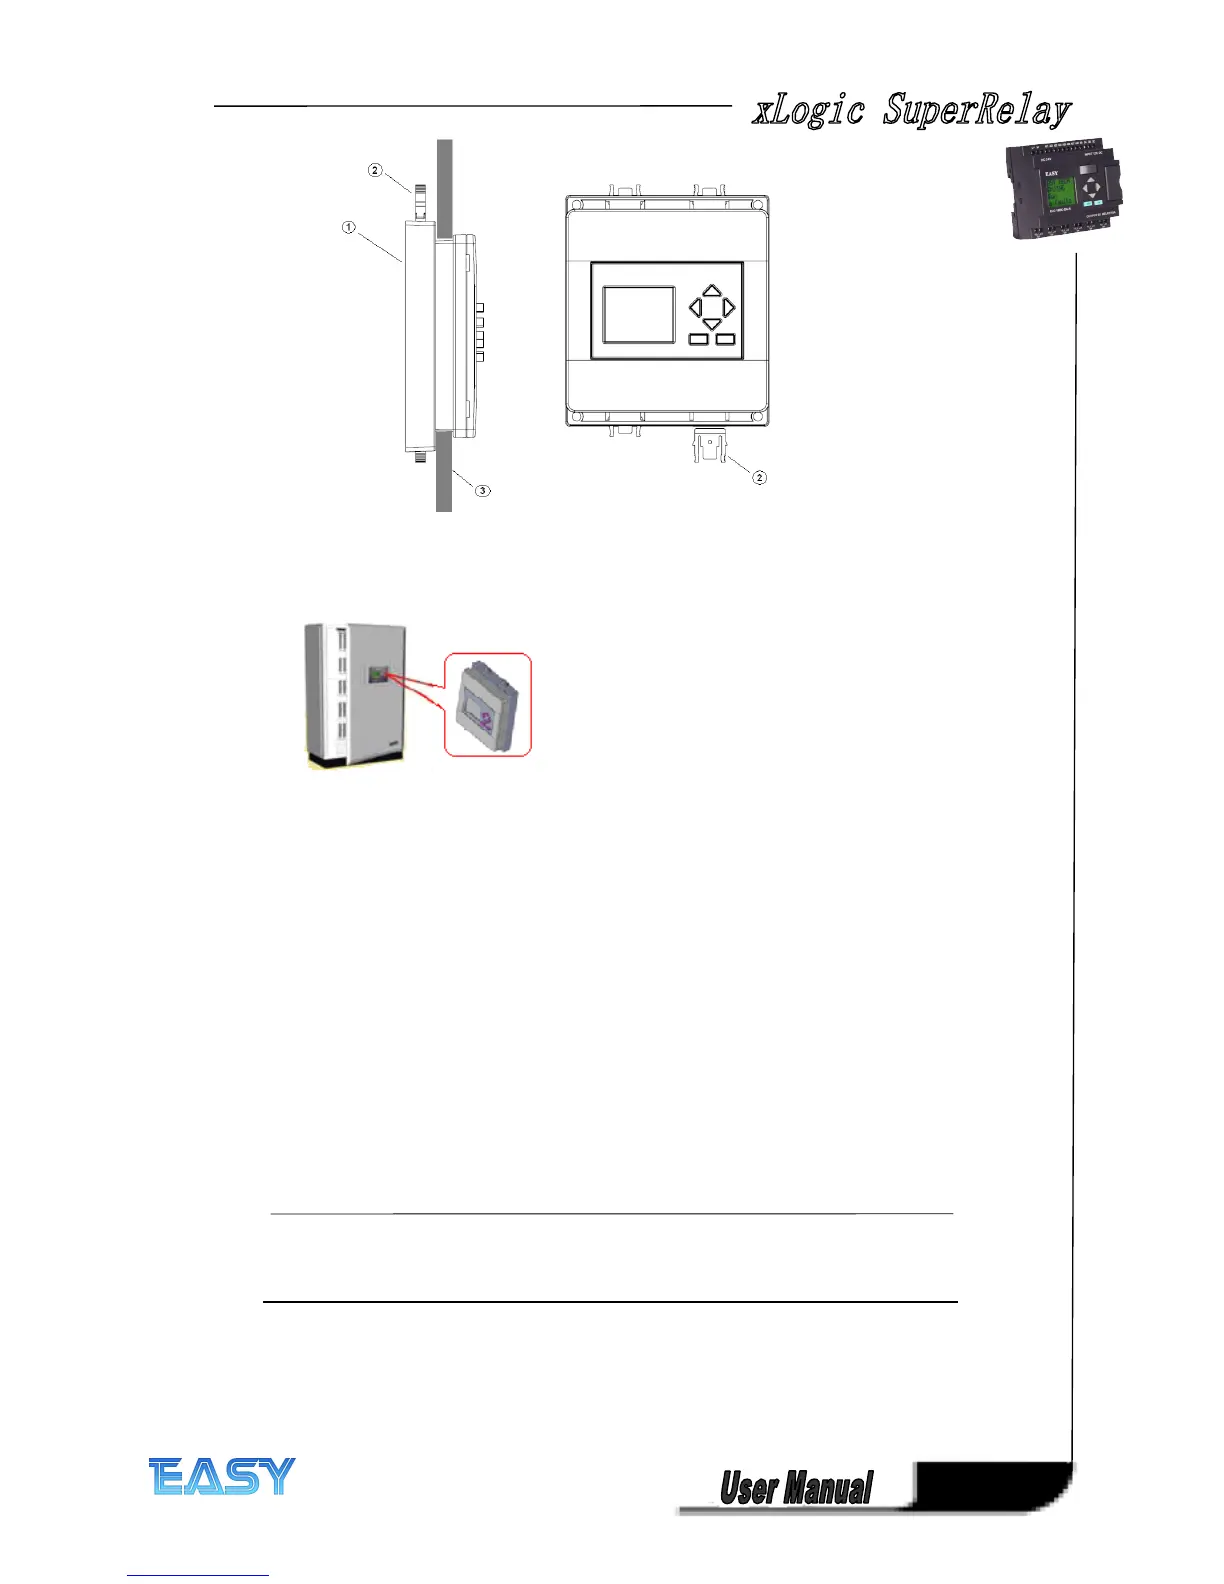
1. Mounting brackets
2. Mounting lock
3. Cabinet door or control panel (Thickness:1.5 to 8.5 mm)
5. You can then use the ELC-COVER-CABLE
ELC-COVER-CABLE
ELC-COVER-CABLE
ELC-COVER-CABLE to connect the ELC-HMI-FP
ELC-HMI-FP
ELC-HMI-FP
ELC-HMI-FP to the ELC-12 Basic
module up to a distance of 1 .5 meters. T his distance can be extended to up to ten meters by
using a standard Sub-D cable together with the ELC-COVER-CABLE
ELC-COVER-CABLE
ELC-COVER-CABLE
ELC-COVER-CABLE .
2.2
2.2
2.2
2.2 Wiring
Wiring
Wiring
Wiring the
the
the
the xLogic
xLogic
xLogic
xLogic
Wire the xLogic using a screwdriver with a 3-mm blade.
You do not need wire ferrules for the terminals. You can use conductors with
cross-sections
of up
to the
following
thicknesses:
1 x 2.5 mm
2
2 x 1.5 mm
2
for each second terminal chamber
Tightening torque: 0.4.. .0.5 N/m or 3. ..4 lbs/in
Note
Note
Note
Note
Always cover the terminals after you have completed the installation. To protect xLogic
adequately from impermissible contact to
live parts,
local standards must be complied with.