1
Put transmission in gear.
Make sure new clutch
brake has been installed.
3
Position transmission so
it is square to and
aligned with engine.
4
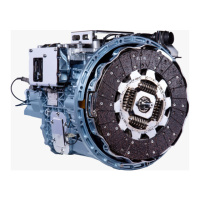
Mesh splines by moving
transmission forward and
rotating the output shaft.
2
Make sure that the yoke
fingers remain in the up
position until they are over
the release bearing housing.
5
Install mounting bolts and
torque to OEM specs. If
installing Solo Advantage
clutch, proceed to Step 6.
Do not let the transmission
drop or hang unsupported in
the driven discs. This can cause
the discs to become distorted
and the clutch to not release.
WARNING
Do not pull on release arm to install
transmission. This will cause the
clutch to over adjust.
Do not force transmission against
clutch with yoke fingers in the UP
position. This will break the cast
webbing of the clutch causing
damage that is not warrantable.
Do not use excessive force. If it
does n
ot enter freely, investigate
the cause of problem and make
any necessary changes.
CAUTION
IMPORTANT
Do not add lube (never seize or
grease) to the input shaft splines.
The discs must be free to move.
6
Install hand hold cover
A-8173 with grommet
positioned toward rear of
hand hold opening in the
clutch housing. Secure the
hand hole cover with two
5/16" x 18 x 1/2" long bolts.
7
Insert plug into hole in the upper
left side of the clutch housing
where the horizontal lube hose
is utilized. (Image not shown)
Note: If the lube hose assembly
should need servicing it can be
replaced without removal of the
transmission.
 Loading...