Progressively tighten mounting bolts in
a crisscross pattern starting with the
lower left bolt. Torque to 40–50 lb-ft
(54–68 Nm). Failure to do this could
result in improper piloting of the clutch
and cause clutch damage.
5
Slide the clutch assembly over the guide
studs and install six lock washers and
mounting bolts (7/16" x 14 UNC x 2 1/4"
grade 5) finger tight. Replace studs with
remaining two lock washers and bolts.
4
Insert aligning tool through
bearing.
Note: The ECA Clutch
alignment tool is a 14-tooth
shaft and is 1-3/4" longer
than the standard shaft.
1
2
Install second disc onto
aligning tool. Follow the
orientation instructions
on the disc.
Install two 7/6" x 14 UNC x 5" studs
into upper mounting holes. Install
assembled clutch.
3
1
3
4
5
6
7
8
2
8
Position the release
bearing so the orientation
of the lube fitting is in the
4 o'clock position.
Remove aligning tool.
7
Remove four yellow shipping
bolts in an even 1/4 turn
crisscross pattern.
6
Generic graphic
Note: The clutch release yoke fingers must be
positioned so they clear the release bearing housing
when removing and installing the transmission.
• Preferred method: Move the release yoke to the
service position via ServiceRanger's Advanced
Product Functions.
•
Secondary method: Remove the ECA prior to
removing the transmission and then manipulate
the fingers by hand.
Do not unbolt the intermediate plate from the
cover assembly.
Do not use vehicle’s transmission to install
the ECA clutch, as it can result in damage to
the clutch or ECA.
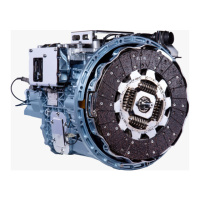
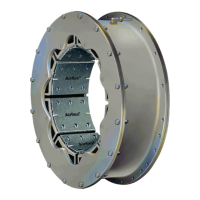
An assembled clutch weighs about 150 lb
s
(68 kg). Avoid the risk of injury. Use proper
equipment when lifting a clutch.
CAUTION
WARNING
9
Following transmission installation, perform
clutch adjustment. See the "ECA Clutch
Adjustment" Section on page 40.
Note: Always perform a clutch adjustment
after a clutch replacement.
 Loading...