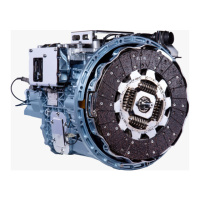
Install three equally
spaced anti-rattle
springs.
Note: Check
orientation on
anti-rattle springs
before installing.
3
Super-duty clutch only:
Ensure the correct flywheel
depth is 2-15/16".
1
Put front disc into flywheel.
Flywheel side must be toward
engine. Use new slots to put
intermediate plate on pins.
2
Turn intermediate plate left. Use
0.006" feeler gauge to check left
pin clearance on all 6 drive pins.
Note: Remove two set screws.
Straighten pins to increase
clearance and reinstall set
screws. Do not file slots.
4
Slide cover over
aligning tool.
10
Install disc into
flywheel. Follow
the orientation
instructions on
the disc.
6
Install
intermediate
plate onto
drive pins.
7
Install second
disc onto
flywheel. Follow
the orientation
instructions on
the disc.
8
Progressively tighten mounting bolts
in a crisscross pattern starting with the
lower left bolt (1, 2, 3, 4, 5, 6, 7, 8).
Torque to 25-35 lb-ft (34-47 N•m).
Failure to do this could result in
improper piloting of the clutch and
cause clutch damage.
12
Remove the aligning
tool. Be sure shipping
blocks are removed.
13
Install two 3/8" x 2-1/2"
studs into upper
mounting holes.
5
Insert aligning
tool through
discs.
9
1
3
4
5
6
7
8
2
T
O
T
U
R
N
D
E
P
R
E
S
S
B
O
L
T
Install lock washers and mounting
bolts (3/8" x 1-1/4" grade 5) finger
tight. Replace studs with lock
washers and bolts.
11
 Loading...
