57Installation and Service Guide Color Controller E-46A
Replacing parts
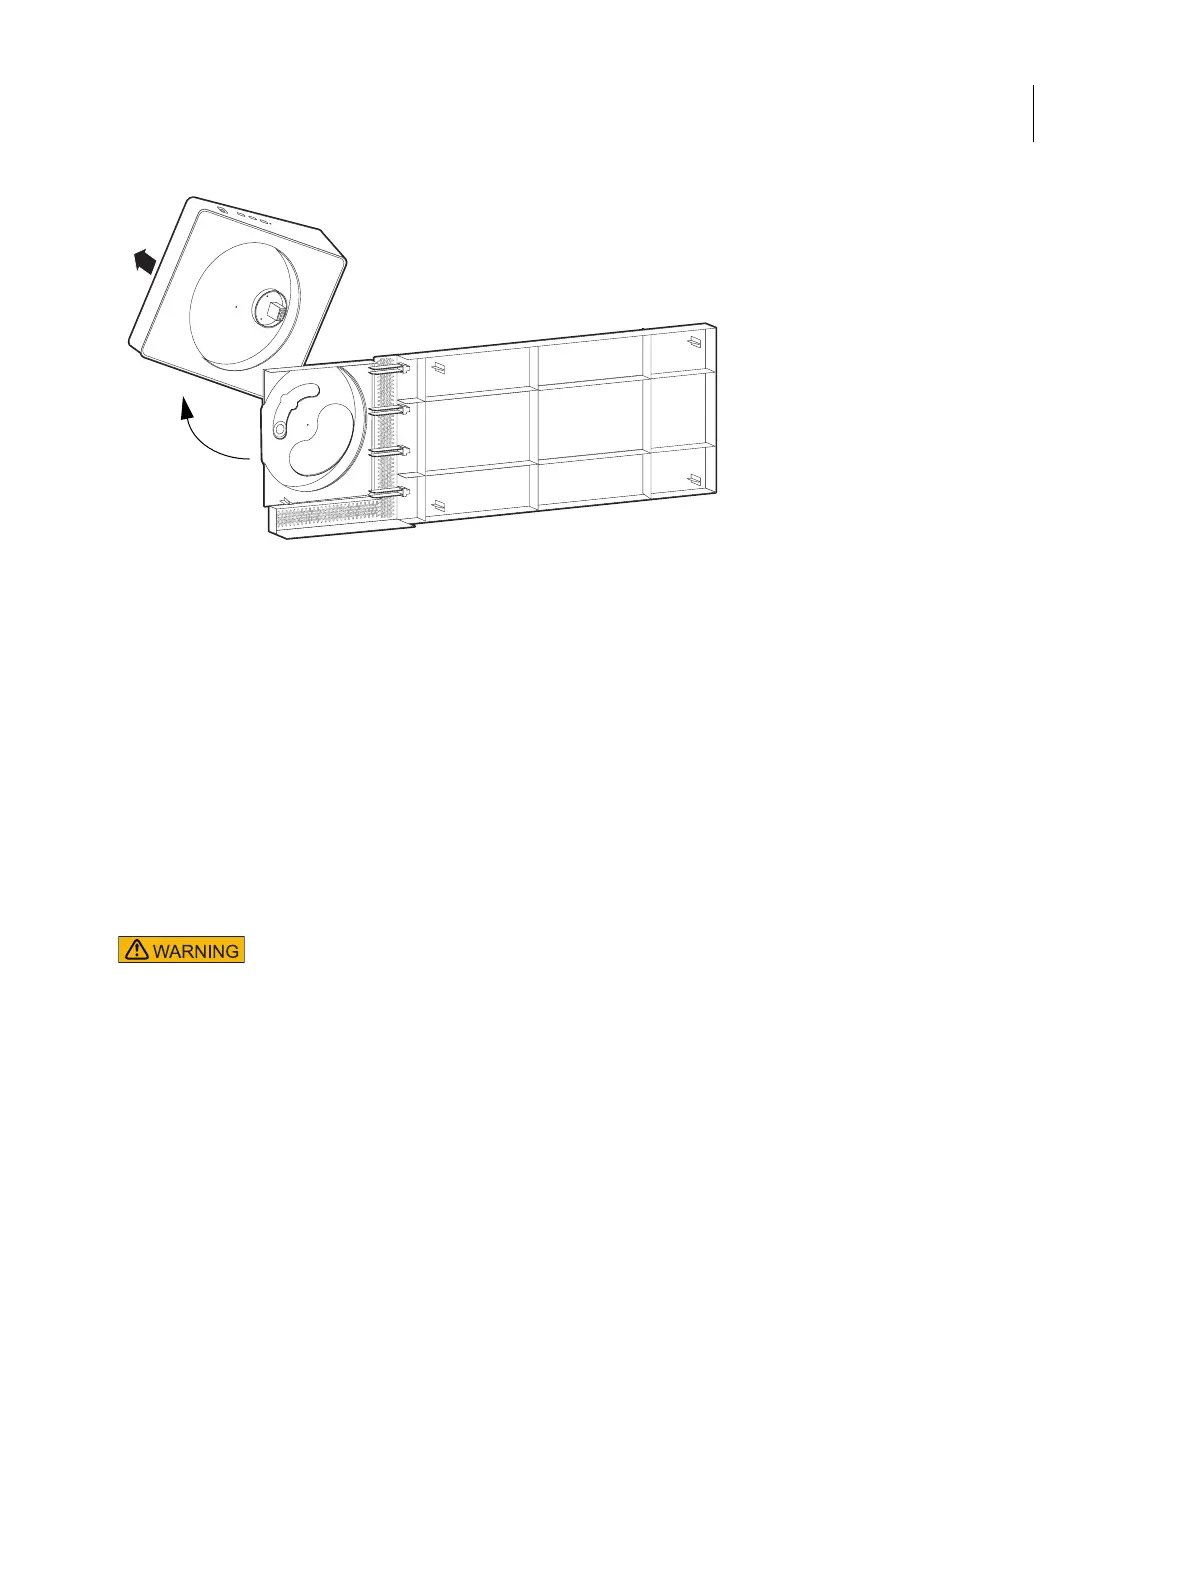
7 Rotate the Fiery QuickTouch 45 degrees.
8 Remove the top bezel.
Replace the Fiery QuickTouch
1 Attach the new Fiery QuickTouch part to the top bezel by rotating the top bezel 45 degrees, then rotate until the
bezel and Fiery QuickTouch align. Insert the spring washer, then the screw with washer and tighten.
2 Once attached, ensure that the Fiery QuickTouch moves properly from side to side.
3 Place the top bezel with Fiery QuickTouch atop the unit on its side.
4 Plug in the USB cable and insert the plug so that the mark on the cable and mark on the internal board line up.
5 Insert the two screws to secure the plug and grounding bracket.
6 Insert the power harness and loop it around guides to allow the Fiery QuickTouch to move freely.
7 Use a tie-wrap to secure the power cable to the tab on the supporting bracket for USB connector.
8 Replace the top bezel on top of the unit and slide back in place.
9 Check that the bezel cover extends over the rear sheet metal to be properly in place.
10 Replace the chassis panels (see page 53).
Removing and replacing boards
This section includes procedures for removing and replacing the following boards:
• Printer interface board
• Motherboard
Use a screwdriver with a magnetic tip so you do not drop a loose screw into the Fiery QuickTouch
unit.