11. Maintenance
Service
manual
487 03 29 41
8
11
8
4
3
7
5
B
B
B
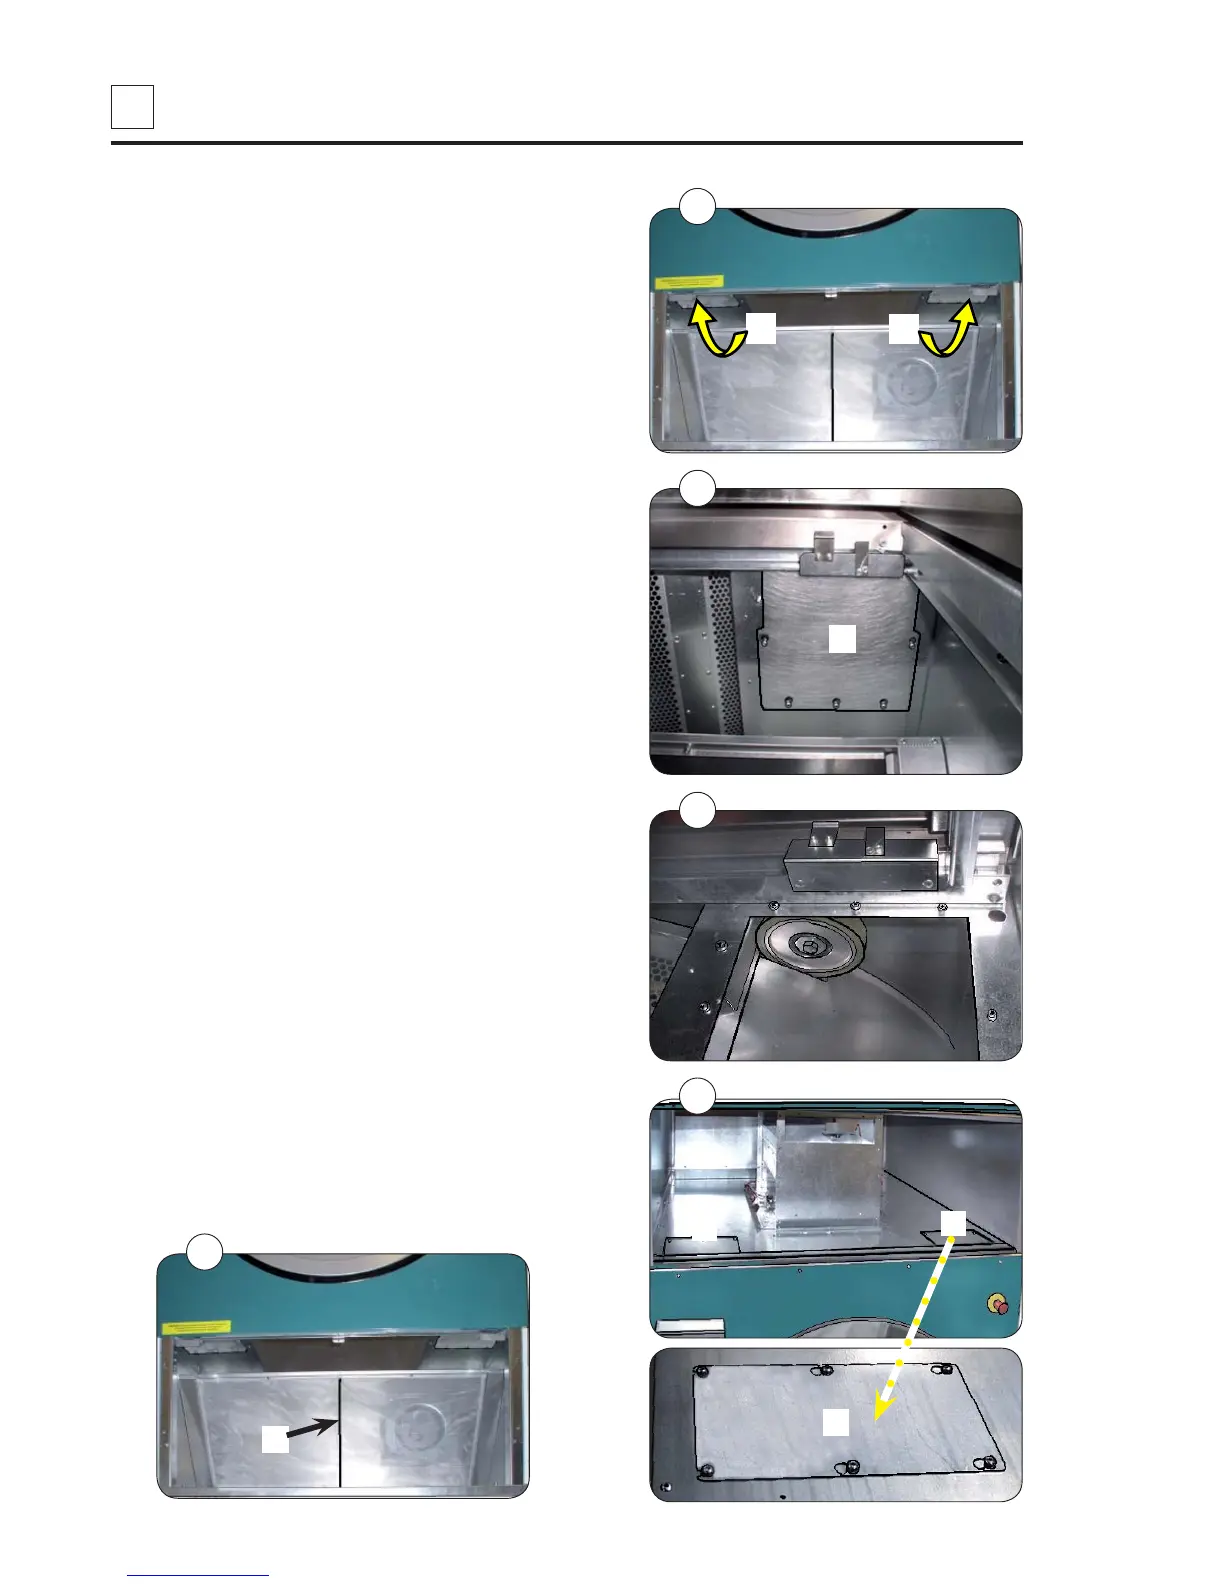
Cleaning around the drum.
(continued from the previous page)
3. Service cover plates B, fig. 3.
4. Undo the 8 screws in each service cover
plate (the screws must not be completely
unscrewed), fig. 4.
5. Dismantle service cover plates B, fig. 5.
6. Open front shutter.
Dismantle service cover plates F (the screws
must not be completely unscrewed), fig. 6.
7. Remove the lint using a vacuum cleaner.
8. Reassemble the dryer.
9. Connect the power supply.
10. Function check the dryer.
• Note!
The filter must turn so that the centre brace M
in the filter is visible, fig. 7.
6
F
F
F
M