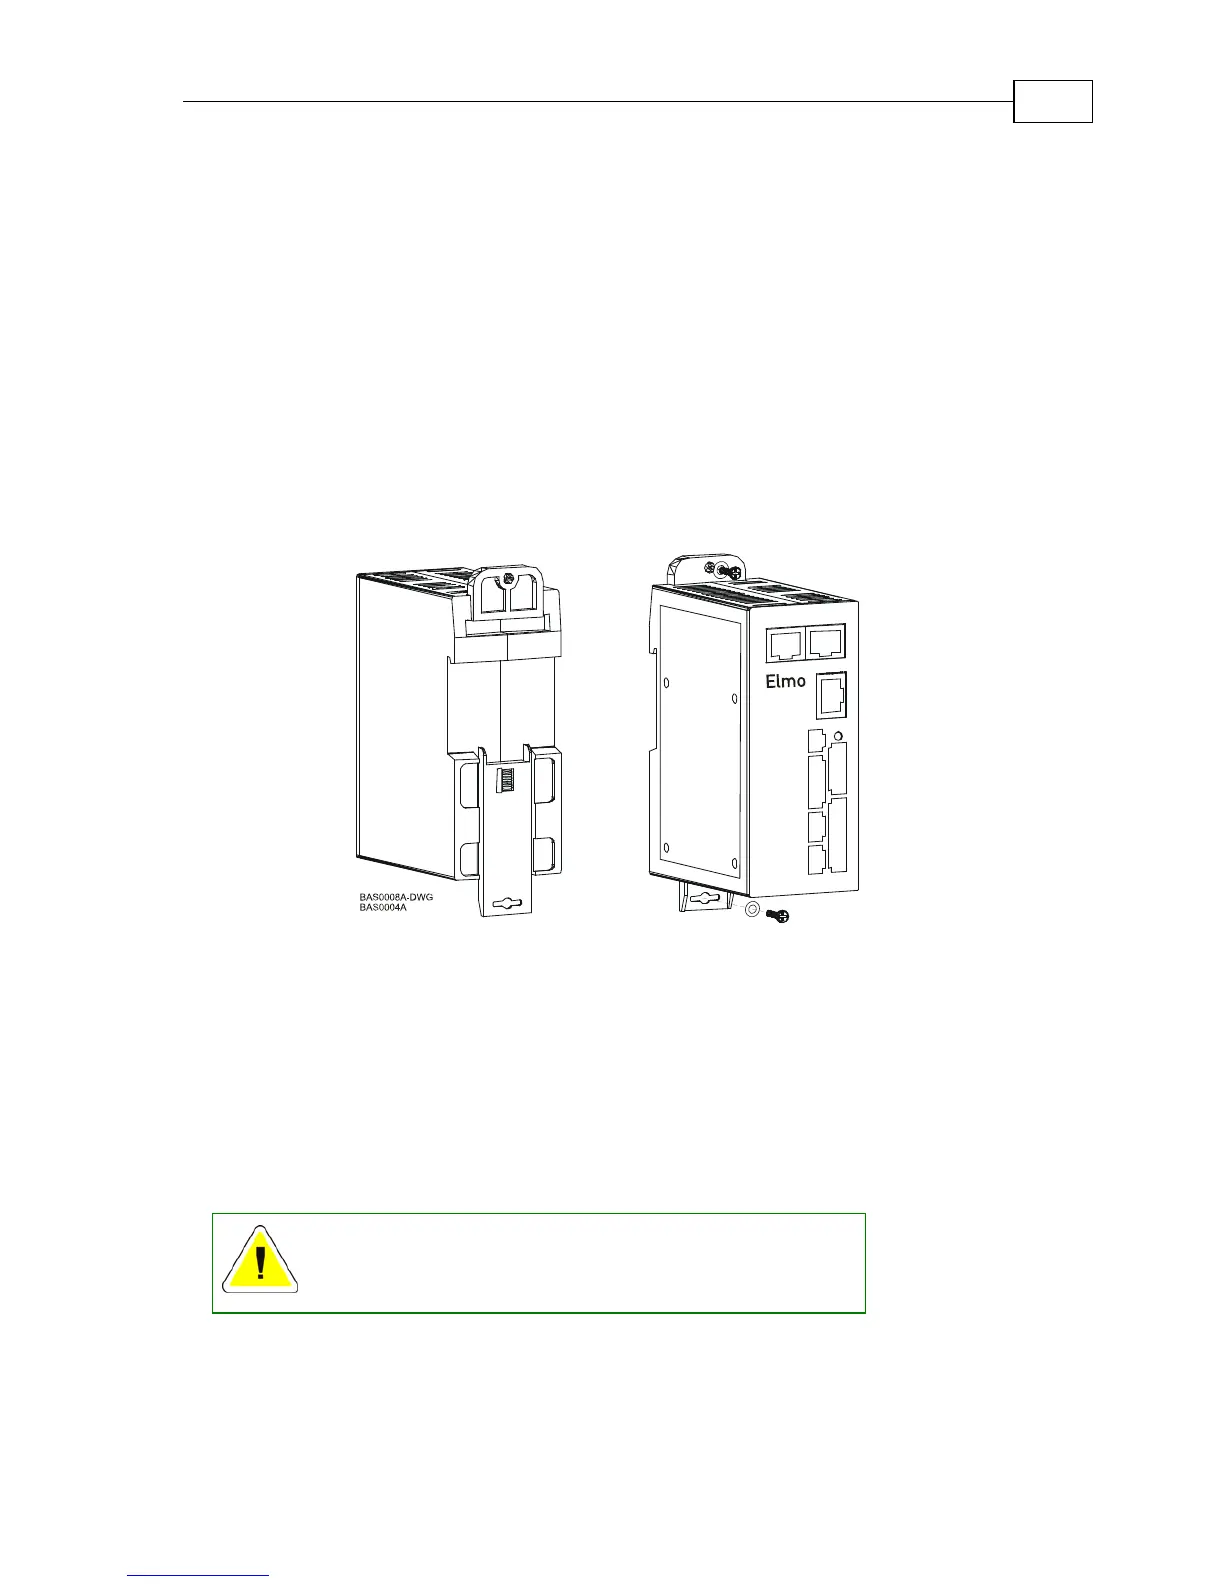
Figure 3-2: Mounting the Bassoon on a on DIN Rail
3.4.2 Mounting Directly onto a Wall
The mounting strips at the back of the Bassoon enable it to be screwed directly into a wall. If it
is not already assembled in the upper slot in the back of the Bassoon, assemble the upper
mounting tab now.
To mount the Bassoon onto a wall:
1. On the back of the drive, fully extend the top mounting strip so that the ends with the
holes are exposed. (The bottom strip is delivered already extended.)
2. Mount the Bassoon vertically onto the wall with two M4 round head screws and
washers, one through the top hole of the mounting strip and one at the bottom.
Figure 3-3: Extending the Mounting Strips and Attaching the Screws
3.5 Connecting the Cables
3.5.1 Wiring the Bassoon
Once the Bassoon is mounted, you are ready to wire the device. Proper wiring, grounding
and shielding are essential for ensuring safe, immune and optimal servo performance of the
Bassoon.
Follow these instructions to ensure safe and proper
wiring:
Use twisted-pair shielded wires for control, feedback and communication ports. For
best results, use an aluminum foil shield covered by copper braid with a drain wire.
The drain wire is a non-insulated wire that is in contact with parts of the cable,
usually the shield. It is used to terminate the shield and as a grounding connection.
Bassoon Installation Guide Installation
MAN-BASIG (Ver 1.4)
3-5