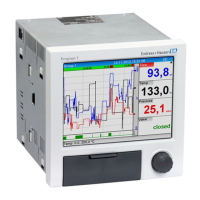
Commissioning Ecograph T, RSG35
34 Endress+Hauser
In the "Setup" menu and in the "Advanced setup" submenu, you will find the most
important settings for the device:
Parameters Possible settings Description
Change date/time UTC time zone
dd.mm.yyyy hh:mm:ss
Change the date and time
Advanced setup Advanced settings for the device e.g. system settings,
inputs, outputs, communication, application etc.
System Basic settings that are needed to operate the device,
(e.g. date/ time, security, memory management,
messages, etc.)
Inputs Settings for analog and digital inputs
Outputs Settings only required if outputs (e.g. relays or
analog outputs) are to be used
Communicati
on
Settings required if the USB, RS232/RS485 or
Ethernet interface of the device is to be used (PC
operation, serial data export, modem operation, etc.)
The different interfaces (USB, RS232/RS485,
Ethernet) can be operated in parallel. However,
simultaneous use of the RS232 and RS485
interface is not possible.
Application Configure various application-specific settings (e.g.
group settings, limit values, etc.)
A detailed overview of all the operating parameters is provided in the appendix at the
end of the Operating Instructions. → 78
9.4.4 Setup via SD card or USB stick
An existing device configuration ("Setup data" *.DEH) from another Ecograph T RSG35 or
from FieldCare/DeviceCare can be uploaded directly to the device.
Import new setup directly at the device: The function used to load the setup data can be
found in the main menu under "Operation -> SD card (or USB stick) -> Load setup" ->
Select directory -> Next".
9.4.5 Setup via Web server
To configure the device via the Web server, connect the device via Ethernet to your PC.
Please observe the information and communication settings for Ethernet and the Web
server under .→ 31
To configure the device via a Web server, you must have Administrator or Service
access. ID and password administration is performed in the main menu under "Setup
-> Advanced setup -> Communication -> Ethernet -> Configuration Web server ->
Authentication".
Default value for ID: admin; Password: admin
Note: The password should be changed during commissioning!
Establishing a connection and setup
Procedure for setting up a connection:
1. Connect the device to the PC via Ethernet
2. Start the browser at the PC; open the Web server for the device by entering the IP
address: http://<ip-address> Note: Leading zeros in IP addresses must not be entered
(e.g. enter 192.168.1.11 instead of 192.168.001.011)

 Loading...