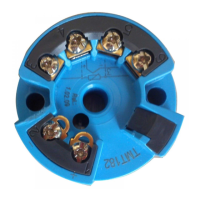
iTEMP TMT82 Commissioning
Endress+Hauser 33
8 Commissioning
8.1 Post-installation check
Before commissioning the measuring point make sure that all final checks have been
carried out:
• Checklist “Post-installation check”, → 16
• Checklist “Post-connection check”,
8.2 Switching on the transmitter
Once the final checks have been successfully completed, it is time to switch on the supply
voltage. The transmitter performs a number of internal test functions after power-up. As
this procedure progresses, the following sequence of messages appears on the display:
Step Display
1 "Display" text and firmware version of the display
2 Firm logo
3 Device name with firmware and hardware versions
4 Information on the sensor configuration (sensor element and type of connection)
5 Set measuring range
6a Current measured value or
6b Current status message
If the switch-on procedure is not successful, the relevant diagnostics event, depending on the cause,
is displayed. A detailed list of diagnostic events and the corresponding troubleshooting instructions
can be found in the "Diagnostics and troubleshooting" section → 37.
The device is operational after approx. 30 seconds, and the plug-in display after approx. 33
seconds in normal operating mode! Normal measuring mode commences as soon as the
switch-on procedure is completed. Measured values and status values appear on the
display.
8.3 Enabling configuration
If the device is locked and the parameter settings cannot be changed, it must first be
enabled via the hardware or software lock. The device is write-protected if the keyhole
symbol appears in the header of the measured value display.
To unlock the device
• either switch the write protection switch on the back of the display to the "OFF" position
(hardware write protection), → 26 or
• deactivate the software write protection via the operating tool. See the description for
the 'Define device write protection' parameter. → 84
When hardware write protection is active (write protection switch on the back of the
display to the "ON" position), write protection cannot be disabled via the operating
tool. Hardware write protection must always be disabled before software write
protection can be enabled or disabled.
9 Maintenance
In general, no specific maintenance is required for this device.

 Loading...