Micropilot FMR62
32 Endress+Hauser
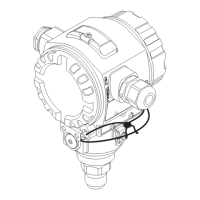
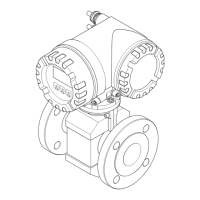
Installation: flush mount antenna
FMR62 - Aligning the antenna axis
Align the antenna so that it is perpendicular to the product surface.
Caution:
The maximum reach of the antenna can be reduced, or additional interference signals can
occur, if the antenna is not installed perpendicular to the product.
Radial alignment of the antenna
Based on the directional characteristic, radial alignment of the antenna is not necessary.
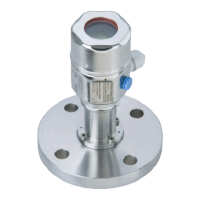
Information concerning nozzles
A0032206
Nozzle diameter (ØD) Maximum nozzle length (H
max
)
1)
Antenna GM
2)
:
50mm / 2"
Antenna GN
2)
:
80mm / 3"
50 to 80 mm (2 to 3.2 in) 600 mm (24 in) -
80 to 100 mm (3.2 to 4 in) 1 000 mm (40 in) 1 750 mm (70 in)
100 to 150 mm (4 to 6 in) 1 250 mm (50 in) 2 200 mm (88 in)
≥150 mm (6 in) 1 850 mm (74 in) 3 300 mm (132 in)
1) In the case of longer nozzles, a reduced measuring performance must be anticipated.
2) Feature 070 in the product structure
Note the following if the antenna does not project out of the nozzle:
• The end of the nozzle must be smooth and free from burrs. The edge of the nozzle should be
rounded if possible.
• Mapping must be performed.
• Please contact Endress+Hauser for applications with nozzles that are higher than indicated in
the table.
Mounting cladded flanges
Note the following for cladded flanges:
• Use the same number of flange screws as the number of flange bores provided.
• Tighten the screws with the necessary torque (see Table).
• Retighten after 24 hours or after the first temperature cycle.
• Depending on the process pressure and temperature, check and retighten the screws, where
necessary, at regular intervals.
The PTFE flange cladding normally acts simultaneously as a seal between the nozzle and the
device flange.
Flange size Number of screws Tightening torque
EN
DN50/PN16 4 45 to 65 Nm
DN80/PN16 8 40 to 55 Nm
DN80/PN40 8 999 to 999 Nm

 Loading...