Presenting Through a Wireless Network 89
Projecting Over a Network
Once you’ve started EasyMP and set up your projector and computer
in either Ad Hoc (Quick) mode or Access Point (Advanced) mode, or
in the optional wired LAN mode, as described on page 154, follow
these steps to start NS Connection and project wirelessly over the
network:
1. Make sure you’ve set up your projector (see page 58).
2. Windows: Select
Start > Programs or All Programs >
EPSON Projector > EMP NS Connection
.
Macintosh: Double-click the
EMP NS Connection icon in your
Applications folder.
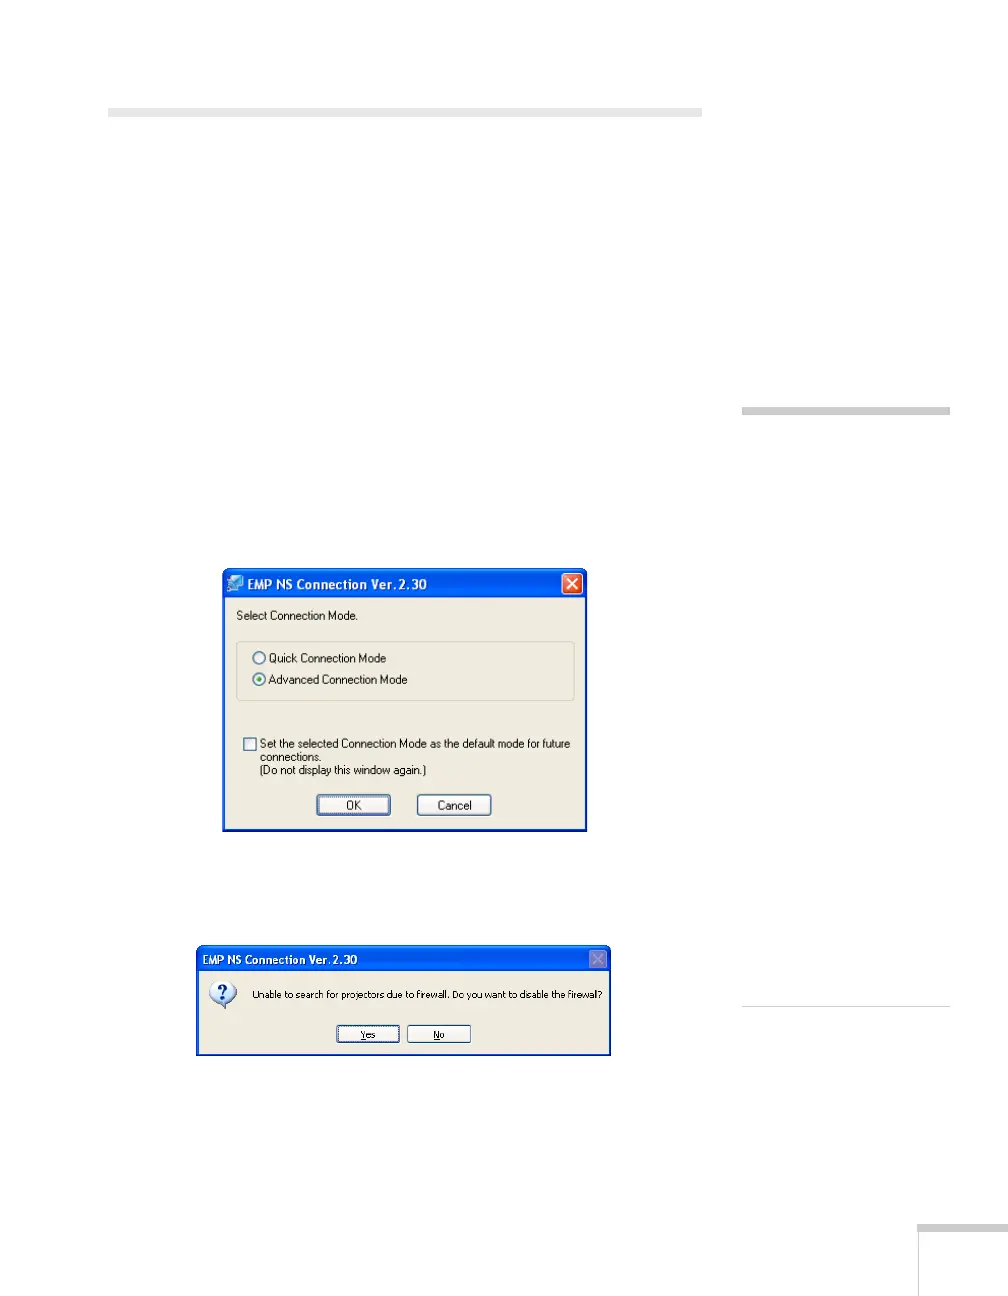
3. The first time you start NS Connection, you see this dialog box.
Choose a connection mode and click
OK.
4. If you see a message asking you to disable the firewall, click
Yes to
make an exception for the projector and allow projection.
In Windows Vista, click
Continue when the User Account
Control screen appears.
note
If you don’t see your network
adapter’s IP address, allow a
minute for it to appear. If
your access point or AirPort
base station uses DHCP
(
Distribute IP addresses
setting is enabled for
AirPort), sometimes it takes
a minute for the server to
pick up the IP address.
Once you’ve selected the IP
address for your network
adapter, you won’t see the
Switch network dialog
box when you start
NS Connection. If you want
to change to a different
network adapter, click
Extension on the EMP NS
Connection dialog box, then
click
Switch LAN on the
extension dialog box.
 Loading...