a
• By pressing the [Geometry] button on the remote control or the
[
] button on the control panel, you can perform the selected
adjustment method directly.
• When you want to re-adjust the projection position and so on, if
you want to release the correction status temporarily, set the
Geometric Correction to Off. Even when it is set to Off, the
correction values are saved.
s Settings - Geometric Correction p.140
• You can save the geometric correction settings using Memory in
Geometric Correction, and load them when needed.
s "Memory Function" p.122
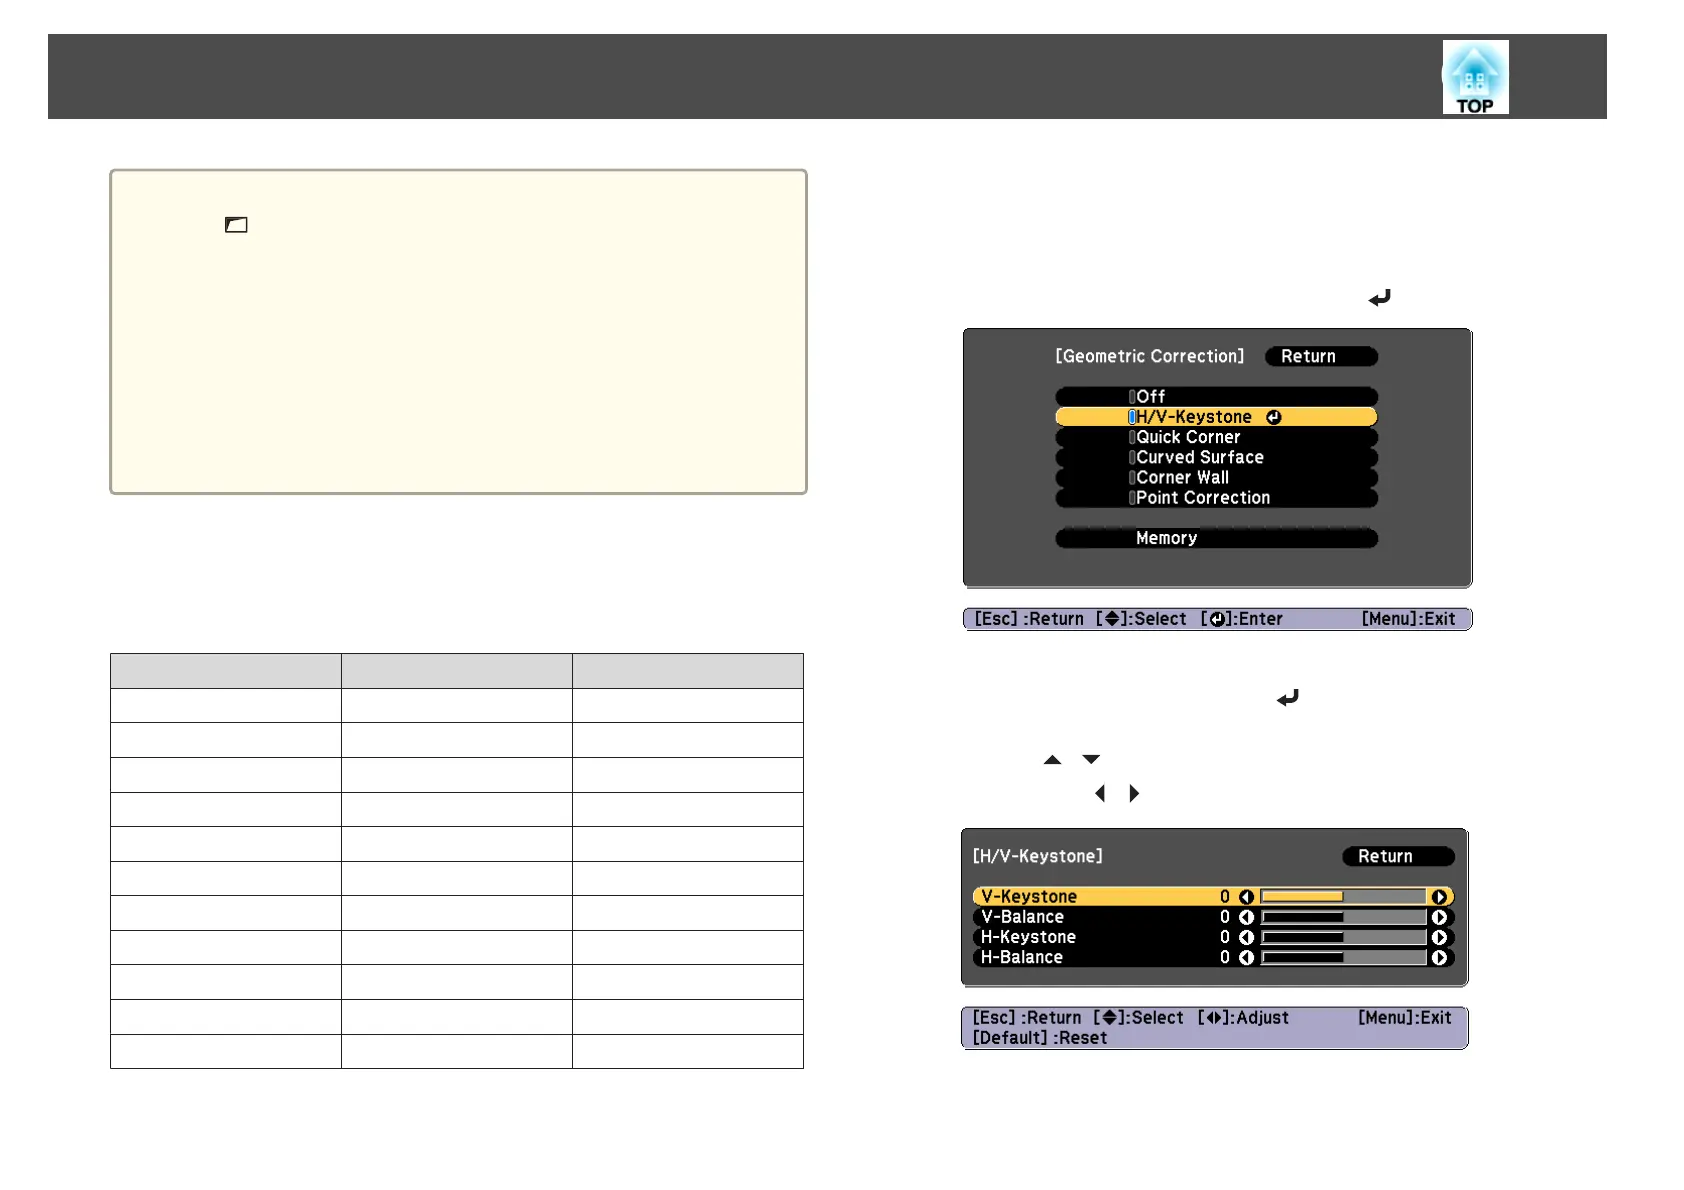
H/V-Keystone
This allows you to correct distortion in the horizontal and vertical
directions independently. The correction ranges are as follows.
Lens type Vertical Horizontal
ELPLM08
*
-45˚ to 45˚ -30˚ to 30˚
ELPLX01 -16˚ to 16˚ -16˚ to 16˚
ELPLU03 -28˚ to 28˚ -28˚ to 28˚
ELPLU04/ELPLU02 -35˚ to 35˚ -30˚ to 30˚
ELPLR04 -34˚ to 34˚ -30˚ to 30˚
ELPLW05 -40˚ to 40˚ -30˚ to 30˚
ELPLW06/ELPLW04 -45˚ to 45˚ -30˚ to 30˚
ELPLM09/ELPLS04 -45˚ to 45˚ -30˚ to 30˚
ELPLM10/ELPLM06 -45˚ to 45˚ -30˚ to 30˚
ELPLM11/ELPLM07 -45˚ to 45˚ -30˚ to 30˚
ELPLL08/ELPLL07 -45˚ to 45˚ -30˚ to 30˚
* The lens equipped to models with lenses.
a
Press the [Menu] button while projecting.
b
Select Geometric Correction from Settings.
c
Select H/V-Keystone, and then press the [ ] button.
If the message "If this setting is changed, the image may be
distorted." is displayed, press the [
] button.
d
Use the [ ][ ] buttons to select the correction method, and
then use the [
][ ] buttons to make the corrections.
Adjusting Projected Images
63