continues. If clogging is not cleared even after
performing this operation twice, a message asking
if you want to continue printing is displayed.
U “The Printer Setup Menu” on page 98
Head cleaning procedure
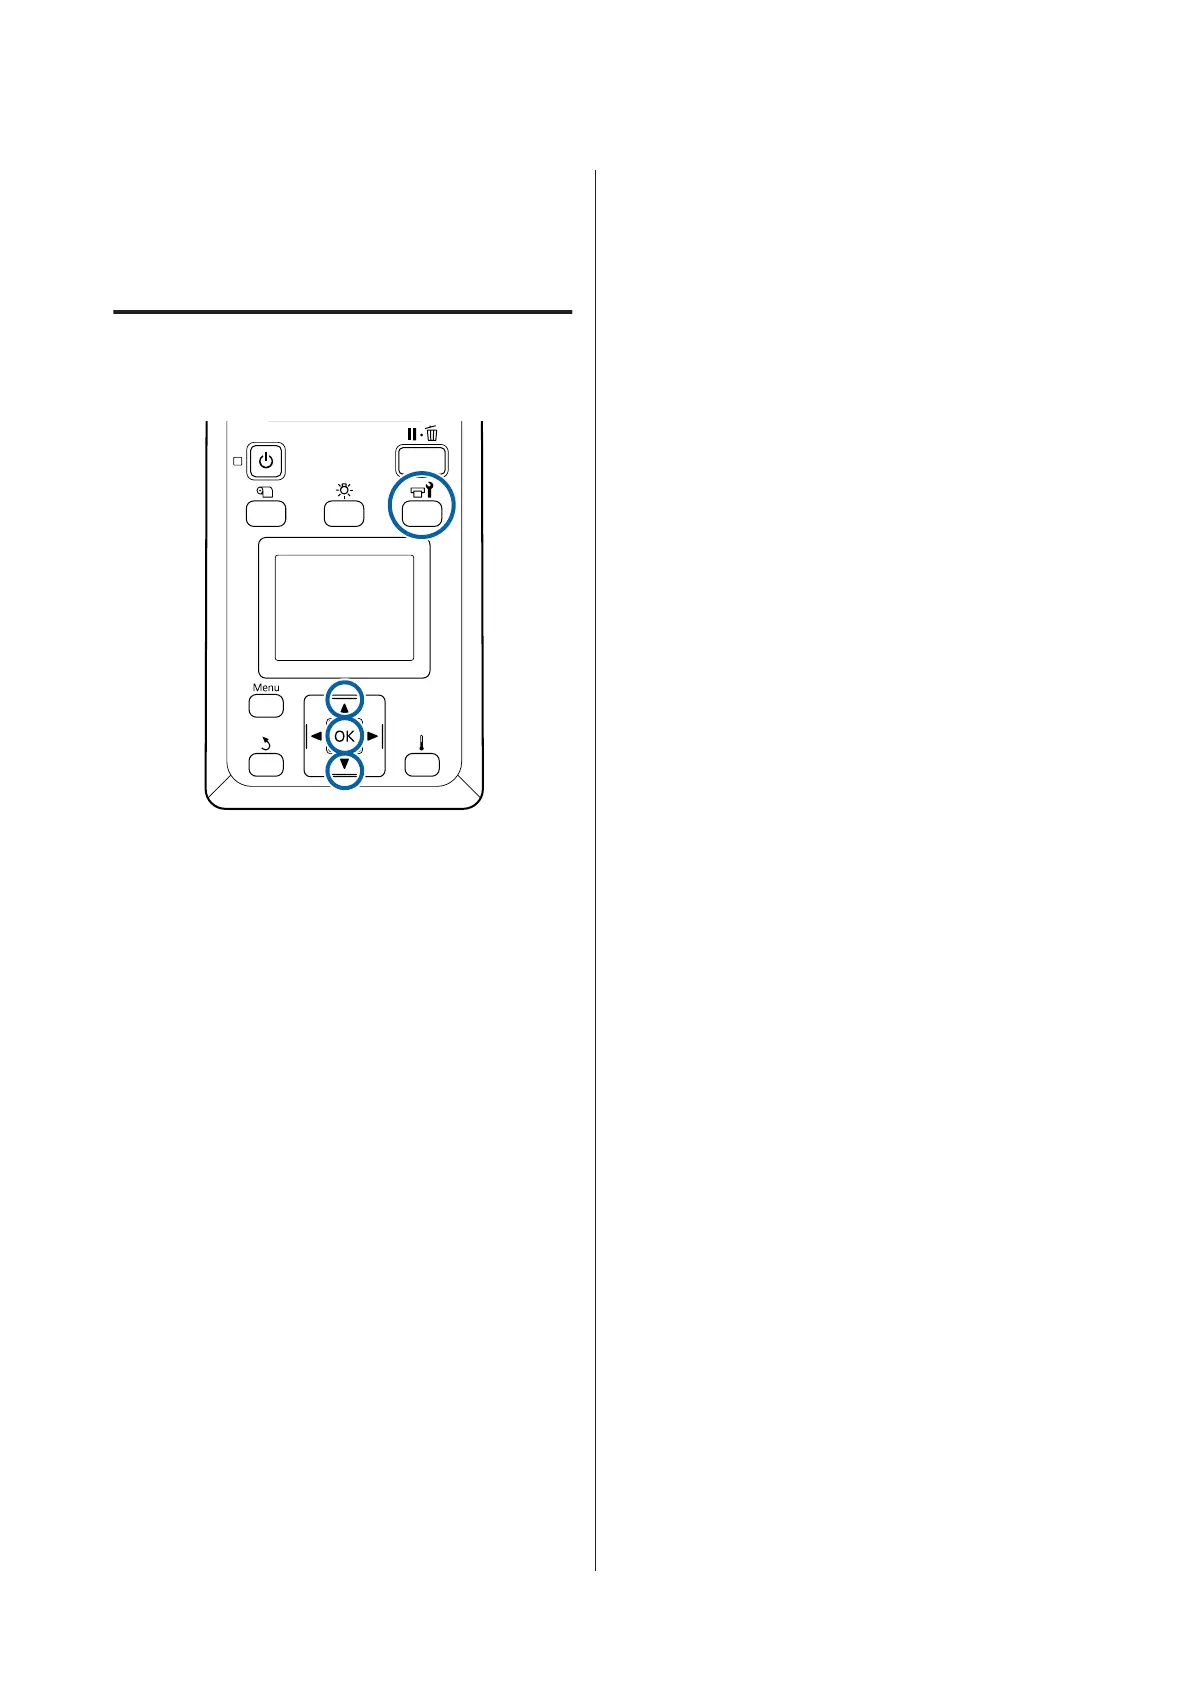
Buttons that are used in the following settings
A
After confirming that the printer is ready, press
the # button.
The Maintenance menu will be displayed.
To clean while printing, press the W button.
B
Use the d/u buttons to select Cleaning and
press the Z button.
C
Select a cleaning level, and then press the Z
button.
There are three levels available for head cleaning.
Perform Cleaning (Light) first. After cleaning,
print a check pattern and if there are still faint
or missing segments, perform Cleaning
(Medium). If this still does not solve the
problem, perform Cleaning (Heavy).
D
Select the cleaning method you want to use for
each row of nozzles.
When Cleaning (Light) is selected, only All
Nozzles is available.
All Nozzles
Choose this option if all patterns in the printed
nozzle check results contain faint or missing
segments. After making your selections,
proceed to Step 6.
Head1/Head2
This is displayed by the SC-S80600 Series/
SC-S60600 Series only.
Select this if there are faint or missing segments
in only one of the print heads. After making
your selections, proceed to Step 6.
Selected Nozzles
Select this if there are faint or missing segments
in only some of the numbered patterns (nozzle
arrays) in the check pattern. You can select
multiple nozzle arrays.
E
Choose the nozzle arrays to be cleaned.
(1)
Use the d/u buttons to choose the nozzle
arrays with faint or missing segments in the
pattern, and then press the Z button.
(2) After selecting the arrays you want to clean,
select Execute With Selection, and then press
the Z button.
F
Head cleaning starts.
A confirmation message is displayed when
cleaning is complete.
If you paused the printer in Step 1, printing will
resume when head cleaning is complete; check
the printout to confirm whether the problem
has been resolved.
G
To print a check pattern and check the status of
the clog, use the d/u buttons to select Nozzle
Check, and then press the Z button.
When printing a check pattern in the margin of
media on which a check pattern has already
been printed, press the u button to move the
print start position to the pressure rollers
position.
When you select Exit and press the Z menu,
the setup menu closes.
SC-S80600 Series/SC-S60600 Series/SC-S40600 Series User's Guide
Maintenance
78

 Loading...