EPSON Stylus CX4100/CX4200/CX4700/CX4800/DX4200/DX4800/DX4850 Revision A
DISASSEMBLY/ASSEMBLY Removal procedure Specific to the Model With No Card Slot (Stylus CX4100/CX4200/DX4200) 168
W A R N I N G
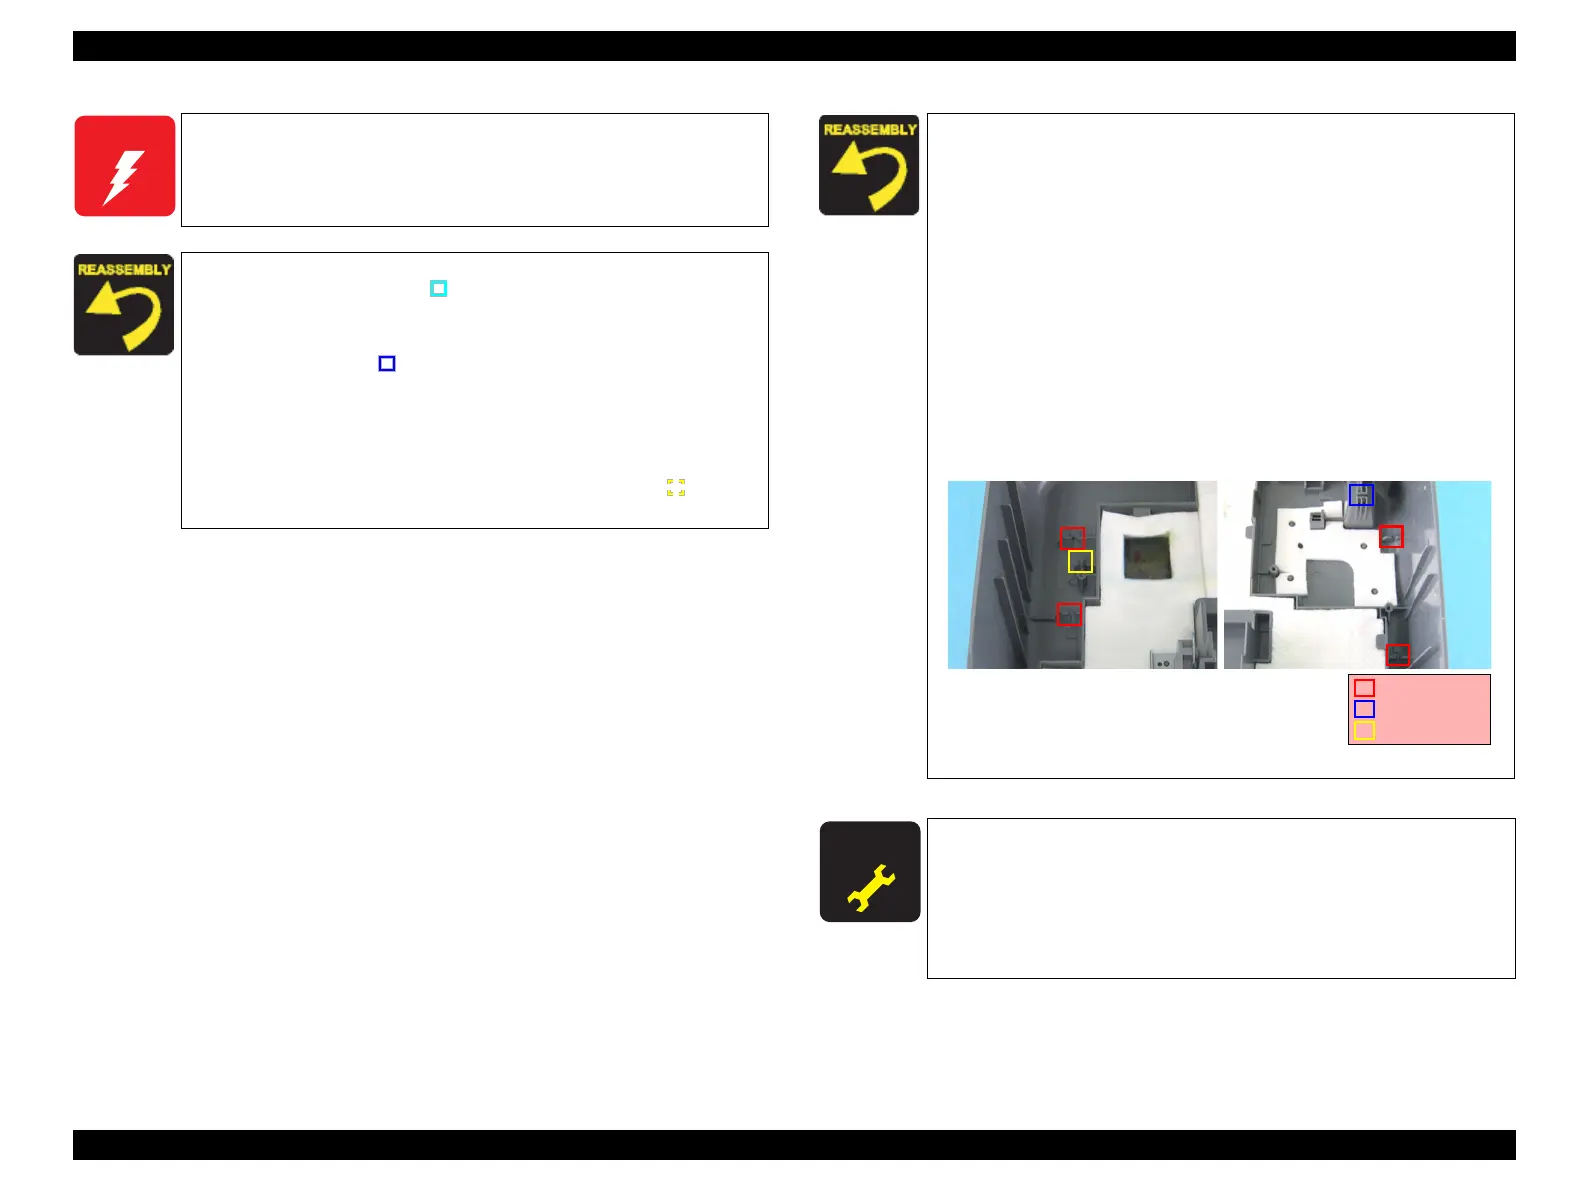
When installing the Printer Mechanism to the Housing, Lower,
insert the Waste Ink Tube to the Eject Ink Joint and securely fasten
the Waste Ink Tube with the Tube Clamp, or ink may leak from the
Tube.
When installing the Printer Mechanism to the Housing, Lower,
match the guide pin (x1,
) of the Housing, Lower with the
positioning hole (x1) of the Printer Mechanism.
When installing the Eject Ink Joint to the Housing, Lower,
match the tab (x1,
) of the Eject Ink Joint with the positioning
hole (x1) of the Housing, Lower.
When installing the Waste Ink Tube to the Eject Ink Joint,
install them so that the handle of the Tube Clamp and the red
line of the Waste Ink Tube are on the right side.
When installing the Rear Cover, match the tabs (x2, ) of the
Rear Cover with the notches (x2) of the Housing, Lower.
The assembled accuracy of each part composed of Printer
mechanism is based on Housing Lower.
To ensure the assembled accuracy, you have to control the assembled
standard position of main frame against X/Y/Z-axis direction as the
following figure.
[X-axis direction]
Confirm that Printer Mechanism is properly placed in the
channel of Housing Lower and that there is no gap.
[Y-axis direction]
Confirm that Printer Mechanism is properly placed in the
channel of Housing Lower and that there is no gap.
[Z-axis direction]
Align the positioning hole (x1) of Printer Mechanism with the
dowel (x1) of Housing Lower, and confirm that there is no gap.
Figure 4-55. Assembled Standard Position of Main Unit
A D J U S T M E N T
R E Q U I R E D
After replacing/removing the Printer Mechanism, perform the
adjustment in the following order. (Refer to Chapter 5
“ADJUSTMENT”)
1. “Initialize PF Deterioration Offset”
2. “Disenable PF Deterioration Offset”
3. “CR Offset”
X axis: 4 points
Y axis: 1 point
Z axis: 1 point
 Loading...


